Showing posts with label Embossing folders. Show all posts

Saturday, 3 October 2026

October's CAS Mix Up Challenge ......

Happy weekend to you,

Happy World Card Making Day too!  It's the perfect day to launch this month's CAS Mix Up Challenge

It's my turn to host, and the challenge for October is a Mixed Media one, with the prompt .....

Blackout Embossing 

Time to get out all your favourite embossing folders and have some fun!


This is a new to me technique.  I've seen it used a lot online, and it always looks stunning, but I haven't really done much of it myself. 
The first time I tried it, I didn't actually use any colour, I just simply used a black ink over the debossed side of an embossing folder design, so I'm not even sure if that can be classed as the 'Blackout Embossing technique'.  (I'll show you what I mean at the end of this post!)

Anyway, on with this month's challenge.  
I've got two cards to share with you, the first is using a pretty embossing folder from Simon Says Stamp called Blossom Field.  It's a pretty floral design, with lots of little details.


I simply ran the EF through the Big Shot with some plain white cardstock.
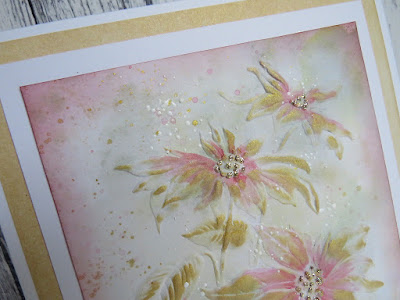
I then coloured the flowers, on the de-bossed side, using Distress Oxide Inks, in shades of pink and yellow.  I found the easiest way, for me, was to use small blending brushes to get the colour into the debossed detail of the card.


This is quite a thick EF so the detail is quite deep in the cardstock which is what you need for this technique, so that when you rub over with the black ink you don't get too much on the coloured bits.  Does that make sense?

I used Black Soot Distress Oxide on this card, but Nocturne Versafine Clair or any black ink would work just as well.  Try whatever you have to hand.
I gently rubbed the ink pad over the surface of the card, to bring out the coloured, debossed design ........ this was so much fun to do!  Try not to add too much black ink at once, I think less is definitely more with this technique.  Build up the depth of colour gradually .... remember it's always easier to add more than it is to take it away!

A simple stamped sentiment and a few highlights with a gold gel pen finishes off the card


This technique also works well with cardstock that has already got colour on it .......


I found this small piece of card in my bits box.  It's a leftover from a previous project I think, possibly a mop up piece by the look of it.   


The embossing folder is Piped Floral Lace from Altenew (I think this is my favourite EF at the moment ...... I love it!!!)  Again this is a deep, 3D, folder, giving lots of detail. 
Just remember, if you use already coloured cardstock, make sure you put it in the EF folder the right way up ..... you need the coloured side to be debossed.

For a bit of extra interest, but still keeping things CAS, I added my blackout piece to a white, die cut postage stamp frame and added the same in black, underneath.

If you need more inspiration for October's challenge, then check out the latest post on the CAS Mix Up Blog.  There you'll find more fabulous ideas from our Design Team and, there's also links to some useful videos showcasing this fun technique.
We also have a fabulous Guest Designer this month. Darnell from djkardkreations is joining in the fun so be sure to pop over there and say Hello!

Remember to follow the Challenge Guidelines ......  and keep your cards CAS.


Before I go, here's a picture of what I mentioned earlier ..... something I played around with whilst taking part in the #100 Day Challenge earlier in the year.  
It's the Blackout technique (sort of!) without any colour ....... I love this look, but then again I'm a big fan of black and white with just a hint of colour!


I'm really looking forward to seeing your take on the Blackout Embossing challenge.  I can't wait to see your entires in the gallery.  Have fun!

Thanks for popping by ....... enjoy your weekend.

We've spent the last few days in the lovely town of Knaresborough.  An historic market town in North Yorkshire. 


Nice walks, great places to eat, and the weather's not been too bad either.
We walked through Nid Gorge, quite a long walk but nice ....... I need the excercise!!


The next stop on our travels is one of our favourite places .......... we're off to the city of York!

Cheerio until next time .......


Products used:
Card 1
Embossing Folder ...... Blossom Field - Simon Says Stamp
Inks ........  Distress Oxide Inks - Mustard Seed, Scattered Straw, Picked Raspberry, Black Soot; Versafine Clair - Nocturne (for the sentiment)
Stamps ....... Happy Birthday sentiment from my stash
Other ......  Gold Metallic Gel Pen

Card 2
Embossing Folder ...... 3D Piped Floral Lace - Altenew
Inks ........  Distress Inks - Mustard Seed, Scattered Straw, Wild Honey; Versafine Clair - Nocturne 
Stamps ....... Happy birthday Sentiment from my stash
Other ...... Postage Stamp dies; Small crystal gemstones, black cardstock


Tuesday, 30 June 2026

What a week it's been ......

Happy Tuesday ......

Hope you're all well.

Now, where do I start? .......... let's just say,  I did a bit of a thing since my last post.
I won't go into too many details but, I will say that I am OK. 
  
A week last Friday (is it really that long since I blogged!) I had a fall.  
I fell down the stairs at home, top to bottom, and hit, full body weight onto an oak table in the hall ..... ouch!! 
Luckily hubby was there (thankfully he works from home).  I spent hours in our local A&E, and was eventually air lifted to the Trauma Unit in Aintree Hospital across in the UK with, 5 broken ribs, a fractured hip, and a damaged spleen with internal bleeding (I don't do things by half!) 

After a week of being monitored hourly, lots of medication, and plenty of TLC, I was allowed home last Thursday.  
I'm battered and I'm brusied, still in a lot of pain but, fortunately no actual surgery was needed. 
Doctors were happy that the bleeding has stopped, and that my injuries were healing nicely ...... phew! 
Now its just a case of resting, and taking things easy ...... I can do that!  
Unfortunately our next motorhome trip is going to have to wait a while ...... sigh!

So ........ before all that lot happened, I had been enjoying spending time in the craft room.  I'm loving getting back into playing with my stash.  Nothing too fancy yet, but I'll get there.  My crafty shopping list is growing daily.

Here's a quick and easy design that can be changed up to suit anyone .... young, old, male or female


As you can see, this was done with a masculine look but, just change the background, use more feminine colours and it's perfect for girls of all ages.  You could even add extra little details on there.

I simply embossed the background using a Tim Holtz Woodgrain 3D Embossing Folder with some white cardstock, and then dragged Weathered Wood Distress Oxide Ink, directly from the ink pad, over the top, to bring out the woodgrain detail


The large sentiment is simply die cut from a piece of leftover cardstock found in my bits box, which looks like it was a mop up piece from various projects.  I also cut it from black cardstock, and layered the two together, slightly off setting them to give a shadow effect


So easy, but looks great!

I think I'll be sticking to quick and easy, and Clean and Simple cards for the moment.  At least the craft room gives me something else to think about whilst I'm recovering.   
I can also catch up with all my favourite blogs, and watch all those amazing craft videos.  I'll be back to normal in no time.
And ...... I'm getting a little bit excited .......... something is happening in July!!  My lips are sealed for now, but all will be revealed very soon!

Thanks for popping by ...... enjoy the rest of your day.

Cheerio until next time .......


Products used .....

Inks ........ Distress Oxide Ink - Weathered Wood, Versafine Clair - Nocturne
Embossing Folder .......  Tim Holtz Woodgrain 3D Texture Embossing folder
Dies ....... Giant Happy Birthday Die - Lawn Fawn

Tuesday, 16 June 2026

Embossing Washi Tape .......

Happy Tuesday to you,

I hope you had a great weekend and that your week has got off to a good start.  
We actually had a little bit of sunshine over the weekend, so out came the BBQ which was nice.  I got a day off cooking as hubby's the one who cooks outside!

I've got a card to share with you today ...... it's been a while!
I saw this technique on Facebook, from Stamptastic Designs ........ I think I've got that right, I hope I have!
You may have already seen this done but I must confess, I hadn't and I just had to give it a go.
It's simply, using washi tape (we've all got rolls of that!) and an embossing folder ....... how easy is that!  But WOW ....... love the results!!


I've had this roll of Washi Tape forever, so I doubt that this particular design is still available .... sorry! 
It was from Altenew, and it was called Painted Fantasy. 
Now you're thinking ........  how could she possibly remember that!?  Well, I didn't.  What I do remember is, using it once before on a Blog Challenge so, I did a search here on my Blog.  And guess what ...... I found it!  I said I'd had it a while but, really ......... 2019!!!!!!!  Oh my goodness.  Oh well, at least I'm using it now.  I saved it for this very card.

So,  the technique ............. I simply put the washi tape onto a piece of white cardstock.  The tape is nearly 4 and a half inches wide so it's great for making card fronts.

I then took the panel and using the pretty Piped Floral Lace 3D Embossing Folder from Altenew, which has recently found its way into my craft room, I ran it through my Big Shot.
Voila!  How easy is that ....... and the results are gorgeous!


I trimmed it down a little and mat it onto a piece of white cardstock before attaching it to my cardblank.
There's so much detail from the 3D embossing folder,  adding to the already pretty floral design of the washi tape, I don't think anything else is needed.


Except a sentiment of course ......... stamped and die cut. 


I am going to have to get some more washi tape ........ this technique is soooo cool!  I love how this has turned out and I know exactly who the card is going to! 

Thanks for popping by ..... enjoy the rest of your day.
Are you following the World Cup?  We're huge football fans here so we're looking forward to tomorrow evening, when England play their first game.  There's been quite a few surprises in the games played so far, so who knows what's going to happen tomorrow. 

It's also Royal Ascot this week (I'm a horse racing fan too).  This could be an expensive few days!!

Cheerio until next time .........


As this is the first time I've used the EF I'm going to link this up to Darnell's June NBUS Challenge (Challenge #87)


Products used ......
Embossing Folder ....... Piped Floral Lace 3D Embossing Folder (Altenew)
Stamps ...... Opposites Attract Sentiment Stamps (The Greetery)
Dies .......  Opposites Attract Matching Dies, Opposites Attract Script Dies (The Greetery)
Inks ....... Versafine Clair - Nocturne, Distress Oxide - Picked Raspberry
Other .......  Painted Fantasy Washi Tape (Altenew) no longer available (sorry!)


Sunday, 1 October 2023

Quick and easy, but looks sooo pretty ........

Happy Sunday ........

Welcome to October!
I do love this time of year, when the temperatures are starting to cool a little, and the leaves on the trees are starting to turn.  It's been a lovely day here on the island so, dinner went in the slow cooker this morning, and we spent the afternoon in the sunshine, giving the garden a good old tidy.
I even took the plunge and changed my wardrobe around.  All the pretty, bright coloured, summer dresses have been packed away and it's out with those deep, rich Autumnal shades .... my favourites.  The woollies are out, along with those winter coats, socks and boots! 
I suppose it won't be that long before I can start to think a little more festive and decide where I'm putting the trees this year (sshhhh! ..... I've already been looking at Christmas decorations!).  

Anyway, before the craft room starts to look like Santa's grotto, and everything in there is dusted in glitter (hmmm ........wonder how hubby's going to cope with that now that we're sharing our work space!)  I still have some birthday cards to make. 


This idea came from Pinterest (one of my go to places when I need inspiration!).
I do like a nice embossing folder and the 3D ones from Simon Says Stamp are just gorgeous.  There's so much detail on them, and some even come with matching dies, so you can add more depth and dimension ..... I love them!

This one is called Darcy Bouquet, it's not a new design at SSS but it is the first time that I've used it (like so many things in the craft room!)  It does have matching dies to cut out 3 of the large flowers.  I didn't use it this time but, I will give it a go at some point.

I simply ran the folder through my Big Shot using a piece of coloured cardstock (Stampin Up's Sweet Sorbet)  I did spritz the card lightly with clean water before I ran it through and just look at that detail ...... amazing!


To make the design stand out a little more, I used a sponge to apply some White (Picket Fence) Distress Ink onto the raised design. 

I added a die cut sentiment ..... cut and layered three times and coloured using the matching ink to the cardstock from Stampin Up! again 


I added a few sparkly gemstones just to finish it off.

A really simple design but, it does look soooo pretty!

As it's the first time I've used this Embossing folder I'm going to join in the fun with Darnell's NBUS Challenge #55
(that's if I can remember how to link up ..... it's been a while!)


I do love a good Blog Challenge so, as the diary looks pretty quiet next week I might just find some more to play along with.

Thanks for popping by, have a great week ahead.
Time to see how that dinner is doing ..... it smells delicious!

Cheerio until next time .......


Monday, 13 December 2021

12 days until Christmas ........

Happy Monday! ........

Well, that's my booster jab all done and dusted before Christmas.  Lets hope it's like the other two ...... no nasty side effects! 

I hope you all had a lovely weekend.  I can't believe there's only one more before the big day ....... are you ready for it?  We did make a start on the all important Christmas gravy yesterday.  Bless Jamie Oliver for his delicious Get Ahead Gravy base ..... works a treat every year!

I've got some more Christmas cards to share with you today ....... batch making is a wonderful thing!

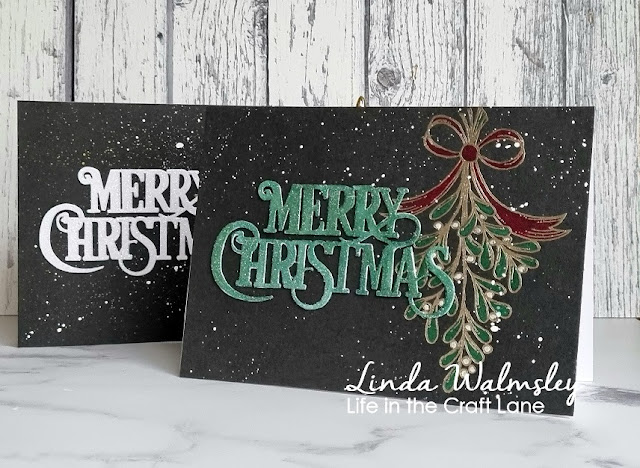
Here's that new die again, told you I would be using it a lot .........


Same card, just added a change of colour to the die cut sentiment.

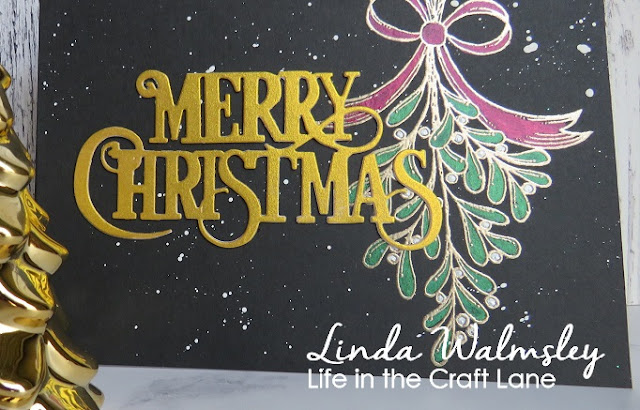
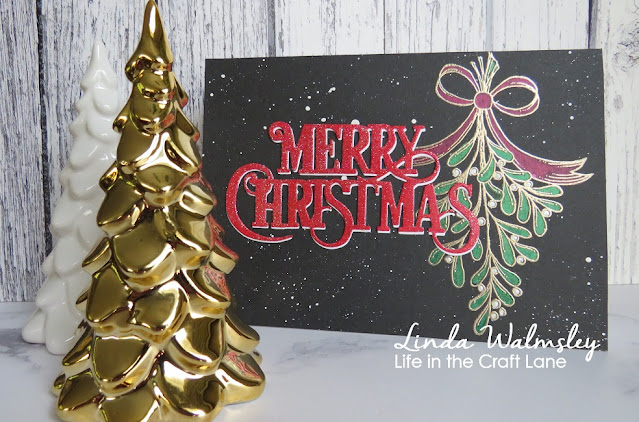
The bunch of mistletoe is from a Julie Hickey stamp set called Under the Mistletoe ........ it fits perfectly on these 7x5inch cards.
I stamped and heat embossed in Platinum onto black cardstock, and then used pearlescent paints to colour it in


A few splatters of white paint onto the backgrounds and then I added the die cut sentiment ....... simple!
The gold one above is just coloured with Delicata Golden Glitz ink, applied direct from the ink pad.
The red and green versions were coloured with inks and then heat embossed with a sparkly clear embossing powder


And the white one was just glittered ....... so quick and easy.  The only thing that took the time was painting the mistletoe!


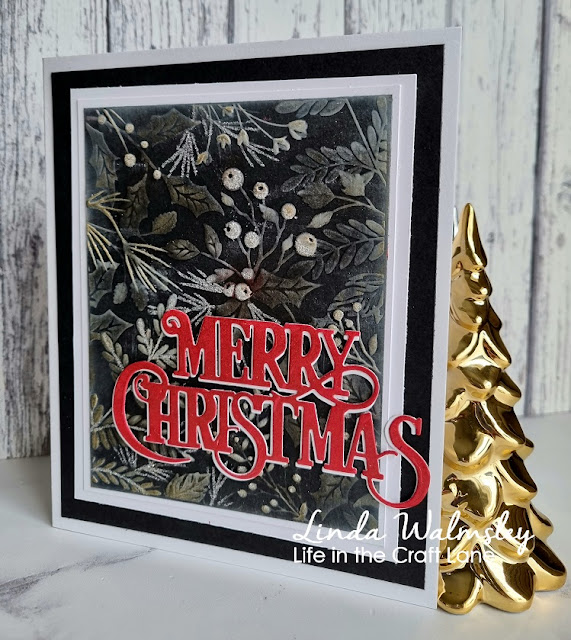
Here's another easy design, this time with an embossing folder ......... I'm loving black cardstock at the moment!

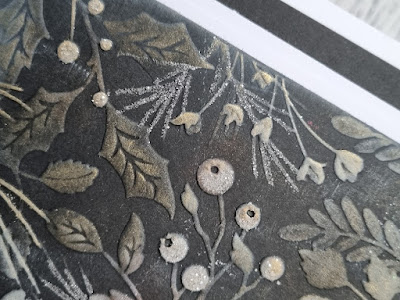
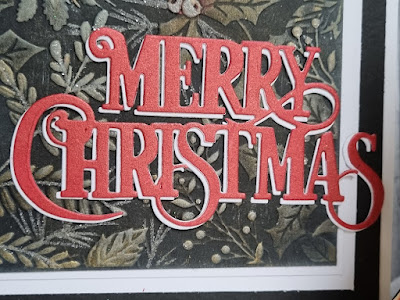
This embossing folder is ......... Holiday Greenery from Simon Says Stamp.  I've simply run it through the Big Shot with a piece of black cardstock.  I then used various inkpads (metallic) to add the colours, gently swiping each one over the top of the raised areas.


A little bit of mat and layering to frame the piece, and to finish I added a touch of Tim Holtz's Clear Rock Candy Glitter to highlight pieces of the greenery and of course, added my favourite die cut sentiment, cut twice, one coloured (Delicata Ruby Red metallic ink), one not, and then layered to give a shadowed look


Really easy cards ......... which is great if you've left things a little late like I have,  I love how they've turned out though.  

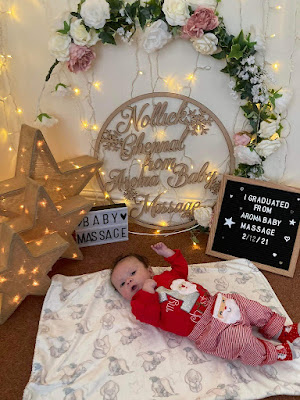
Wouldn't this make a great Christmas card ...........  can you believe Arthur's 3 month's old today!


and these are just a couple of photos from his first photoshoot ...... cute or what!

First family photo 💖


Thanks for popping by ...... enjoy the rest of your day.  
Time for a coffe and a mince pie I think

Cheerio until next time .......


Tuesday, 7 December 2021

Hello December ......

Happy Tuesday ..........

'Where have you been?' I guess you're all saying, well the answer to that is .......... nowhere!  
I've no excuses, I just think I needed a break.
 
We should actually be across in the UK right now with the van but ...... the ferry was cancelled on Saturday morning, just as we arrived at the port.  The weather was getting pretty bad, and to be honest I wasn't looking forward to the trip so I was kind of glad we weren't sailing.
Unfortunately it does mean that we probably won't get across now before Christmas which is a shame, we won't be able to see family as planned, and, because we should have been taking the van for it's service it may just affect the warranty, we'll have to see about that!  Fingers crossed we can sort something out.

It has been a busy couple of weeks though what with one thing and another ...... welcome to December!  
We've done a little bit of late night Christmas shopping here and there, we're almost done now I think.  Found time for a cheeky lunchtime treat at our favourite restaurant, and hubby actually went into the office for a few days, first time since the pandemic started I think.  It was strange not having him at home!

Around the house, we've had the heating break down, just as the cold weather arrived ........ perfect timing!!!  Thankfully it didn't take the plumber too long to get it all cosy again.
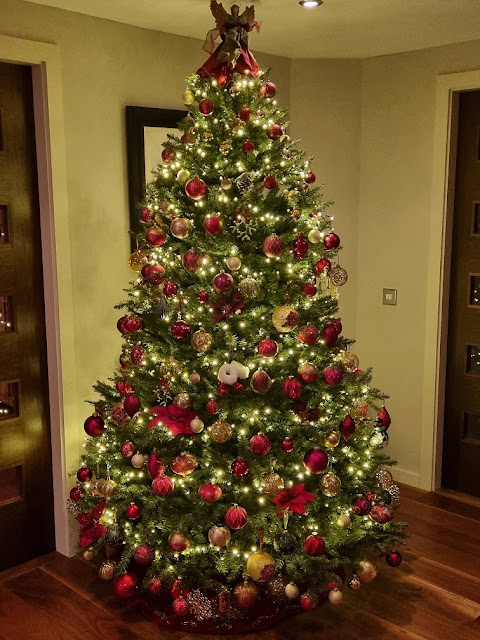
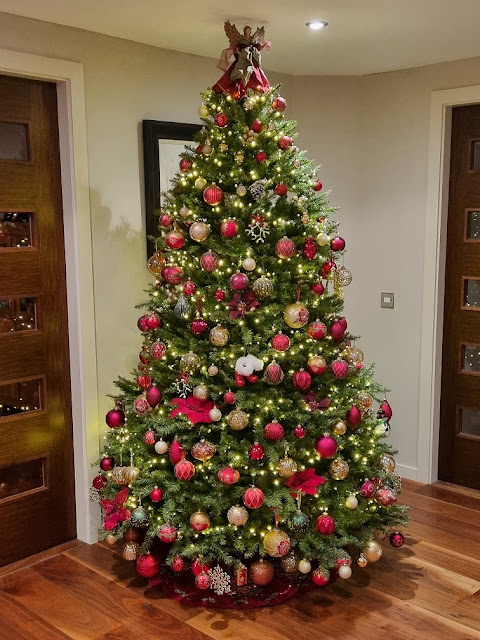
We've had a new fridge arrive ready for the festive season and of course the Christmas trees are all decorated ........


The big one fits nicley in the hall, although I did have to be a little creatvie with some of the top branches (thank goodness the angel has a wide skirt!!)


And then my favourite one in the lounge .........


Still needs a few more baubles ........ only joking ........ maybe


I also had a crafty project to do for someone on the island which, thankfully, got my mojo going in time to get some more Christmas cards done.  I really thought I was going to have to send shop bought ones this year which wouldn't have gone down well, at all!

Here's a couple of  designs that have come out of the craft room recently .......... 


These should have been going across with me this last weekend to be hand delivered to family members.

Made using the gorgeous Tim Holtz Poinsettia Embossing Folder ...... I think this came out last year but I never got around to using it!

I smooshed some Distress Inks (Antique Linen & Old Paper) onto my craft mat, spritzed with water and then used a piece of watercolour card to pick up the colour.


Once this was dry, I lightly spritzed the back of the card with water and then ran it through my Big Shot using the embossing folder.

I then gently rubbed over the raised areas with a gold ink pad (Delicata - Golden Glitz) to bring out some of the detail 


I added a touch of red Distress Re-inker (Festive Berries) onto the flowers, and used quite a bit of water to spread the colour around.

A little bit of sparkle from some glitter, a few splatters of the gold and red inks onto the background, and I finished with a sprinkling of Chunky White Embossing powder, heated from underneath


I also added a bit of Distress Ink around the edges of the card (Aged Mahogany) and stamped a festive sentiment on the bottom.

I also added some of the design on the inside too .......


This next card was made from a leftover piece from World Cardmaking Day .........


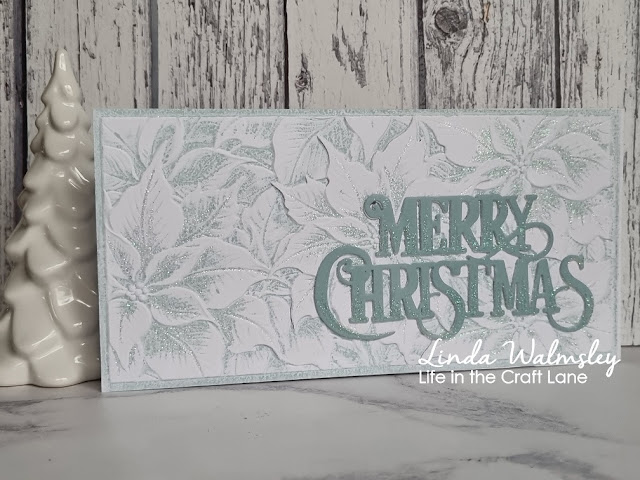
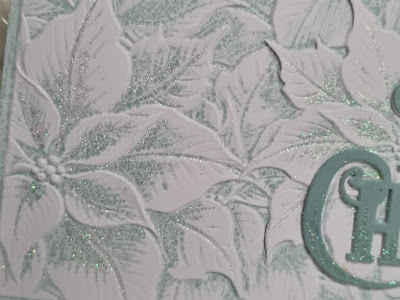
Another beautiful poinsettia embossing folder, this time from Lisa Horton Crafts.  I love this folder, the detail is just amazing!


I wasn't too sure about the panel at the time, I'd used Distress Oxide Ink (Speckled Egg) on the folder and I didn't like the results.  I think I'd put too much ink on and it pooled and gave a dotty effect.  But, I didn't want to throw it away so I left it on my desk.
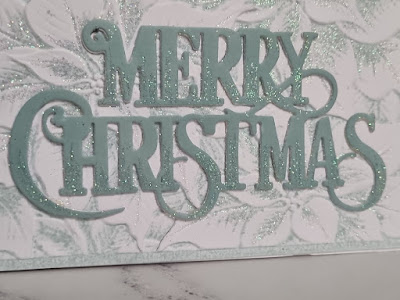
I'm so glad I did .......... because look,  with a touch of glitter here and there, and my new favourite die, it looks perfect!  


I'll apologise now, but you will be seeing a lot of this die!  It arrived in the craft room at the weekend and I love it!!!!  It's from The Ton.  It's such a great size, the font is gorgeous, and it cuts beautifully. 
I might even make some more of this one!

It's still blowing a hoolie out there today.  We're in the middle of Storm Barra, and it's wild!  
I thought Arwen was bad enough last week but this one seems to be worse.  No boats (if we'd have gone across we might not have been able to get back!) and the airport is closed.  There's roads closed across the island, trees down everywhere, including our garden.  One hit the bathroom window this morning and gave me a right old scare.  Luckily there was no damage to the window but, the tree doesn't look so good!
I think it's an evening in front of the TV for us ......... stay safe and warm if the weather's bad where you are.

Thanks for popping by ........ enjoy the rest of your day.

Before I go .......... looks like this little angel is getting in the mood for Christmas.  
I can't believe our little grandson Arthur is 12 weeks old already! Not sure he understands the whole Christmas thing yet but he loves the twinkly lights! 


I think the day was all a bit much for him ....... just look at those legs! 💖


Cheerio until next time ........