Showing posts with label Hero Arts Stamps. Show all posts

Friday, 1 July 2022

Welcome to July! ........

Happy Friday ......

I hope you've had a lovely week.  We're sadly coming to the end of our Scottish motorhome adventure.  Just one more night, then it's time to catch the ferry back to the Isle of Man, and start planning for the next trip ...... six and a bit weeks and counting!

Can you believe we're in July already ........ half way through 2022!!!!  My goodness ...... it'll be Christmas before we know it ....... just saying!

A new month means a new CAS Mix Up Challenge.  
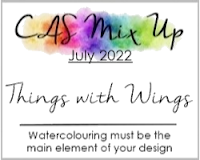
I'm hosting this month, and it's the turn of the Watercolour Challenge, with an added little twist ......


 I would like you to use 'Things with Wings' on your cards, as well as using the watercolour element of the challenge 

Things with Wings could be anything from birds, butterflies, bees, to fairies or even aeroplanes. As long as it's got wings you'll be fine.  Keep your cards CAS (Clean and Simple) and remember to use watercolouring on there too.

Here's a couple of ideas for you, both using very easy watercolouring techniques .......


Choose your image and stamp using a water reactive coloured ink.  Distress Oxides for example, are perfect for this, they stamp beautifully and react so well with water.  
Use a wet paintbrush to gently pull some of the colour out from the outline, trying to keeping as much of the stamped detail as possible.


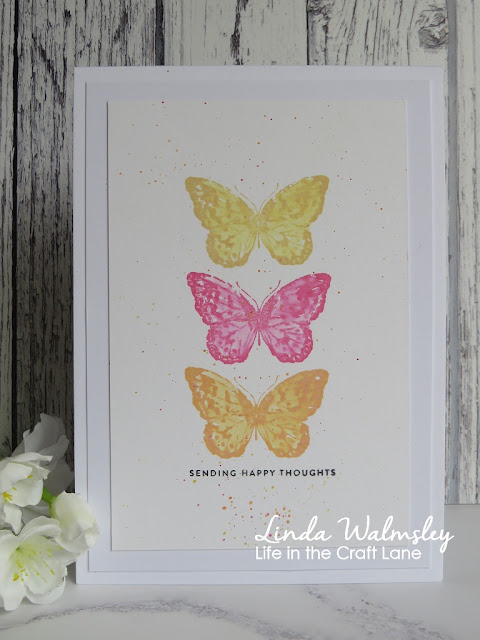
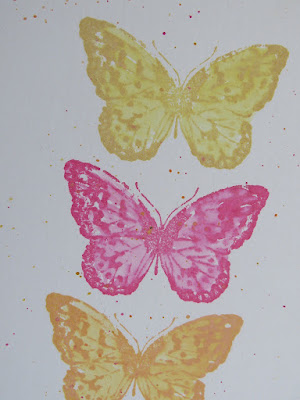
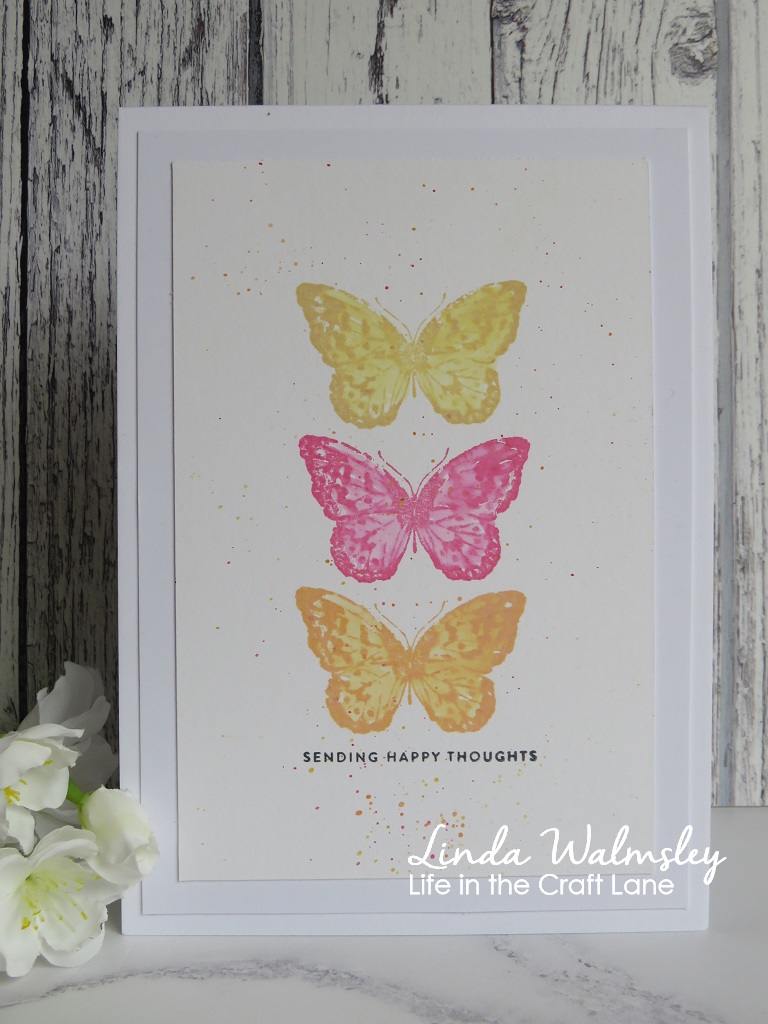
I used Distess Oxides for my card, stamped onto watercolour card ........ Scattered Straw, Picked Raspberry and Dried Marigold  
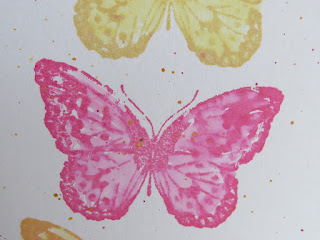
I then used a wet paintbrush to gently move the ink ...... I found the more water on your brush the more the colour seemed to move, so don't have the brush too wet.
  
If you would rather add more colour over the top of your stamped image instead of taking colour from the outline, let your stamping dry,  smoosh the inkpad onto a craft mat, spritz with water and then use a paintbrush to watercolour your stamped image ..... hope that makes sense!


Some of the original stamped detail will disappear a little, but this gives more of a watercoloured effect I think


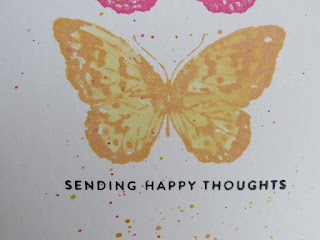
I stamped a sentiment underneath my butterflies, and finished off with a few ink splatters from the same colours of Oxides, over the butterflies

This next technique is really quick and easy to do .......


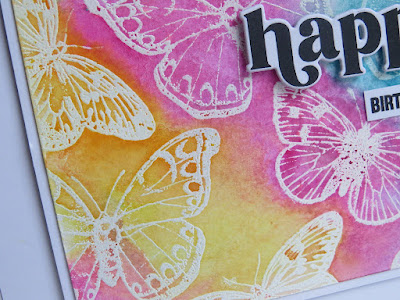
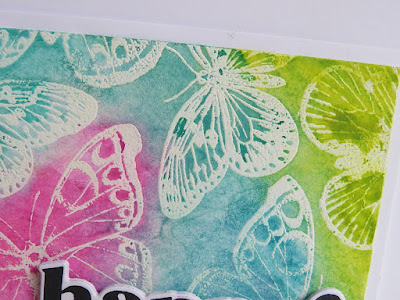
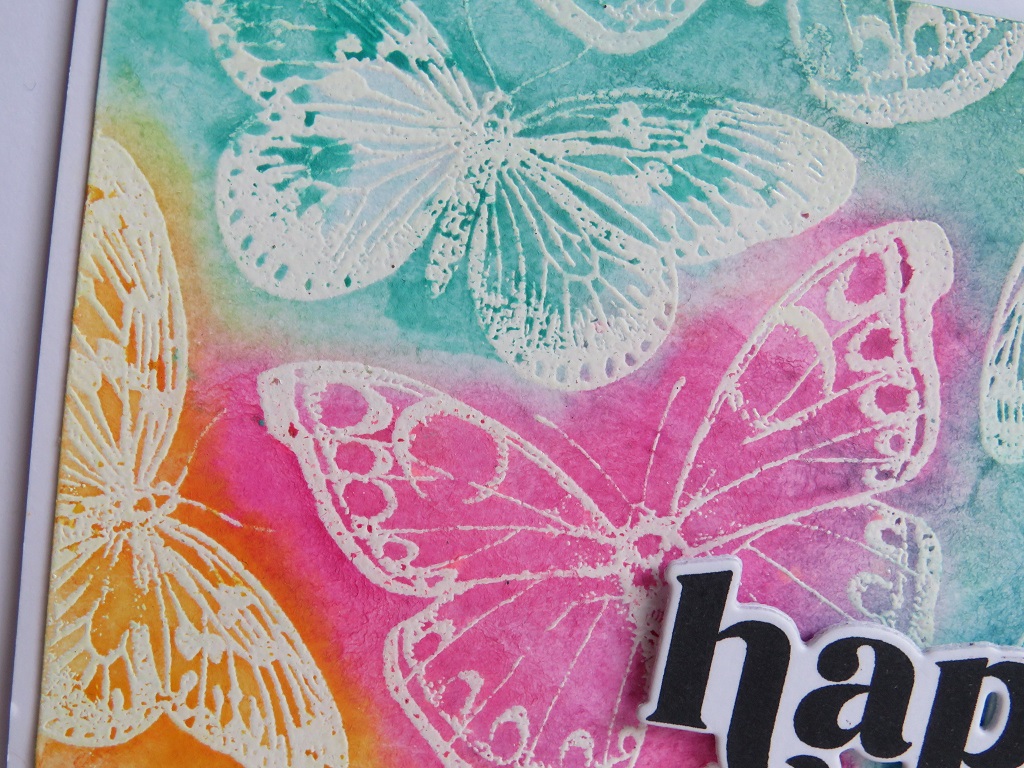
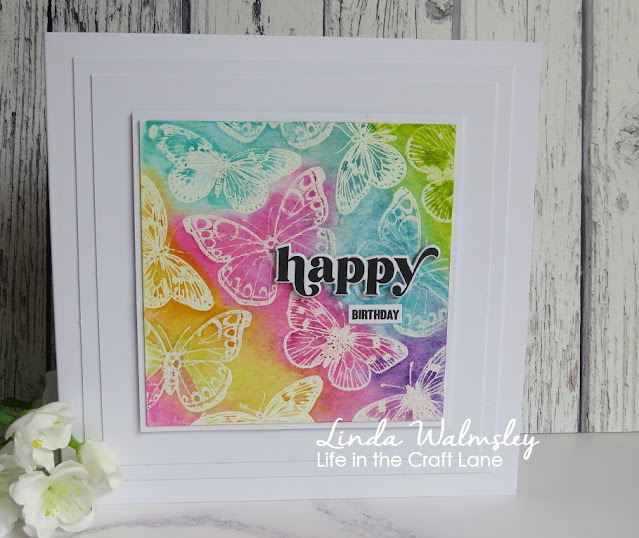
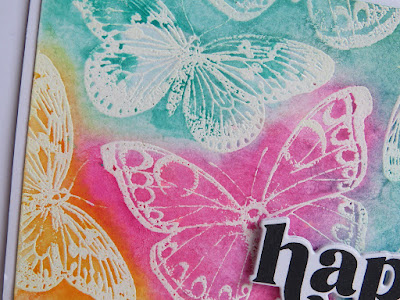
I stamped the butterflies all over a piece of white watercolour cardstock using Versamark Ink, and then sprinkled them with white embossing powder and heat set.


Once the embossing powder had cooled I then spritzed the cardstock with water and used Altenew Watercolour Paints to add the colour.
I spritzed the paints with water before I started, to get them into a liquid, and then used a paintbrush to pick up the colour and drop it onto the wet watercolour cardstock.  The water on the card helps to move the colour around but I did sprtiz again to make sure the colours blended together nicely


Repeat the process until you're happy with the depth of colour.   Use a paper towel to mop up any excess ink and water, this will also clean off your heat embossing, letting your stamped images show through.  
I prefer to leave this to air dry but you could use a heat tool, just be careful not to over heat the embossing.


The sentiment was added in two parts ...... one stamped and die cut (I do love the font on this stamp set from The Greetery!) and the second part simply stamped on a snippet of card and attached underneath


Check out the CAS Mix Up Blog for more inspiration for this months challenge from the rest of the Design Team.  There's also links to some videos using watercolour techniques.

Happy stamping!

Thanks for popping by ..... enjoy the rest of your day.

We've started our journey back to the Isle of Man today .... sigh!  
We had three lovely nights on Bunree Campsite. although the weather wasn't great.  I will share some pictures with you later.  
We really liked the site though, in fact we've already booked for next April.  I'm always ready for a trip to Scotland!

Tonight we're on a campsite called King Robert the Bruce's Cave Campsite in Kirkpatrick Flemming, not far from Lockerbie. Just the one night, then tomorrow we finish our drive to Heysham to catch the afternoon ferry back to the island.  Time to go home!

Cheerio until next time ........


Card 1
Supplies
Stamps: Watercolor stamp set CMS 217 (Tim Holtz); Tiny Words (Simon Says Stamps) for the sentiment 
Inks: Distress Oxides -  Scattered Straw, Picked Raspberry, Dried Marigold; Versafine Clair - Nocturne (for the sentiment)
Other: Watercolour cardstock

Card 2
Supplies
Stamps: Antique Engravings (Hero Arts): Opposites Attract Sentiments (The Greetery)
Inks/Paints: Versamark ink; Versafine Clair - Nocturne for the sentiment
Other: White Embossing Powder (WOW!); Opposites Atttract Matching Sentiment Dies (The Greetery)

Friday, 17 January 2020

Craft Stamper Challenge ..... did someone mention cake?

Hello again ......

Busy day today ....... and it's only 9am!!

It's time to remind you about this month's Craft Stamper Blog Challenge  have you entered yet?

The theme is Anything Goes so it really can be anything you like ...... a card, a journal page, an ATC maybe.  Just remember you MUST include some actual rubber stamping on your project.

The challenge has already been running for a week, but there's still plenty of time left to play along and be in with a chance of winning one of the fab prizes up for grabs ...... more about that later.

Just in case you need a little bit of inspiration, here's a fun idea for a birthday card ...... I need so many in January!


Cupcakes are always welcome ...... especially chocolate ones!

I stamp the cupcake image onto a piece of white cardstock, heat embossed with a clear powder, and then fussy cut it.


I used ZIG markers to colour in the actual cupcake and the strawberry on the top, and the cream on the cake I painted with a white pearlescent paint and just a touch of pink marker blended in.
A few dots of glitter glue here and there add a touch of sparkle.


I stamped the sentiment on a scrap of card and used a die to cut it out and then attached it to the back of my cupcake


I cut a piece of black cardstock to fit the front of a 7x5 inch card blank, and splattered it using gold and silver inks


To add a bit more fun to the card I used a Wobbler to attach the cupcake so that it moves .......


Check out more inspiration and ideas from the rest of the Design Team on the Craft Stamper Blog today and then join in the fun.  You could win one of the fabulous prizes on offer. 

We have TWO winners each month ...... a Design Winner chosen by the DT, from all of the eligible challenge entries.  The prize for that is a double page spread in Craft Stamper magazine featuring the winning project, a Winner's Profile post on the CS Blog and, the chance to be a Guest Designer on a future challenge ..... not bad eh!

Winner number two is randomly chosen, again from all the eligible entries and they receive the Blog Challenge prize.  Look at what's up for grabs for the January challenge ........ I wouldn't mind winning that little bundle! 


So ..... get stamping!!

Thanks for popping by ..... have a great day, and a fabulous weekend.

Cheerio until next time ......


Products used:
Stamps: Sweet Friend Cupcake (BIG & BOLD collection Colorado Craft Company); Cupcakes (Hero Arts) - for the sentiment
Inks: Versafine Clair - Nocturne; Delicata Golden Glitz & Silvery Shimmer inks for the splatters
Others: Fine Detail Clear Embossing Powder (WOW!); ZIG Clean Color Brush Markers; White Pearlescent paint; Stitched Oval Nesting Dies (Stampin Up!)

Saturday, 2 November 2019

Happy Little Stampers CAS Challenge .......

Happy weekend ......

I hope you're having a good one.
We had an early start this morning so hubby could watch the rugby final ...... but we won't talk about that!!   We have had a lovely day out and about though, we even managed to dodge the rain!  And as we speak we should be sat in our favourite little restaurant, with a nice bottle of wine, enjoying delicious food with some friends.  Exactly what weekends are for ...... cheers!

Anyhow ..... it's time to launch this month's Happy Little Stampers CAS Challenge


As you can see the theme is ....... 'tis the Season

As there's only a little over seven weeks until Christmas ...... eeeeek!!!  I thought it was time I really started thinking about making my Christmas cards.


Clean and Simple (CAS) is definitely the way to go ...... great for posting too!

This little guy seems to make an appearance every year ........ he's one of my all time favourite snowmen.  Unfortunately I think he's no longer available, I know he's been in my stash forever!!


I stamped the snowman directly onto the front of my card, using a grey ink.  I then added a touch of colour to his hat and scarf using ZIG markers, and stamped my sentiment underneath.


A few dots of glitter glue here and there adds a touch of festive sparkle.

Well thats one done for the festive box!

The challenge runs until the end of November so there's lots of time to play along.  And if you need a little more inspiration check out the Happy Little Stampers challenge blog and see what the rest of the Design Team have created.

Thanks for popping by ..... enjoy the rest of your weekend.

Cheerio until next time .......


Products used:
Stamps: Snowman (wooden stamp from Inkadinkadoo); Miracle of the Holidays - sentiments (Hero Arts)
Inks: Ranger Dye Ink Pad - Cool Graphite; Versafine - Satin Red
Other: Nuvo Glitter Drops; ZIG Clean Color Brush Markers

Friday, 4 July 2014

Are you ready for a new Take It Make It challenge .......?

Happy Friday everyone!

And Happy Independence Day too for anyone in the US. 

Actually ...... I'm in the US!!  I should say Good Morning from Las Vegas ..... well it's only just morning over here ..... if this has gone live at 9am (UK time) as planned, then it's only 1am on Friday and I probably haven't been asleep very long!!
You guessed it .... I'm on holiday again, so that means this is a scheduled post.


Just because I'm living it up in one of my favourite hotels on the strip (The Palazzo) enjoying fine dining, endless sunshine and the odd game of poker in the casino (well .... it would be rude not too wouldn't it!) doesn't mean I can't find time to join in the fun with the rest of the DT  for the new Take It Make It Challenge over on the Craft Stamper Blog.

So glad you all enjoyed last month's challenge ...... Bleach Blocking.  We had loads of fabulous entries, it was tough choosing a winner I can tell you.

This month the technique we'd like you to use is ......

EMBOSSING POWDER RESIST

This is so much fun to do, whether you choose to create a fabulous background or, a stunning focal point on your design.  Stamp it, emboss it, add some colour over the top ....... and watch your design appear.


Not sure if you would call this the background or the main image ....... I suppose it could be both.

Anyway, I started by stamping this gorgeous large Vine from Hero Arts onto some white cardstock, using Versamark ink.  I then embossed using a white detail embossing powder (clear also works well with this technique)


I then applied my colour over the top using a variety of Distress Inks - Picked Raspberry, Worn Lipstick, Dried Marigold, and Scattered Straw.


I started at one corner and worked my way up the card, blending each of the colours as I went along.
You can see how the embossing powder resists the ink ..... as you apply more colour over the embossed image the design slowly appears ...... clever!
Once you're happy with the depth of colour, use a piece of kitchen roll to buff over the design and take off any remaining ink left on the embossed image and really see it pop!

To add a bit more interest to the back ground I flicked over the ink with some clean water, let it sit for a few seconds then used kitchen roll to mop up the excess.  I love this technique, again the deeper the colour of ink the more the splatters will stand out.


The words I've used are also from Hero Arts, as are the cute little butterflies.  These have been stamped directly onto the inked card, and then stamped again onto another piece, coloured using the same Distress inks.
I then cut them out and layered them over the top, attaching just down the centres so that the wings can be raised a little to add dimension.


And of course I had to do something on the inside ......


More pretty butterflies stamped onto the white card first, then layered again using coloured versions.

There's lot's more inspiration for this month's challenge over on the Craft Stamper Blog.  Pop over and see  what fabulous creations the rest of the Design Team have come up with, using the Embossing Powder Resist technique. 
You have until midnight on 23rd July to get your entries in, and the winner will be announced on Friday 25th July. 
Our sponsors for this month's challenge is the fabulous WOW Powders so it's well worth giving it a go!
Have fun and good luck!

Thanks for popping by ..... enjoy the rest of your day, and have a great weekend.

Cheerio for now

Linda
xx

Thursday, 12 June 2014

We're all going on a ...... Summer holiday

Happy Thursday evening .....

Are you singling along with me ..... sorry!!! 
It's a very happy Thursday for me ..... one more sleep then I'm off on holiday - Whoo Hoo!!

The old craft room door is well and truly CLOSED .... even my desk is tidy!  Everything on the 'To Do' list has been crossed off ..... photos taken and uploaded, emails sent and blog posts scheduled .... well the ones due in the next few days anyway.  I even squeezed in time to sit in the sun.   
Now it's time to finish the packing, ring the Take Away and pour a nice glass of something chilled I think.

Before I do that though it's time to get all festive .... a little earlier than usual this week but, just because I'm going away on holiday doesn't mean I'm going to miss my regular Blog Challenges.

It's time for Merry Monday ...... and how cute is this inspiration picture ......


This week the challenge is to feature Santa Hats on our Christmas cards ....... I can do that!


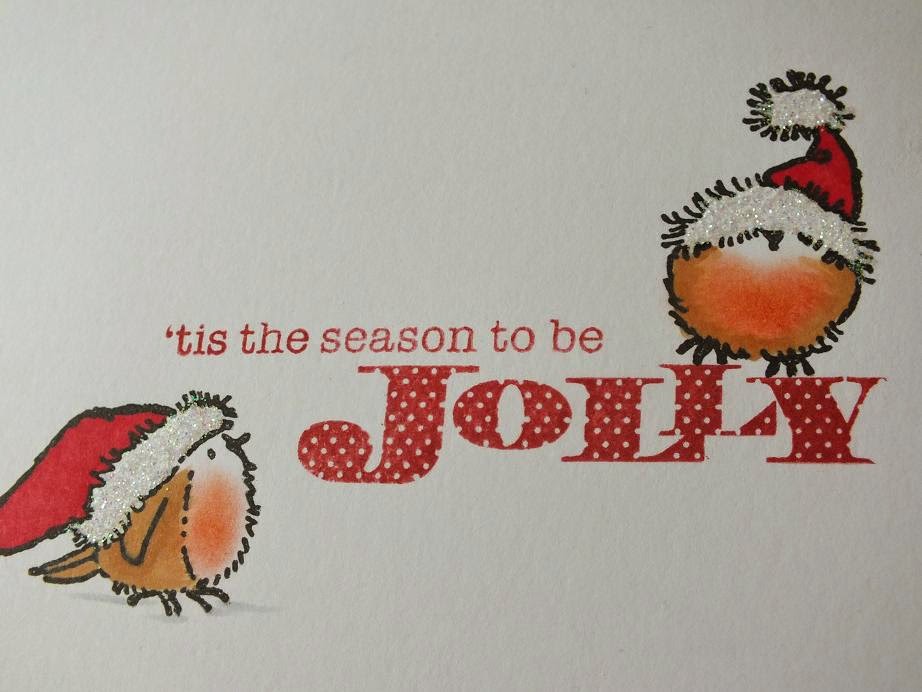
This is a similar to a design I made last year, using the cute little Penny Black robins, from the Winter Wonderland 'T' for Transparent set (the only reason I bought this stamp set was for the little guy sat on the word 'Jolly' ..... he's sooooo cute!!)

The words are from Hero Arts, and have been stamped using a red Archival ink ......


and then the little guys have been stamped and coloured using a mix of Copic markers and Distress Inks


I added a touch of sparkle to each of their Santa hats, and of course there had to be another little robin on the inside ....... wearing his Santa hat of course


Well that's me done for today ..... there's a Special Thai Green Curry and a cold beer waiting for me ...... nom! nom!  Enjoy your evening.

Thanks for popping by ......... the next time I see you I'll be on the other side ...... across in the UK that is.  Let's hope the sun keeps shining.

Cheerio until next time

Linda
xx

Thursday, 13 February 2014

Blowing in the wind .......

Helloooo,

We had a bit of wild night last night ...... no I'm not talking about a Walmsley Wednesday again.  
Windy doesn't come into it.  In fact all the schools on the island cancelled their after school clubs, evening classes were cancelled, flights didn't go and of course the ferries were cancelled because of the weather.   Some of the gusts actually shook our house.   
I very nearly had a Mary Poppins moment at one point ..... the other half and I had to do battle with the garden brolly ..... and we lost ...... miserably!  I've been saying for a while we need new garden furniture ..... well we do now!!! 

I said yesterday I'd be back with my Less is More entry for this week ......and here it is


It's the dreaded ONE LAYER WEEK ....... and the theme is

ANYTHING GOES!

I actually don't mind the One Layer Weeks anymore ..... it's the 'anything goes' that's the hard part.  And One Layer Cards can sometimes take the longest time to produce ...... no mistakes allowed.  Surprisingly this was only my second attempt ..... it usually takes me a lot more before I get one right!!

I took inspiration for the design from one of the brand new JOFY stamps ..... one from her Minis range.  I spotted them whilst checking out the new stuff over at Country View Crafts (better get the bank card ready - it's going to get expensive!)

I used the Burlap panel from the IndigoBlu stamp set - Sarah's Choice and stamped it using Vintage Sepia Versafine ink.
I then overstamped the leaves, from the Hero Arts Clear stamp set - Delicate Leaf Clusters in black.


The words are from the Simple Sayings set from Mr Holtz


Like I said, this was my second attempt ..... the first one ended up with the dreaded black finger mark on it (arggghhh!).  All was not lost though ....... a cheeky little wooden button did the job in covering it up ....


but ...... now it was no longer one layer ...... so I had to do another one.   I got there in the end.

It's been a little bit calmer on the island today, thank goodness.  The wind's still blowing mind, just not as strong - yet!!!

Thanks for popping by today.  I do hope the weather's being kind where you are ....... stay safe and warm.

Cheerio until next time ......

Linda
xx

Saturday, 6 October 2012

Happy World Cardmaking Day!

Morning everyone,

Just a quick post from me tody. I have to be at the airport shortly to pick up my daughter and that gorgeous Grandson of mine.

It's WORLD CARDMAKING DAY (whoo hoo!) and to celebrate there's a competition starting today, running all week until the 12th October, over on the Craftwork Cards Blog

CANDI 4 CANDY
 CANDY 4 CANDI

All you have to do to be in with a chance of winning is pop over to the Blog, and become a follower, if
you're not already. Then leave a comment EVERYDAY, until the 12th, using the magic word CANDI. 
The prize is fabulous, you won't want to miss out ........  it's a whole lot of Candi gorgeousness, and all the extras that go with it -  worth over £100!  (Wow!)
So go on, pop over there and start leaving your comments.  The DT will be posting everyday so there'll be something new to see and lots of inspiration on how to use your Candi and all the other great CWC products.  I've a post already to go, not sure what day it's going to be on there though, you'll just have to keep checking.

I'm afraid I won't be cardmaking today, going to have my hands full I think.  I was busy yesterday though, but I can't share it with you just yet.  I made a Wedding Anniversary card for one of hubby's work colleagues to give to his wife.  It's their 1st anniversary so I wanted to make something special. - where did that year go!
I like it, just have to wait and see if he does (fingers crossed!)
Here's something I can share though .........  it's a bit of a blast from the past, about this time last year.  I don't think it's been on the Blog before, apologies if it has.
It was for a very special friends birthday.  Made using some of my favourite Hero Arts stamps, I love that large ruffled flower.  I've paper pieced the petals to match the background and layered it up.  You can see I've also used the lovely foliage stamp behind to add a bit of depth, and it's all finished off with a beautiful large silk ribbon bow.
Well, that's me done. Sorry it's a bit short and sweet, but I can't go to the airport in my PJ's so I'd better get a move on.  
If you're off to the GNPE in Harrogate today, enjoy!  If not make the most of World Cardmaking Day.
Have a great weekend, and I'll see you all again soon.
Thanks for looking
Linda
x