Showing posts with label Penny Black Dies. Show all posts

Saturday, 15 February 2020

More CAS inspiration ......

Happy weekend folks ......

Well, we're back to flights cancelled and no ferries sailing.  Storm Dennis has arrived!!  Looks like hubby maybe be grounded tomorrow too ..... his afternoon flight to the UK has been cancelled just waiting to see if he can get on the evening one ...... unless that's cancelled too!

Anyway ......... it's time to remind you about this month's CAS Challenges ...... CAS Mix Up and CAS Stencil

Lets start with the CAS Mix Up Challenge. 
Joanna is our host this month, and the theme is Stencil using a Die Cut


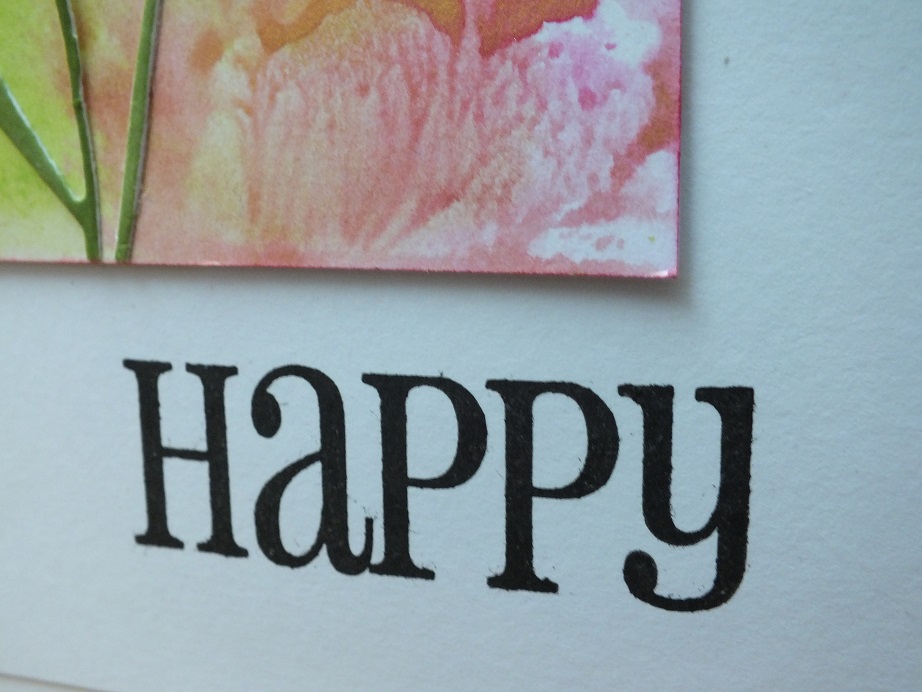
I've used one of my all time favourite dies from Penny Black ..... I love this flower! 


I simply die cut the flower from a piece of white card stock ..... put the flower to one side for later and used the what was left of the card as my stencil.

Blended Distress Oxide inks through the design to create the background layer of flowers


I cut the flower again from another piece of white card (that's another one I can use as a stencil), layered the two together and then coloured the top one with Oxides inks, before attaching it over the top of the stenciled versions creating a pretty little bouquet


A few inks splatters,  a cute little twine bow and a sentiment to finish off


On to the CAS Stencil challenge.   Hosted by the lovely Barb,  the theme is .......  Foil


Check out the CAS Stencil Blog for links to some fabulous tutorial videos on different ways of adding foil to your projects.

I've used a really simple way of adding just a touch of foil ...... not to easy to photograph though especially with the weather we're having at the moment!!


I masked around the edges of a piece of white card, and then stamped the script in the background. 
Still with the masking tape in place, I added Distress Ink around the edges.  Distress ink stays wet for a little while so, if you're quick you can get embossing powder on there.  I used the tacky stuff, you know the one, looks like embossing powder but it goes sticky when heated.
I sprinkled just a little around the edges, brushed most of it away and then heated what was left and quickly applied my foil over the top.  I let it cool for a couple of seconds and then rubbed over the foil to make sure it had stuck.  And this was the look I got ........ a sort of distresed, grungy look .....


I removed the masking tape and stenciled the flower over my background.  Again the ink I used stayed wet for a little while so I did the same again with the sticky powder - sprinkled some on, brushed off where I didn't want it and heated it.  Placed the foil on top and then peeled it away ..... voila!  just a touch of shimmer and shine.


I really like the effect.

There's still a week left if you fancy joining in with any of the CAS challenges ..... hopefully I'll see you in the gallery.

Thanks for popping by ..... enjoy the rest of your weekend.

Cheerio until next time  ........

CAS Mix Up
Products used:
Stamps: Share Laughter clear stamps (Hero Arts) for the sentiment 
Inks: Distress Oxide Inks - Mowed Lawn, Picked Raspberry; Scattered Straw; Dried Marigold; Versafine Clair - Nocturne; Delicate - Golden Glitz (for the splatters)
Others: Bashful Die (Penny Black); Natural Twine; Wonky Stitched Rectangle Dies (CUTplorations from STAMPlorations

CAS Stencil
Products used:
Stamps: Labeled Messages (Mama Elephant); Script Background (Uniko)
Stencils: Floral Stencil (Tim Holtz)
Inks: Distress Inks - Vintage Photo, Gathered Twigs; Versafine - Smokey Grey; Versafine Clair - Nocturne 
Others: Ranger Tacky Embossing Powder; Foil from my stash

Monday, 15 July 2019

Back on dry land ......

Happy Monday to you .......

I'm back!!!!   Another fabulous family holiday over ...... and we're already planning the next one!


We all had a great week on the Norfolk Broads ....... totally relaxed, ate far too much good food, and possibly had a few too many cheeky G&Ts but ....hey! we were on holiday!!!  I will share some more pictures with you once we've sorted through them.

It's all back to normal though this week ...... and it's busy!!!
I did take a 'small' craft bag with me on holiday with some bits and pieces to do but ...... it never got touched!!!  I'd also planned on blogging a little bit whilst we were away, but the internet on the boat was so bad I didn't even try. 
So .... it's catchup time this week. It's going to take me a while to see what I've missed on all your blogs, never mind catching up with this one!!! 

First up, I'm playing along with one of my favourtie Blog Challenges ....... CAS Mix Up

 
I couldn't miss this month's theme, seeing as I'd already got my Alcohol Inks out for the CAS Stencil Challenge.
I've used the Alcohol Ink Lift technique, there's some stamping on there and the element of my choice is ..... die cutting


Using an applicator tool with a felt pad I applied a few drops of the Alcohol Pearl inks onto the pad and then swiped it across a piece of YUPO paper.  I used a clean pad for each of the different colours, and blended them with a tiny drop of Blending Solution


I used one of my all time favourite Penny Black stamps .... Blush, inked using the Alcohol Ink Lift pad to add the flowers in the background .......


I added a few splatters using some Blending Solution on an old paintbrush and stamped my sentiment over the top ......


I added my die cut frame around the edge and finished off with a co-ordinating die cut flower, cut from a piece of YUPO, coloured using the same Alcohol inks


A few dots of glitter glue add a touch of sparkle.

Well that's one off the list ..... what's next?

Thanks for popping by ..... enjoy the rest of your day.
I'm off to the craft room now ..... well, maybe in a little while.  It's a shame not to make the most of the glorious sunshine we've got this afternoon.   Although I am dying to try these out .......


Yes, I couldn't resist treating myself to these gorgeous Blender Brushes by Taylored Expressions.  They were waiting for me when I got home at the weekend ....... it's almost a shame to use them though .... they look so pretty!!!

Cheerio until next time .......


Products used:
Stamps: Blush (wooden stamp), Special Sentiments (T for Transparent) - Penny Black
Inks: Alcohol Pearl Inks - Sublime (green), Alchemy (yellow), Splendor (orange) & Deception (pink); Blending Solution, Black Archival ink, Alcohol Ink Lift 
Others: Bashful die - Penny Black; Nesting rectangle dies to create the frame; White Blizzard Glitter Drops (Nuvo)

Saturday, 4 May 2019

CAS Stencil Challenge .......

Hello there ...... I'm back again.

How's your day been? It's been lovely here ..... our Bank Holiday weekend has got off to a great start.

I've spent the day in the company of my crafty friends, working on more calendar pages.  We've had a great time, playing with simple masking techniques and easy scene building, using the gorgeous Lavinia stamps ....... more about all that later.

It's time to get this months CAS Stencil Challenge underway. 
It's hosted by the lovely Sue this month and it's another fun technique for you .....


Stenciling over Coloured Backgrounds ...... there's a few ways you can do this. 

Use your stencils with inks, or pastes etc.,  over pretty Designer papers, or even over those papers that are not your favourites but you don't want to throw then out .... we all have them!!
Why not stencil over one of those many inky backgrounds you have, made from all those mop up pieces of card perhaps.
Or ....... a really simple way is to just use coloured card, as I've done here.


I've used an off cut of coloured cardstock ..... a pretty pale green shade, and then stenciled over the top using Distress Oxide inks and the TH Mosaic stencil


I love how the Oxides still keep their colour even on the green cardstock.

I die cut a frame to fit over the top and then added a pretty die cut flower, coloured using Oxide inks


A sentiment stamped underneath ....


and a few touches of Crystal Glaze here and there, to add a bit more interest to the stencil design.


Now it's your turn.  Happy stenciling!

The rest of the Design Team have been busy, check out the CAS Stencil blog and see what they've created  And we've also got another great Guest Designer this month .........  Michele (from I Card Everyone) is joining in the fun.  Please pop by and say Hello.

Thanks for popping by ..... enjoy the rest of your day and have a great weekend.
We're off out again later ..... its Thai food tonight.  Well, I've been busy all day, so I'm not in the mood for cooking!

Cheerio until next time .......


Products used:
Stamps: Heartfelt clear stamp set (Penny Black)
Inks: Distress Oxides; Verafine Clair (Black)
Other: Mosaic stencil (Tim Holtz); Crystal Glaze (Nuvo); Stitched Frame Die; Daisy Die (Penny Black)

Saturday, 2 January 2016

Time to 'smoosh' for Happy Little Stampers

Hello there,

Happy New Year!!!
With all the celebrations over .... hope you had a fabulous evening seeing in the start of 2016 ....... now it's time to get back to business.  Yes it's the first HLS CAS Challenge of 2016 ....... and we're starting the year with a real fun technique for you to use .....

'SMOOSHING'


What's 'smooshing' I hear you say?  Well ...... it's one of those really technical terms in the crafting world.  A really cool technique for colouring cardstock, to create fabulous backgrounds etc.  It basically involves applying ink or paint directly to a craft mat, spritz with some water then 'smoosh' your card through the ink to pick up the colour ..... simple!
You can use most types of ink ..... Distress Inks, Re-inkers, Alcohol ink, water-based markers, Inka Gold, Acrylic paints ..... and try it on different types of cardstock  too, to see what results you can get ...... just have a play.

If you're still not sure check out the HLS Blog ...... on there you'll find links to some fab videos and great tutorials.

For my challenge inspiration piece, I've used a 'smooshed' background, made using Distress Inks, applied directly from the ink pad onto a craft mat .......  I've also added in a little Inka Gold paint to add a touch of shimmer


This is a great way to colour pieces of card ..... a few whole sheets at a time to cut up and use on future projects or, I like to use up all the smaller pieces, left over bits ........ to use with die cuts or punches.

I used Picked Raspberry and Twisted Citron inks along with the Inka Gold, spritzed them with water then placed a piece of regular white card on the top, pressed it down a little, gave it a twist, then smooshed it through the colour and then left it to dry.


See how the mica in the Inka Gold gives that lovely shimmer .... so pretty


The daisies have been die cut from the same piece of cardstock ...... from the edges where there wasn't much colour ......


but this still gives a nice effect


I added my sentiment along the bottom ...... HLS Bold Birthday Sentiments


and carried on the greeting inside ........


You can see I've also added a little extra detail to the inside by using strips of my smooshed card along the bottom.

The challenge is sponsored by the Happy Little Stampers store .......


and the winner will receive one of the fabulous HLS stamp sets.

Go on ..... why not give smooshing a go .... it's fun!

Thanks for popping by .... enjoy the rest of your day.

Cheerio until next time


XX

Thursday, 16 July 2015

Time for a touch of Christmas in July ........

Happy Thursday!

Only 4 more sleeps before it's time for my next little trip across to the UK.  Not that I'm really looking forward to it but ..... my case is almost packed!!

Things in the old craft room are coming along nicely too ....... I probably shouldn't say this but, isn't it great when things go according to plan!

It's time to get a little festive I think ....... we haven't had a Christmas post for a while ..... Ho! Ho! Ho!
There's a new challenge on the block too ...... Happy Little Stampers have launched their brand new Christmas Challenge 


Each month, on the 5th, there'll be a new challenge along with a WORD, Christmas related of course, that must be used on your projects.

This month we've got .......


Now you know me, I love my Blog challenges, and I do like making my Christmas cards.
Here's what I came up with .....


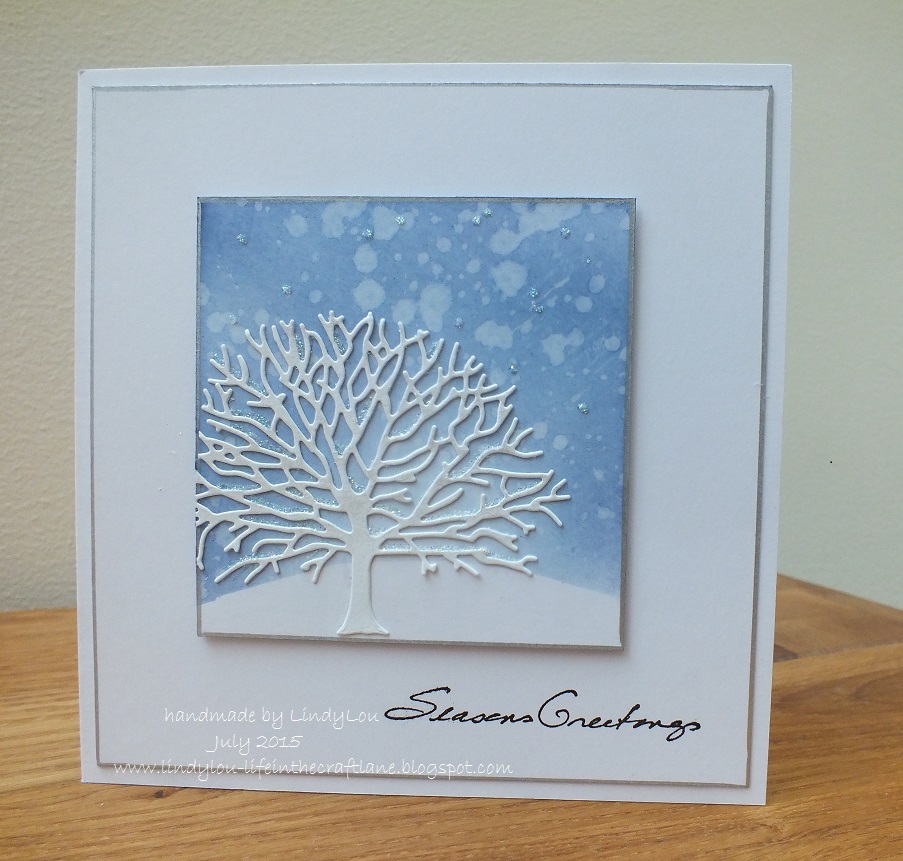
This pretty little die, from Penny Black, had been sat in my stash since last year, never used so, I thought it was time for it to make it's debut in the old craft room.  Not bad for a first appearance!

I kept things quite simple .... cut the tree from plain white cardstock,  and then spritzed it with a little Perfect Pearls.
While it was drying, I inked up my background piece using Distress inks and a few splashes of water


I then attached the tree over the top and added some fine crystal glitter


A bit of matting and layering to finish off the card, along with a nice festive greeting


You can see that I've edged around my little winter scene, and the added layer with a silver pen ..... one of those wide nibbed leafing pens that you can get in gorgeous metallic colours.
I just placed the nib on the edge of the card, and then applied a little pressure as I moved the nib around the edges.  The more pressure you apply, the thicker the coloured edge will be.
This is quite a good technique to use as it adds the look of an extra layer of card without adding the bulk, or the extra weight ...... great when you have to pop your cards in the post!

Oh well .... must dash.  I've still got a list of things to do ..... one being finish off that special project that needs to go across with me next week.  It's almost done, thank goodness. I'll give you a sneaky peek later.  Fingers crossed I can get it over there without damaging it (gulp!)

Thanks for popping by ..... enjoy the rest of your day.

Cheerio until next time

Linda
xx

Saturday, 9 May 2015

Port Sunny here I come .......

Morning!  Happy Weekend!

A bit of an early start for me .... no lie in this weekend!!! I've been up since stupid o'clock but I don't mind though because right about now I should be sat with a coffee (depending on the state of the sea!) on the ferry, with friends (hoping that we're all still awake!) crossing over to Liverpool, on my way to the Happy Stampers Festival at Port Sunlight .... whoo hoo!! (Let's hope we have a good crossing!)

It's been quite a busy week what with one thing and another but, I've made time to play along with some of my favourite challenges.
Today it's the turn of  ........ the Happy Little Stampers CAS Challenge  (no relation to the craft show) ....... where we have to use Die Cuts or Punches


I chose Die Cuts for my entry and used one of my favourite dies from Penny Black ......


Nice and simple ...... I stamped the words (one of my favourite Tim stamps) in the centre (ish) of a piece of white cardstock .....


I then cut the die from coloured card ..... twice in green, one pink and one white.


I attached the stems onto the card along side my words, then layered the flower heads over the top.
You can see I've added a touch of shading to the white one using a little Distress ink around the edges.
A touch of glitter to the centers  finishes them off nicely.

I also added a few ink spats to the background for a bit more interest.


Me being not one to waste anything .... I used the leftover waste from my die cut flower as a stencil to decorate the inside of my card .....


A little co-ordinating Distress ink brushed through and you've got a matching flower .....


So simple to do but very effective ..... and it's another way to use all of those dies.

Well hopefully we'll be nearly there now ..... raring to go, looking forward to catching up with friends, and ready to shop!!
If anyone's going along to the show today have a great time, spend loads and if you see me .... say hello!

As this is a scheduled post my link up to the challenge won't actually happen until I get home later tonight .... don't worry I've left myself a note so I won't forget!!!

Thanks for popping by ..... enjoy the weekend.

Cheerio until next time

Linda
xx

Tuesday, 3 March 2015

Red and green .... positively festive!

Happy Tuesday,

Well, dare I say it ..... fingers crossed it doesn't all go pear shaped from here ..... but this week, so far, is going according to plan!  Apart from the printer  breaking down on me this morning that is .... arghhh!!!  There's a problem with the ink so the printer's telling me ..... That'll teach me to use non hp ink cartridges.  Well .... it's just going to have to wait until I get back next week, unless hubby feels like taking a look at it over the weekend (that's not going to happen!!)

Anyway, I said I was trying to get everything done before I go away on Thursday ...... washing and ironing - check!  Case is packed - check!  Shopping all done and fridge is full - check!  Blog posts scheduled - check!  and it's only Tuesday.

I've even done my card for this weeks Merry Monday challenge........ yes it's time to get all festive!

This weeks theme is ..... RED and GREEN


What do you think .......?


I love these little sparkly Christmas lights ..... cut using the Penny Black die  'sparkle string' from red and silver glitter card, and gold mirri


You can see I've layered the light bulbs onto the gold mirri string.
I didn't have any green glitter card in my stash so I cut one string of lights from silver glitter card and then coloured it using a green Copic marker ...... does the job!


A festive sentiment finishes off another CAS Christmas card


And of course a little something on the inside ....


Oh well .... that's another job done - check!
Now I just need to tidy the old craft room (or I could just close the door!) get my craft tools ready for the retreat and sort out my craft bag for tomorrow ....... it's workshop day over at my friend Jill's.  I have cake too ...... the birthday celebrations continue!!!

Thanks for popping by .... enjoy the rest of your day.

Cheerio until next time

Linda
xx