Happy Thursday to you .......
I hope you've had a good day. It's time to get April's CAS Stencil challenge underway.
This month our host is the lovely Barb, and there's another fun theme for you. It's one of my favourite things to use with stencils .......... Embossing Pastes/Gels
These are a great way to add texture and dimension to your stencil designs. Use the coloured pastes for quick and easy designs. Use the clear or translucent pastes over the top of colour to add dimension, or simply colour your own by adding paints, inks or mica powders to white pastes. They're so much fun. If you've never used this technique before, you can find links to some fabulous, easy to follow video tutorials on the CAS Stencil Blog.
OK .... now for some inspiration
I've used inks first with my stencil. Black for the leaves and branch, and grey for the actual flower heads
When I'm using inks with stencils it's definitely less is more! I like to use a stencil brush or a sponge and I pounce the ink through the design, building the colour up gradually. This cuts the risk of the ink pooling underneath the stencil, and means that you get a nice crisp image.
I masked off the leaves and branch and then applied a translucent paste over the top of the magnolia flowers to add some dimension. Whilst the paste was still wet I sprinkled some Ultra-fine Glass Micro Beads over the top, to add some more texture.
Please note ..... not all texture/embossing pastes have an adhesive in them so beads or glitter might not stick once they are dry. I tend to use the Sweet Poppy stencil pastes and these are fine.
A few splatters of gold ink here and there ....
And a simple sentiment to finish off, heat embossed in gold .....
The challenge is open until April 24th so you've lots of time to play along.
Don't forget to check out what the rest of the Design Team have been up to.
Thanks for popping by ..... enjoy the rest of your day.
We're off out this evening to a special dinner at our favourite little restaurant/wine bar.
The founder of the Little Beauty Winery from Marlborough in New Zealand is paying a visit and the menu has been designed around their amazing wines. A seven course tasting menu with wines that match each delicious dish perfectly ..... it's going to be a great night!
Cheerio until next time .......
Products used:
Stamps: Life is a Journey clear stamp set (Sweet Poppy)
Inks: Versafine Clair - Nocturne, Distress Oxide - Hickory Smoke; Delicata Pigment Ink - Golden Glitz; Versamark
Others: Magnolia stencil (Sweet Poppy); Translucent Stencil Paste (Sweet Poppy); Ultrafine Glass Micro Beads - Silver (Sweet Poppy); Gold embossing powder (WOW!)
Showing posts with label Sweet Poppy Stencil pastes. Show all posts
Thursday, 4 April 2019
Saturday, 30 March 2019
Thank goodness it's the weekend .......
Happy weekend ......
I know ..... I've been missing for a week ....sorry! Everything's OK, it's just been one of those weeks when life gets in the way.
We've been having the drive and patio cleaned which is turning into a bigger job than we thought! We've got some friends coming over next weekend so I've sort of been getting ready for that. We've had a couple of evenings out, one of which was a Masterclass in Greek Wine would you believe. That was fun ...... we're really looking forward to our holiday in Santorini now!!
It was also Lauren's last shift as manager of The Railway on Tuesday ..... yes she's leaving the brewery and moving on to pastures new. She's staying in hospitality but, it's bar and restaurant this time, down in the south of the island ......... Port Erin. She's taken an Assistant Manager post at a relatively new place called The Little Fish at the Bay ........ I'll let you know what it's like! It sounds lovely, lots of seafood, and the guy that owns it also has a couple of our favourite places in Douglas so it should be nice.
We've had a nice week because she's had a few days off, so we've had some mum/daughter time. Lunches out ..... nails done ..... a bit of shopping. It's cost me a fortune!!!
Anyway enough about all that. I did manage to spend some time in the craft room.
I've been busy with my Sweet Poppy Stencils. As the lovely Lucy is back on the TV again in April (I think it's the 19th ...... but I will confirm that), the DT have been busy creating some new samples using some old favourite stencil designs along with a couple of brand new stamp sets.
The beautiful Magnolia is having another outing ...... I love this design
It's so pretty on it's own, with just a simple sentiment ......
I've used it here with the Pearlescent White Paste, and then sprinkled some of the gorgeous brand new Ultra Fine Glass Micro Beads over the top
These beads are so tiny but they give great texture, and thery're available in a range of gorgeous colours ......
A few sparkly gems and a simple sentiment .....
It's so pretty when used with coloured inks too ......
These are Distress Oxides simply applied using a stencil brush .......
A few splatters of gold ink and a fw dot s of glitter glue .......
With a pretty heat embossed sentiment to finish ......
Same stencil just different colours of ink .....
and this time I've used the stencil around the edges of my piece of card, to frame this fab sentiment
Even though it's quite a large flower you can still use it to create smaller projects such as matching gift tags .....
This is just one of the designs that will be on the show, I'll be back next week with a little look at a few more.
Thanks for popping by ....... have a great weekend.
And if you're in the UK, and you're a Mum, have a lovely Mother's Day tomorrow. We're off out for a nice family lunch so no cooking for me!
Ooh ..... and don't forget, the clocks go forward tonight. Summer is on its way!
Cheerio until next time ......
Products used:
Stamps: Life is a Journey stamp set (Sweet Poppy)
Inks: Versafine Clair - Nocturne; Distress Oxides - Spun Sugar, Worn Lipstick, Bundled Sage, Gathered Twigs; Picked Raspberry
Others: Magnolia stencil (Sweet Poppy); Pearlescent White stencil paste (Sweet Poppy); Micro Beads - Pale Pink, Green, Brown; Clear gems; Versamark ink, Gold Embossing Powder
I know ..... I've been missing for a week ....sorry! Everything's OK, it's just been one of those weeks when life gets in the way.
We've been having the drive and patio cleaned which is turning into a bigger job than we thought! We've got some friends coming over next weekend so I've sort of been getting ready for that. We've had a couple of evenings out, one of which was a Masterclass in Greek Wine would you believe. That was fun ...... we're really looking forward to our holiday in Santorini now!!
It was also Lauren's last shift as manager of The Railway on Tuesday ..... yes she's leaving the brewery and moving on to pastures new. She's staying in hospitality but, it's bar and restaurant this time, down in the south of the island ......... Port Erin. She's taken an Assistant Manager post at a relatively new place called The Little Fish at the Bay ........ I'll let you know what it's like! It sounds lovely, lots of seafood, and the guy that owns it also has a couple of our favourite places in Douglas so it should be nice.
We've had a nice week because she's had a few days off, so we've had some mum/daughter time. Lunches out ..... nails done ..... a bit of shopping. It's cost me a fortune!!!
Anyway enough about all that. I did manage to spend some time in the craft room.
I've been busy with my Sweet Poppy Stencils. As the lovely Lucy is back on the TV again in April (I think it's the 19th ...... but I will confirm that), the DT have been busy creating some new samples using some old favourite stencil designs along with a couple of brand new stamp sets.
The beautiful Magnolia is having another outing ...... I love this design
It's so pretty on it's own, with just a simple sentiment ......
I've used it here with the Pearlescent White Paste, and then sprinkled some of the gorgeous brand new Ultra Fine Glass Micro Beads over the top
These beads are so tiny but they give great texture, and thery're available in a range of gorgeous colours ......
A few sparkly gems and a simple sentiment .....
It's so pretty when used with coloured inks too ......
These are Distress Oxides simply applied using a stencil brush .......
A few splatters of gold ink and a fw dot s of glitter glue .......
With a pretty heat embossed sentiment to finish ......
Same stencil just different colours of ink .....
and this time I've used the stencil around the edges of my piece of card, to frame this fab sentiment
Even though it's quite a large flower you can still use it to create smaller projects such as matching gift tags .....
This is just one of the designs that will be on the show, I'll be back next week with a little look at a few more.
Thanks for popping by ....... have a great weekend.
And if you're in the UK, and you're a Mum, have a lovely Mother's Day tomorrow. We're off out for a nice family lunch so no cooking for me!
Ooh ..... and don't forget, the clocks go forward tonight. Summer is on its way!
Cheerio until next time ......
Products used:
Stamps: Life is a Journey stamp set (Sweet Poppy)
Inks: Versafine Clair - Nocturne; Distress Oxides - Spun Sugar, Worn Lipstick, Bundled Sage, Gathered Twigs; Picked Raspberry
Others: Magnolia stencil (Sweet Poppy); Pearlescent White stencil paste (Sweet Poppy); Micro Beads - Pale Pink, Green, Brown; Clear gems; Versamark ink, Gold Embossing Powder
Saturday, 16 February 2019
Happy Weekend! .....
Happy weekend .....
I hope you're having a good one.
I've been a bit quiet on here the last few days ...... I've been getting my breath back after all the fun of the Uniko Birthday celebrations. Everything is good though ..... busy, busy, busy as usual.
I got a sudden urge to Spring clean everything at the beginning of the week (what's that all about!!)
The house is absolutely sparkling! Windows done, floors done, woodwork polished. A lovely new bed in the spare room ready for our visitors in April, and the hot tub is all dusted off and ready to be refilled! Even the craft room is tidy!!
I also bought myself a new breadmaker, just a small one. The kitchen has been filled with the smell of freshly baked bread nearly every day, which is lovely ....... the results aren't bad either!
I have been in the craft room too this week ....... doing a little bit of this and that.
I'm going to start my workshops again I think. Thanks to the lovely Eileen Godwin I'm feeling all inspired. She did a fab Facebook video, decorating a calendar page and I so want to do one of my own.
So, I ran it by my crafty ladies, and Eileen of course, and they all want to create their own calendars so a workshop it is ...... watch this space!
I was also busy with some Sweet Poppy Stencil stuff. Lucy asked me to re-create one of my previous samples for her .......
Slightly different from the original one, but still pretty.
It's the Change in the Season's stencil on Kraft card, lots of white ink and a touch of sparkle.
Whilst I was waiting for the stencil paste to dry on this one, I also had a little play with some of the new designs that were still out on my desk. These will be on Hochanda at the beginning of March.
The Steam Train ...... great for masculinen designs
This is a fab stencil .... a nice large design but, you don't always have to make big cards with the larger stencils. If you're happier creating something smaller, just use part of the design .....
This is actually the result of a 'happy accident' ...... I never throw anything away if I can help it.
I'd used the stencil previously with the black paste and black glitter on the top, on a piece of cardstock coloured with Brushos but ...... I didn't let the paste dry properly!
As you can imagine the smudge wasn't easy to hide (ooops!) ....... so I just cut it off!
There was still enough of that fab train left though, to die cut using one of my circle dies
You can see there's a couple of bits that overlap the actual circle ......
To do this I first placed the die where I wanted it to be and drew a fine line along the edges of the metal die, either side of the bit that was going to overlap.
I then fussy cut around the sections of the train on the outside of the lines. I put the cutting die back in place with the fussy cut sections on the top, and then ran the die through the Big Shot as usual. The result was a die cut circle with the overlapping bits still attached ..... hope that makes sense!!
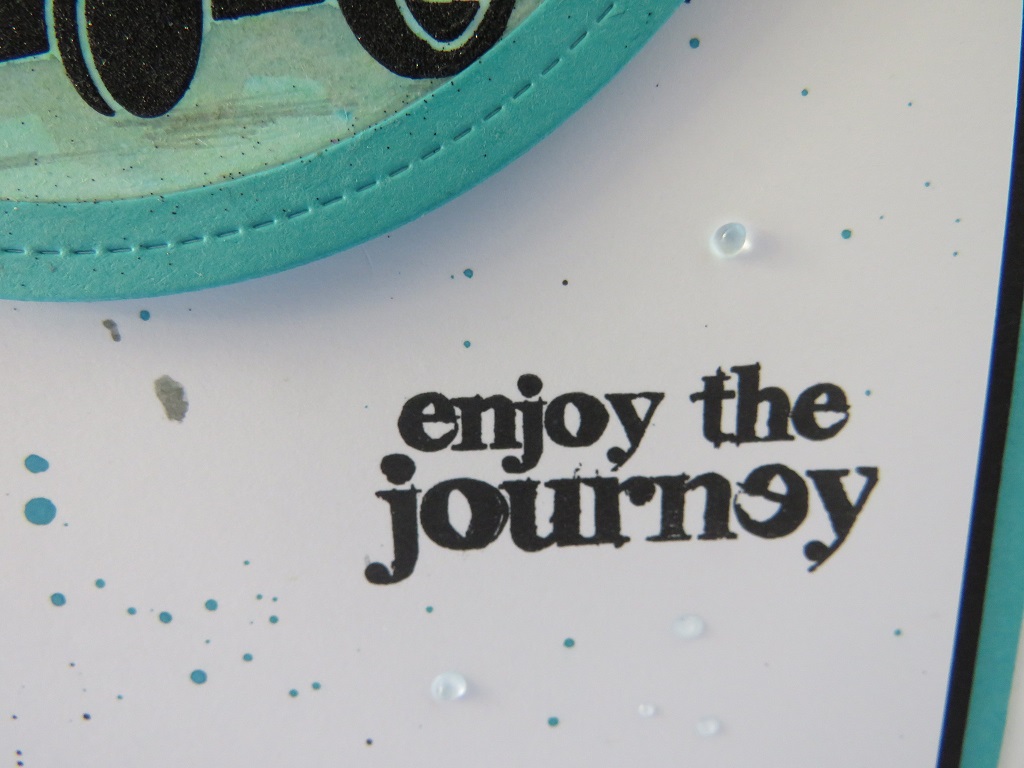
A simple sentiment and a co-ordinating frame .......
And a few splatters of matching ink to finish off
The card above is my 'go to' card size, which is 7x5 inches.
Here's the same stencil, in full this time, on a large square card
Black paste again, this time with sections highlighted using a Liquid Chrome marker
Has this been fussy cut ...... no. It's a sneaky peek at a matching die that will be available for the Steam Train stencil .... how cool is that!
It doesn't cut the steam cloud ...... so I've used my sentiment in it's place.
Another of the new designs is the pretty Floral Mandala ....
Used here with Distress Oxide inks .....
a little touch of Stardust Gel Pen to add a bit of shimmer around the edge
And then a hidden sentiment in the middle, die cut using one of the new Sweet Poppy word dies that are coming soon
It also looks great when used with the stencil pastes too .....
I think the date for the Sweet Poppy shows on HOCHANDA is March 6th (the day after my birthday!) at 12pm and 4pm.
New products as well as some favourites, and lots of tips and techniques from the lovely Lucy.
Thanks for popping by ..... enjoy the rest of your weekend.
Cheerio until next time .....
I hope you're having a good one.
I've been a bit quiet on here the last few days ...... I've been getting my breath back after all the fun of the Uniko Birthday celebrations. Everything is good though ..... busy, busy, busy as usual.
I got a sudden urge to Spring clean everything at the beginning of the week (what's that all about!!)
The house is absolutely sparkling! Windows done, floors done, woodwork polished. A lovely new bed in the spare room ready for our visitors in April, and the hot tub is all dusted off and ready to be refilled! Even the craft room is tidy!!
I also bought myself a new breadmaker, just a small one. The kitchen has been filled with the smell of freshly baked bread nearly every day, which is lovely ....... the results aren't bad either!
I have been in the craft room too this week ....... doing a little bit of this and that.
I'm going to start my workshops again I think. Thanks to the lovely Eileen Godwin I'm feeling all inspired. She did a fab Facebook video, decorating a calendar page and I so want to do one of my own.
So, I ran it by my crafty ladies, and Eileen of course, and they all want to create their own calendars so a workshop it is ...... watch this space!
I was also busy with some Sweet Poppy Stencil stuff. Lucy asked me to re-create one of my previous samples for her .......
Slightly different from the original one, but still pretty.
It's the Change in the Season's stencil on Kraft card, lots of white ink and a touch of sparkle.
Whilst I was waiting for the stencil paste to dry on this one, I also had a little play with some of the new designs that were still out on my desk. These will be on Hochanda at the beginning of March.
The Steam Train ...... great for masculinen designs
This is a fab stencil .... a nice large design but, you don't always have to make big cards with the larger stencils. If you're happier creating something smaller, just use part of the design .....
This is actually the result of a 'happy accident' ...... I never throw anything away if I can help it.
I'd used the stencil previously with the black paste and black glitter on the top, on a piece of cardstock coloured with Brushos but ...... I didn't let the paste dry properly!
As you can imagine the smudge wasn't easy to hide (ooops!) ....... so I just cut it off!
There was still enough of that fab train left though, to die cut using one of my circle dies
You can see there's a couple of bits that overlap the actual circle ......
To do this I first placed the die where I wanted it to be and drew a fine line along the edges of the metal die, either side of the bit that was going to overlap.
I then fussy cut around the sections of the train on the outside of the lines. I put the cutting die back in place with the fussy cut sections on the top, and then ran the die through the Big Shot as usual. The result was a die cut circle with the overlapping bits still attached ..... hope that makes sense!!
A simple sentiment and a co-ordinating frame .......
And a few splatters of matching ink to finish off
The card above is my 'go to' card size, which is 7x5 inches.
Here's the same stencil, in full this time, on a large square card
Black paste again, this time with sections highlighted using a Liquid Chrome marker
Has this been fussy cut ...... no. It's a sneaky peek at a matching die that will be available for the Steam Train stencil .... how cool is that!
It doesn't cut the steam cloud ...... so I've used my sentiment in it's place.
Another of the new designs is the pretty Floral Mandala ....
Used here with Distress Oxide inks .....
a little touch of Stardust Gel Pen to add a bit of shimmer around the edge
And then a hidden sentiment in the middle, die cut using one of the new Sweet Poppy word dies that are coming soon
It also looks great when used with the stencil pastes too .....
I think the date for the Sweet Poppy shows on HOCHANDA is March 6th (the day after my birthday!) at 12pm and 4pm.
New products as well as some favourites, and lots of tips and techniques from the lovely Lucy.
Thanks for popping by ..... enjoy the rest of your weekend.
Cheerio until next time .....
Monday, 14 January 2019
New designs from Sweet Poppy Stencils .......
Happy Monday .......
This week is going to be a little crazy I think, if this morning is anything to go by! Talk about multi-tasking ...... good job I'm female!!!
Before I lock myself in the craft room ...... and I'm not coming out until everything's done! ...... I want to share a couple of the new stencil designs with you from Sweet Poppy, launched at the end of last week. There's something for everyone.
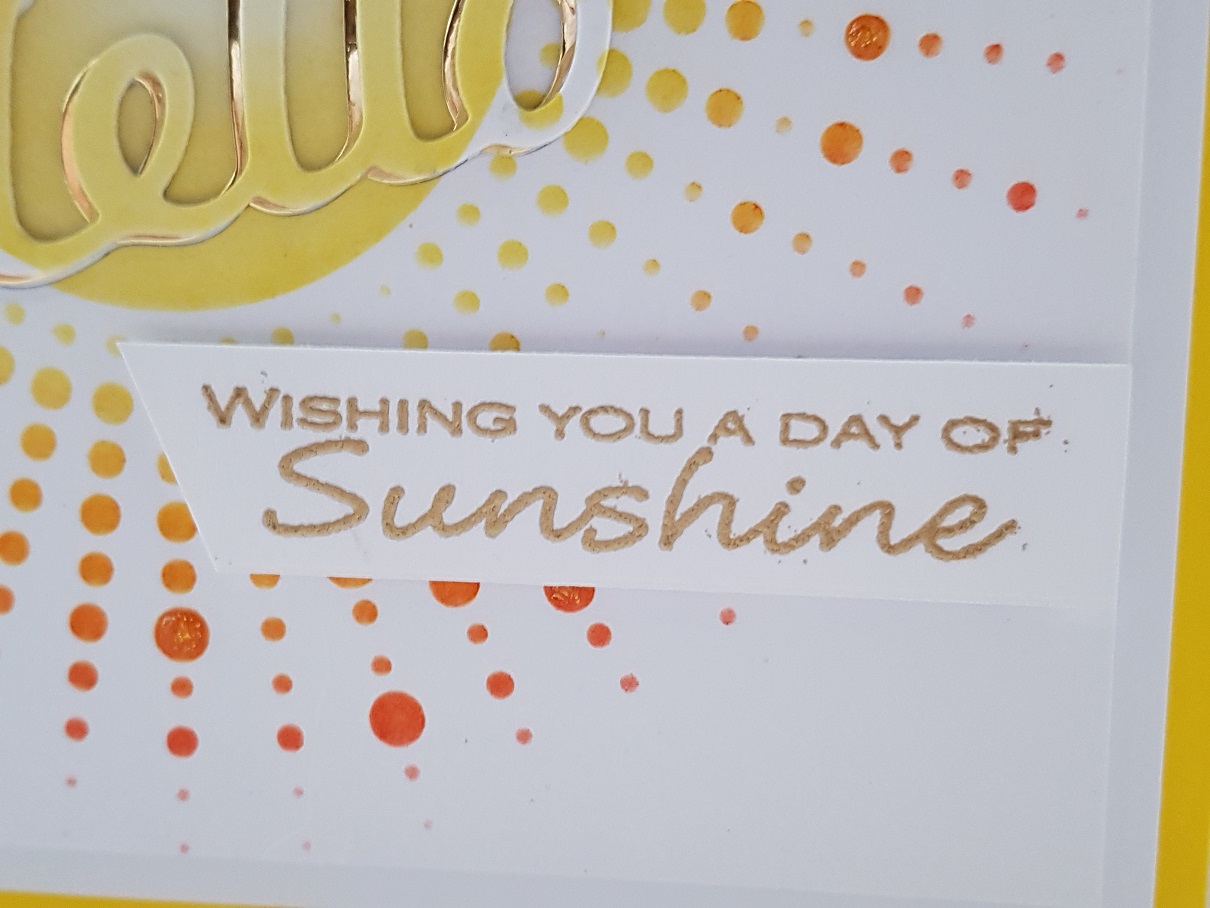
One of my favourites is the new Sunburst ..... this is going to be so useful. Great for using to create backgrounds, or add detail and layers to your projects. But also fabulous to use on it's own, either in full .... it's a great size, or just part of the design.
Here's the design in full, on a 7x7 finished sized card ..... how fab does that look but it's so easy to create.
I've gone for nice, bright sunshine colours in Distress Inks, simply sponged through the stencil
I added a touch of glitter glue to highlight some of the dots.
A simple sentiment is all it needed to finish off ..... partly die cut (I'm teasing you here with something that's coming in March)
And partly stamped .......
You don't have to make large cards though .... here's a little 5x5 design using the same stencil .....
I used the Sweet Poppy Stencil Medium in Gold this time and sprinkled gold glitter over the top
I used a die to cut out the centre, and popped my cute little monster behind .....
The new Monster Love stamp set from Concord & 9th just had to come into the craft room ...... it's so cute!!
I stamped one of the monsters onto a scrap of leftover card, added a touch of colour and then die cut him to fit in the centre circle.
I stamped the heart, added my sentiment, and fussy cut, and then attached it using a piece of folded acetate so that it moves around a little
Another of the new designs is this fabulous Carousel ..... just look at the detail
I've used some of the pastel coloured pastes through the design, then sprinkled with crystal glitter over the top ......
This is another large design which is perfect for those 7x7 or bigger, cardblanks.
I used Distress Inks to create the background, in the same pastel shades. I simply swiped the inks onto a craft sheer, spritzed with water, and then used a paintbrush to splatter the colours onto my card
A sentiment on the bottom ......
And a little of the design on the inside ......
All the new stencil designs can be found on the Sweet Poppy Website. Just click on the New Products section.
Thanks for popping by ...... enjoy the rest of your day and have a great week.
I've got so much to do this week, it's going to be a busy one.
We've got Chris back at home, it's Lauren's birthday on Thursday and then we're all off to the UK on Friday for a family wedding at the weekend. In between the ironing and the packing, all the craft stuff, and my DT commitments, I have to get my hair done, nails done, birthday shopping with Lauren. I need to find a tie for hubby that will match my dress. Speaking of which ...... it fits, thankfully!! I tried it again over the weekend, and the shoes I got to go with it are perfect.
We haven't been to a good wedding for a long time. It's hubby's brother that is finally tying the knot. Him and his girlfriend have only been together for about 25 years so I think it's time don't you!
Oooh! I almost forgot, we have another little celebration ......... can you believe that my little old blog is 7 years old today!!
That's a lot of blogging!! And I've enjoyed every minute if it.
I'd like to say a BIG Thank You to all my Blog Friends and Followers for visiting, and commenting. I couldn't do it without you ...... mwah!!!
Cheerio until next time .....
This week is going to be a little crazy I think, if this morning is anything to go by! Talk about multi-tasking ...... good job I'm female!!!
Before I lock myself in the craft room ...... and I'm not coming out until everything's done! ...... I want to share a couple of the new stencil designs with you from Sweet Poppy, launched at the end of last week. There's something for everyone.
One of my favourites is the new Sunburst ..... this is going to be so useful. Great for using to create backgrounds, or add detail and layers to your projects. But also fabulous to use on it's own, either in full .... it's a great size, or just part of the design.
Here's the design in full, on a 7x7 finished sized card ..... how fab does that look but it's so easy to create.
I've gone for nice, bright sunshine colours in Distress Inks, simply sponged through the stencil
I added a touch of glitter glue to highlight some of the dots.
A simple sentiment is all it needed to finish off ..... partly die cut (I'm teasing you here with something that's coming in March)
And partly stamped .......
You don't have to make large cards though .... here's a little 5x5 design using the same stencil .....
I used the Sweet Poppy Stencil Medium in Gold this time and sprinkled gold glitter over the top
I used a die to cut out the centre, and popped my cute little monster behind .....
The new Monster Love stamp set from Concord & 9th just had to come into the craft room ...... it's so cute!!
I stamped one of the monsters onto a scrap of leftover card, added a touch of colour and then die cut him to fit in the centre circle.
I stamped the heart, added my sentiment, and fussy cut, and then attached it using a piece of folded acetate so that it moves around a little
Another of the new designs is this fabulous Carousel ..... just look at the detail
I've used some of the pastel coloured pastes through the design, then sprinkled with crystal glitter over the top ......
This is another large design which is perfect for those 7x7 or bigger, cardblanks.
I used Distress Inks to create the background, in the same pastel shades. I simply swiped the inks onto a craft sheer, spritzed with water, and then used a paintbrush to splatter the colours onto my card
A sentiment on the bottom ......
And a little of the design on the inside ......
All the new stencil designs can be found on the Sweet Poppy Website. Just click on the New Products section.
Thanks for popping by ...... enjoy the rest of your day and have a great week.
I've got so much to do this week, it's going to be a busy one.
We've got Chris back at home, it's Lauren's birthday on Thursday and then we're all off to the UK on Friday for a family wedding at the weekend. In between the ironing and the packing, all the craft stuff, and my DT commitments, I have to get my hair done, nails done, birthday shopping with Lauren. I need to find a tie for hubby that will match my dress. Speaking of which ...... it fits, thankfully!! I tried it again over the weekend, and the shoes I got to go with it are perfect.
We haven't been to a good wedding for a long time. It's hubby's brother that is finally tying the knot. Him and his girlfriend have only been together for about 25 years so I think it's time don't you!
Oooh! I almost forgot, we have another little celebration ......... can you believe that my little old blog is 7 years old today!!
Happy Blogiversary to Life in the Craft Lane!!
I'd like to say a BIG Thank You to all my Blog Friends and Followers for visiting, and commenting. I couldn't do it without you ...... mwah!!!
Cheerio until next time .....
Subscribe to:
Posts (Atom)