Showing posts with label Finnabair inspired. Show all posts

Wednesday, 14 June 2017

And we're off ........

Good morning ..... and Happy Wednesday!

Sorry I'm a bit late sharing the workshop from the weekend ...... I've been a little busy so far this week.  We're going on holiday today .... whoo hoo!!

We did have a great workshop though .... lots of fun decorating wooden boxes using acrylic paints, gorgeous shimmer paints  (Finnabair's Art Alchemy Sparks range and the Imagination Crafts Starlights), gilding waxes and lots of embellishments.  It's funny how everyone follows the same techniques, but the end results are always so different .... I love it!

Here's a look at my inspiration pieces I created to get them started ......


You've already seen one of these up close, in a blog post from last week, you can find the details here if you missed it.

This box has actually been altered quite a few times ...... there's quite a few layers of paint on there now.  That's the thing ..... if you don't like how it's turning out, paint over it and start again! Or if you love the box but just don't like the colour anymore, paint over it again  ..... easy!


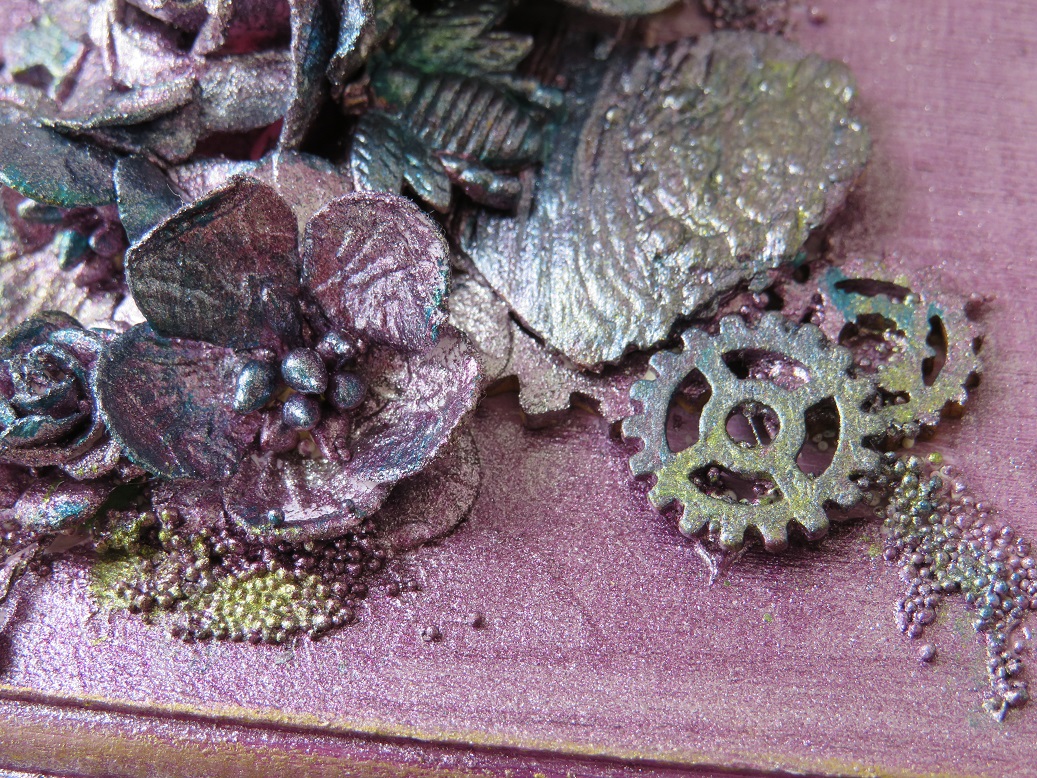
We used various embellishments to create the detail on the boxes ...... paper flowers, metal and chipboard cogs .....


Metal charms and tiny Art Stones ..... anything to add interest and texture

I even but a pretty drawer handle on the top of one box .......


I love how the crown looks on this particular box ..... I used gilding waxes over the paint to bring out all the detail ......

You can see there's more of those Art Stones on here too ..... some larger ones as well as the tiny version


We used texture paste and stencils to add more interest ..... and there's pieces of cotton lace in there too


Once all the detail and the embellishments were on, then came the paints.  The whole thing was painted over, some used just the chalk finish acrylics, others went for it and used all metallics and shimmer, and some even used a bit of both.   We got a fabulous mix of colours and styles ...... here's a look at the finished boxes ......


Aren't they all gorgeous .... love the pink, very feminine.


The golden honey colour looked so rich ....... and as I said, everyone did the same thing but each one ended up totally different.


I'd love to stay and chat but ...... I still need to pack!
Then it's time to load up the car and start on our journey.  Once we're across in the UK our first stop is Birmingham.  Hubby and I have 3 nights in a hotel .... 2 days at the BBC Good Food Show which is on at the NEC, and then dinner booked on Friday evening at a favourite restaurant.
Happy days!

Thanks for popping by ... enjoy the rest of your day.

Cheerio until next time ......

Monday, 26 September 2016

It's going to be a busy one .......

Happy Monday folks ......

I've got a nice short, but busy week ahead.  Fingers crossed, everything seems to be going according to plan ..... the old craft room is a complete mess, multiple projects are on the go at once but hey .... the To Do list is getting shorter .... slowly!

Hubby and I are off on a trip across to the UK ..... he's booked a few days away up in bonnie Scotland. We're taking the car, sailing across on the Friday morning ferry, and then driving up there.
Yes .... I know it's nearly October, and the weather isn't brilliant ....... and yes I did say we're on the ferry!!  Apparently there are two storms on their way to the UK which are going to collide before they get there ..... sounds like fun!!! But, I'm sure we'll have a great time whatever the weather.  Already packed the travel pills!! 

It's almost 30 years ago exactly, that Stephen actually proposed to me .... whilst we were up in Scotland.  We'd only been seeing each other for 10 days when he took me on a weekend away and swept me off my feet ..... how romantic is that!  As I said .... that was 30 years ago (sigh!)

Anyway .... lots to get done before we go.
Let's start the week with Saturday's workshop ....... a multi media canvas using texture pastes, stencils, paints, lots of lovely embellishments and finishing off with gorgeous mica sprays .... all inspired by the fabulous Finnabair.    
Everyone had a great day ..... we always have such  good time on our little get togethers ..... although they're not as little as they once were.

They had two options to choose from ..... a black gesso base for the centre canvas (full details on this project can be found here)


I do love this technique .... can you tell! ....... personally the black is my favourite .....


Again this was something I did a few months ago, but if you missed it you can see how it was done by clicking the link here

Then the second option was a white gesso base ...... totally different look

 
Basically everything's the same to begin with for both options.  Texture paste and stencils for the background, although I did throw in a bit of tissue paper on my inspiration piece for something a little different


Once all that's dry ....... arrange your embellishments on the top and then once you're happy with it glue them all into place with some heavy gel medium


As you can see I like to keep my focal point towards the centre more or less, and then build it up a little for dimension and trail it off towards the edges.
I used paper flowers, metal flowers and leaves, cogs, wooden embellishments, little trinkets, buttons, seed beads .... you name it you can put whatever you like on there.
Just bear in mind if you're going for a black gesso base it doesn't really matter what colour of flowers and buttons etc., you use as you'll be covering them up and black gesso covers most things.
If you want to try the white option then keep the colours of what you put on there quite neutral .... you need to cover the colour with white gesso so things may need more than one coat.


Once the glue starts to dry you can speed things up a little by using a heat tool .... just remember that there's metal on there, so it will get hot ..... and there's paper so not too long with the heat, you don't want to burn anything.

Once you're happy that everything is stuck down, give the whole thing a good coat of gesso, making sure to get in between all the layers.   Let this dry naturally or you can help it along with a heat tool, then the fun begins ..... the mica sprays.  This is where some of the ladies were a little nervous to begin with and were a bit shy with the spraying.  My advice is don't think about it too much, just spray and get some colour on there.  I would advise drying off each colour before changing to another one .... you don't want them to mix and make a muddy mess.
Just keep spraying until you're happy with the result.

Obviously the colours will look different on the different bases .... the black will be more vibrant whereas the white will be a bit more pastel


I went in and added more colour here and there using mica powders and then finished off with a touch of Treasure Gold here and there .....


Everyone was so pleased with the results ....... most of them went for the black option, one did both (there's always one!) used black and white, which turned out fabulous ..... how bad am I though I didn't get any photos!!!
I will try and get some though ..... it would be nice to show off what they created.
We did have one lady go with the white option and she has sent me a picture and given me permission to share her finished project  ....... this was Carol's,  how pretty does this look


Well done everyone .... another fabulous, fun filled day.
Need to get planning the next one now ..... add it to the list!!!

Thanks for popping by ....... enjoy the rest of your day.

Cheerio until next time