Showing posts with label Sweet Poppy Stencil show samples. Show all posts

Sunday, 15 January 2023

More from the January release from Sweet Poppy Stencils .......

Good morning! ...... Happy Sunday!

I hope you're having a lovely weekend.
After two days of strong winds battering our little island things are a little calmer out there today, and the sun is shining ..... for now anyway!

There's less than 24 hours to wait before the first brand new release of 2023 from Sweet Poppy Stencils goes live on the website.
If you're a follower of Sweet Poppy on Facebook then you've probably seen the preview of the new stencil designs ..... what do you think?  Do you need them in your stash?  Is it time to make a shopping list?

I've been playing with some of the new designs and they are lovely.  Check out some ideas for using the large word stencils on my last blog post.

Today it's the gorgeous Floral Crescent Moon ....... how pretty is this


A fabulous large stencil, with a pretty floral cluster.  Perfect for square card designs, and gorgeous to use as is but, just think of all the add ons you can use. 
I've stamped one of Lavinia Stamp's cute little hares on the bottom of the moon ....... I love this little guy!


He's looking up, wishing on a star


I used Delicata Golden Glitz ink to colour the crescent moon, and Distress Inks for the flowers.  I also stenciled these a couple of times onto separate pieces of white card, fussy cut them and layered them up to add dimension ..... so pretty!


Even though this is a large stencil you can make smaller cards, and if one layer is your thing then this design is great for that too .......


This is a 7x5 inch card and I've taken the stencil slightly off the edge.  
Simply stenciled with black ink, and I've added a little bit of doodling with a gold gel pen for some extra detail


A few pretty pearls, a stamped sentiment, and some gold ink splatters to finish off


Use just the flowers from the stencil in other ways to ........ 


How about making your own floral embellishments to add to other stencil designs ...... use pretty coloured inks, fussy cut and layer.
Oh look ..... could that be another stencil from the new release in the background!  Don't you just love it when everything works together!

All the stencils from the new release are available on the Sweet Poppy Website from 10am tomorrow.  And, if you fancy more inspiration and ideas for making the most of them, then tune in to Lucy on Create and Craft on Wednesday the 18th January.


Thanks for popping by ...... enjoy the rest of your weekend.

Cheerio until next time ........


Saturday, 21 November 2020

It's getting a little festive around here .......

Happy weekend! 

It's looking quite nice here this morning, we have blue skies and sunshine.  It feels a bit chilly though, time to get the boots and the big jacket out I think.

It's been a busy week here, but things are calming down a little now.  
Lauren and Alex are all settled, and things are getting back to normal.  It is beginning to look a little Christmassy around here though, a bit earlier than usual but hey!  I think we could all do with some festive spirit right now.  The Christmas decorations are slowly appearing ..... we have three trees in place and decorated and the final one is in the lounge all ready to go.  Whether it will get done this weekend or not, we'll have to wait and see!

Time in the craft room has been very limited this week but, I do have a few Christmas cards to share with you though, more samples that were made for the Sweet Poppy Stencil shows on Hochanda this week. 
It was the last Sweet Poppy show for 2020 and we finished the year on a high.  If you didn't get to see the shows live they are available on Rewind on the Hochanda website.
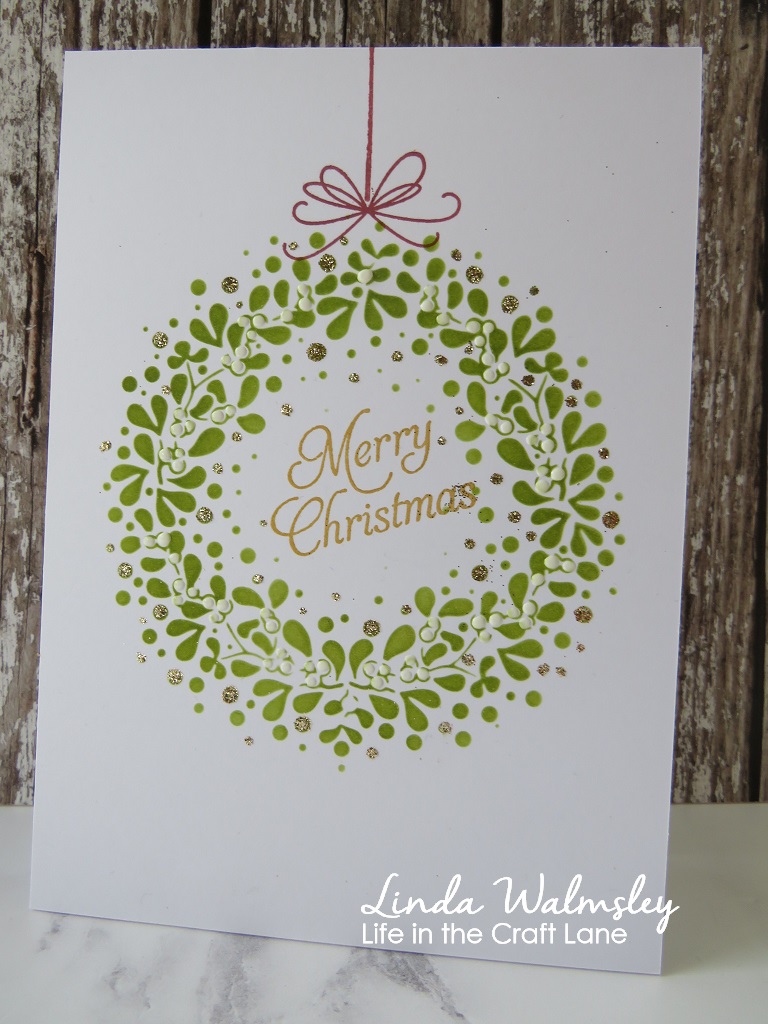
There were new stencil designs, some of which sold out really quickly.  Some back in stocks and some old favourites.  One of which for me, is the gorgeous Mistletoe Wreath ..... I do like a nice wreath especially at this time of year.

This stencil is so pretty, and full of detail.  And it's great for making all different sizes of cards.


I simply used Distress Ink through the stencil ......


I stamped a simple bow on the top and made it look like a hanging bauble


A few dots of white enamel accents on the berries and some sparkly glitter highlights .....


And then a sentiment in the centre.


Really quick and easy, and just the one layer ........ great for posting!

Mix and match the wreath with background stencils ...... it looks fab with the plaid


I even had a die that was the perfect size to cut around the wreath .....


Or, why now use the stencil off the edge for another different look ......


I must make some time this weekend and get some Christmas cards done .... either that or I'll have to send out bought ones which is a BIG no no ...... I would be in trouble!

Thanks for popping by ..... have a lovely weekend whatever you get up to.

Cheerio until next time ......


Products used:
Stencils: Mistletoe Wreath, Plaid Back Plate (Sweet Poppy)
Stamps: Noel, Joy & Peace A6 stamp sets (Sweet Poppy)
Inks: Distress Inks - various shades of green, Delicata - Golden Glitz, Versafine - Crimson Red
Other: White Enamel Accents (Ranger); Gold glitter, Crystalina Glitter (Sweet Poppy)