Monday, 15 August 2022

The CAS Mix Up challenge ..........

Happy Monday! .........

Welcome to a new week .... and a busy one at that!

Time for a quick reminder about this months CAS Mix Up Challenge.
It's a Mixed Media challenge this month which means you need to include some stamping on your card,  you must follow the challenge theme which for August is ........ Emboss Resist, and you must also include one other Mixed Media element ......... you can find a list of ideas for that on the CAS Mix Up Blog
 

The theme this month was chosen by our host Nancy, and is a really fun technique to try.
If you're not familiar with it and haven't tried this before, then check out the links on the CAS mix Up Blog post ..... there's a few different ways you can do this.
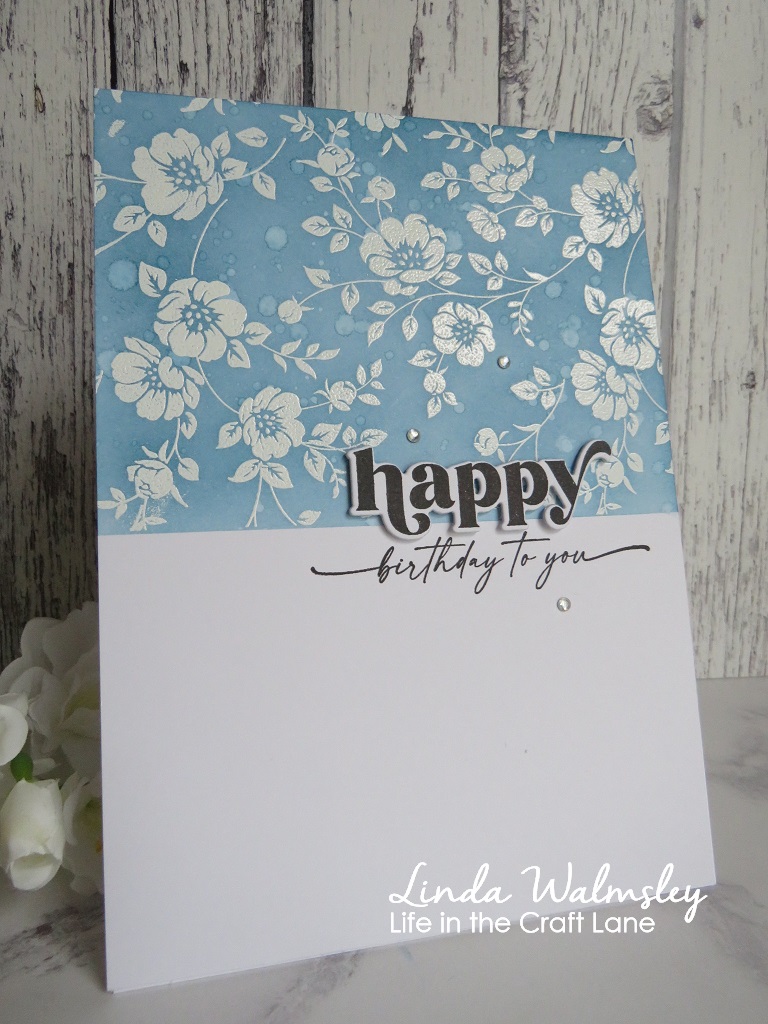

For this card I started by masking off the bottom section of my card front.  I then stamped the pretty floral design across the top using Versafine ink.  I then sprinkled on some white embossing powder and heat set. 


With the bottom part of my card still covered,  I blended Uncharted Mariner Distress Ink over the top of the heat embossing ....... I think this is my new favourite shade of blue!

Once I was happy with the colour, I gently buffed over the top of the embossing with a paper towel to remove any excess the ink from the design.  The embossing powder had resisted the Distress ink so the white  came through nice and bright again.


For a little bit of added interest I splattered the card with a little bit of clean water.  I let it sit for a few seconds to react with the Distress Ink then I mopped up the excess with a paper towel, leaving this pretty speckled look ...... I never get tired of doing this.  It's such a simple technique that works so well, every time.

I added part of my sentiment stamped and die cut on the top, finishing it off with some stamping underneath and a few little gemstones for a touch of added sparkle!


Here's another one I did using the same Emboss Resist technique, only this time I used watercolour paints over the top 


I heat embossed the flower first, then blended the watercolour paints over the top
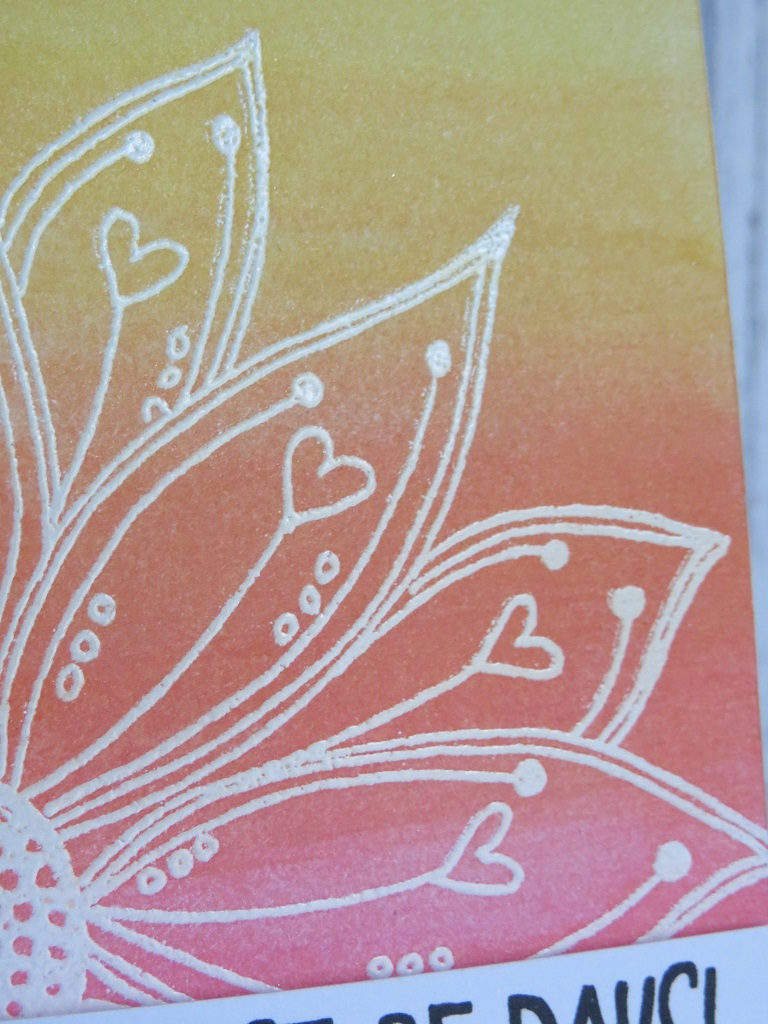

The embossing did take on a little bit of the colour from the paints so it's not quite as white as I would have liked but, it still looks pretty


To keep it CAS I added a sentiment strip over the bottom edge and a few pretty gemstones


I do hope you give this technique a go. 

Happy stamping! 

Well the weather forecast here for yesterday was spot on ........ the heatwave definitely broke last night!  
At around 4am we had the most spectacular thunderstorm that lasted for the best part of an hour ..... and Lauren slept through it all!  Alex on the other hand ended up in our room!  
The lightening woke me up first before the huge crash of thunder, right over the top of us ..... boy was it loud, and scary!!  
And the rain ........ the gutters on the house just couldn't handle the amount of water coming down and there was literally a waterfall coming off the roof!  
We did get up to check around the house ..... and the van!  Thankfully no damage was done, apart from a couple of mains switches had tripped off, which meant some of the house was in darkness but, other than that everything was OK ..... thank goodness.  And things are a little cooler today which is great, I've still lots to do before we go away.
  
We're off in the van again on Wednesday, for our longest trip so far.  We're away for 17 nights this time,  starting with a music festival ...... should be fun!   
It's not just a pleasure trip though, it's business too.  Turns out that hubby needs to work for some of the time, including a day, or possibly more, in London.  Fingers crossed it stays nice and cool for that!

Thanks for popping by ..... enjoy the rest of your day.

Cheerio until next time .........   


Supplies
Card 1
Stamps: Vines & Roses (Tim Holtz - CMS298); Opposites Attract (The Greetery) for the sentiment
Inks: Versamark ink; Distress Ink - Uncharted Mariner; Versafine Clair - Nocturne
Other: White Embossing Powder (WOW!); Oppostie Attracts Die (The Greetery); Self- adhesvie gemstones

Card 2
Stamps: Be Happy stamp set (Julie Hickey Designs)
Inks: Versamark ink; Versafine Clair - Nocturne
Other: White Embossing Powder (WOW!); Altenew Watercolour Paints; Self-adhesive gemstones

Sunday, 14 August 2022

Fun in the sun ......

Hello there ........ 

Happy Sunday to you.  I hope you're all having a lovely weekend. 
It's another beautiful day here on the island (I could get used to this) ........ the sun is shining and it's getting hot out there!  
 
We've got a BBQ this afternoon, a nice easy one this time ....... we're having homemade pizzas!  Quick and easy to cook on the BBQ, although quite a bit of prep to do first.  Guess where I'm going next! 
    
Apparently the heatwave is about to break,  which I'm sort of glad about.  I don't mind the heat today but we're off in the van again next week so, if temperatures are about to cool off a little that's fine by me. I've been a little warm in the van this week, whilst I've been getting things ready!

Anyway, before it gets all crazy, again, I thought I'd do a little catch up.  
There's not been that much going on in the craft room, its just been too hot but, I have been in there.  Well, I had to pack a few bits to take with me in the van!

I did make this though ...... for a guys birthday


I saw something similar on Pinterest so the design isn't all mine ....... when it comes to mens cards Pinterest is always my go too!

I used a Funky Fossil stencil for the speech bubbles and Distress Oxide Inks ........ they are so easy to use with stencils 


I used a different coloured oxide for each of the bubbles, and then searched through my birthday stash for sentiments that fit inside each one.


I added a few matching coloured enamel dots here and there to finish off 


It's been a busy couple of weeks with one thing and another .... all good though.
We've had birthday celebrations, which were fun.   We finally put an end to something that's been going on for the last eight years ...... I won't go into details, I'll just say that everything went in our favour at last, so it was worth all the time and effort!
And my big brother and sister-in-law came over to visit for a couple of days which was lovely as we don't see each other very often these days.  They brought their granddaughter, Amelia with them too .... she's such a sweetheart, and growong up fast!


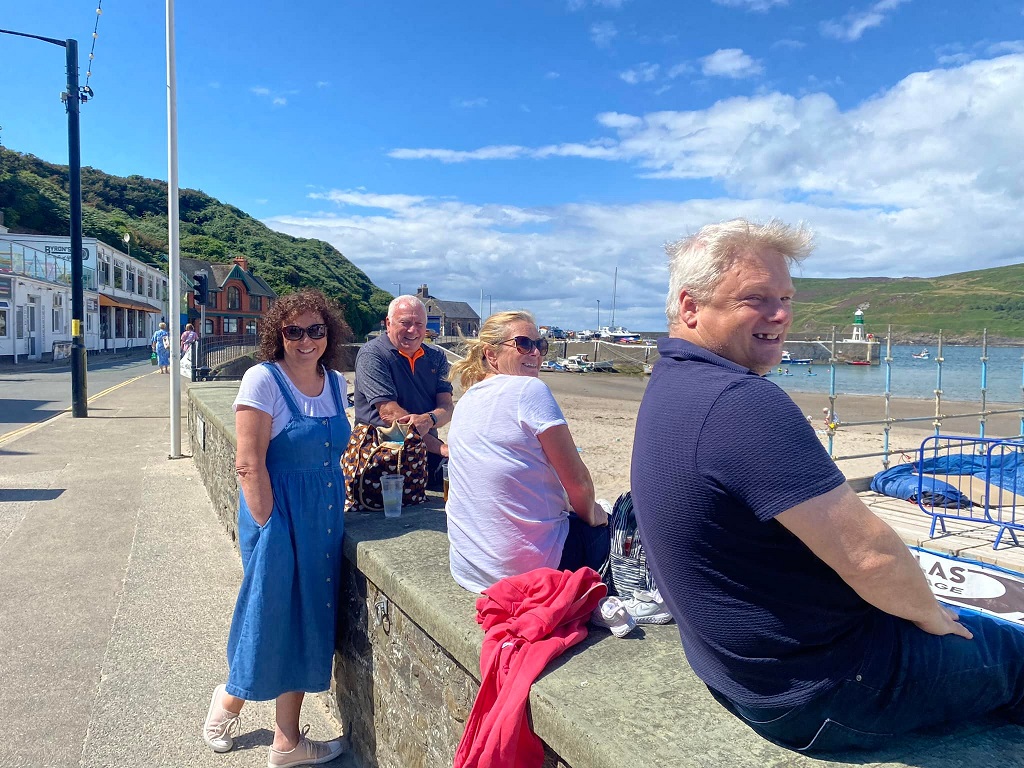
We caught the steam train and spent a day down in Port Erin. 


Amelia loved the train.

It was another glorious day .......


We had fun on the beach, and a bite to eat .....


We spotted one of the dolphins (couldn't really miss it!!) that are hiding all over the island this year for The Big Splash Art Trail


Then it was time to head back to the train .......


Some of us were a little sleepy on the way home ........ awwww!


And to end the day .......... a BBQ, and a rainbow.  Perfect!


It was lovely to see them, they didn't stay long enough!

I've also managed to make a start on some Christmas cards!!! A crafty day with the girls, and I was very productive for once but,  I'll save those for another post.  
Time to enjoy the sunshine I think ...... now where did I put the sun cream! 😎

Thanks for popping by ...... enjoy the rest of your weekend.  

Cheerio until next time ....


Supplies
Stamps: Various sets of birthday sentiments from my stash
Stencils: Say What stencil (Funky Fossil)
Inks: Distress Oxide Inks - Tumbled Glass, Speckled Egg, Spiced Marmalade, Scattered Straw, Abandoned Coral; Versafine Clair - Nocturne (for the sentiments)
Other: Self adhesive enamel dots

Monday, 1 August 2022

Emboss Resist for CAS Mix Up!

Happy Monday! .....

Well, July was a bit of a whirlwind month ......... welcome to August!

A new month, means we have a new CAS Mix Up Challenge.  
It's Mixed Media month, and the lovely Nancy is our host.  The theme she's chosen for August is ......
Emboss Resist ......... one of my favourite techniques.

If you're not familiar with this, or you need some inspiration, then check out the CAS Mix Up Blog.  On there you'll find lots of ideas from the Design team and links to some really great videos on different ways of doing this really fun technique.


Emboss Resist will work with lots of different mediums ....... ink pads, spray inks, pigment powders such as Brushos, paints, watercolour markers, but one of my favourite things to use is Distress Inks.  Because they react so well with water, the embossing resists the ink colour really easily.  
There's so many different ways of using Distress inks too ..... straight from the ink pad, blended with brushes for example or, as I've done for my inspiration piece ....... acetate smooshing!
 
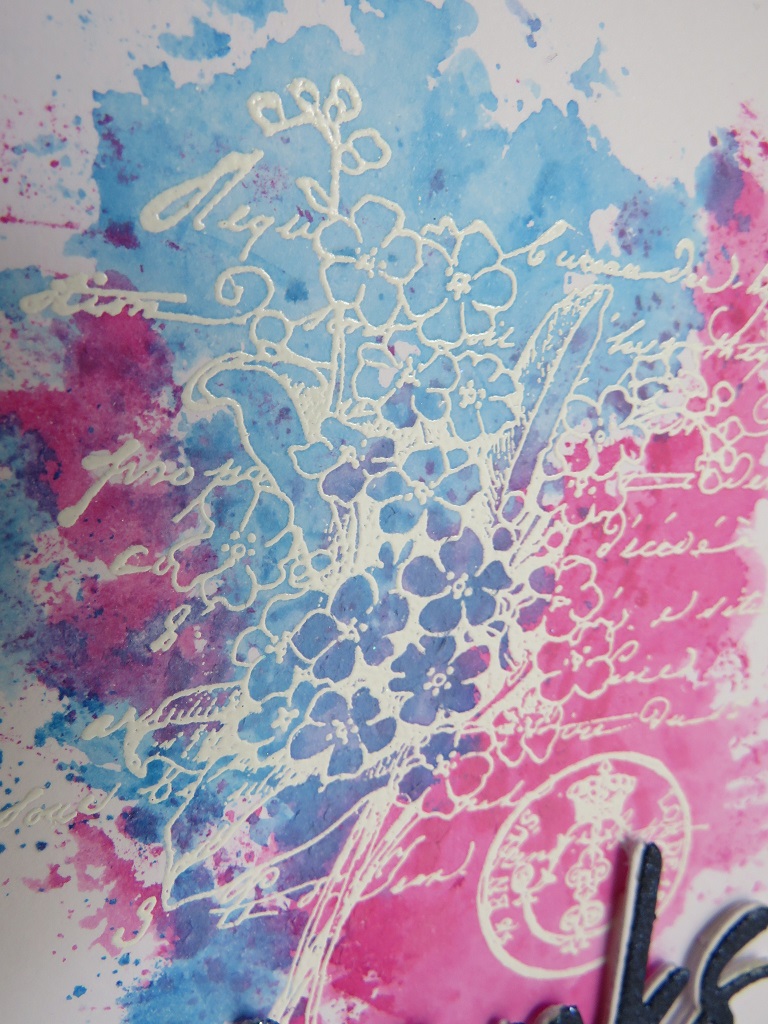
I stamped the pretty floral bouquet onto a piece of white cardstock using Versamark ink, and then heat embossed in white.
 

Hmmm ........ white embossing on white cardstock?  Not an easy thing to see but, with the emboss resist technique all will be revealed in the end! 

I then swiped my Distress ink pads onto a craft sheet ...... Picked Raspberry and Salty Ocean .......
and spritzed the ink with a little water.
I used a piece of acetate to pick up the colour and then laid it onto my cardstock, over the top of the embossed image, pressing lightly with my fingertips to move the ink around a little, making sure that the whole of the embossed image was covered


I repeated this for both colours of ink, building up the depth of colour gradually. 
You can see I wasn't careful about keeping clean edges, I wanted more of the random, splattered look.  
I also overlapped the two colours to give some shading here and there 


Once I was happy with the colour, I moppped up any excess ink with a paper towel and then gently buffed over the embossed image to remove any residue left from the inks.  
Because the embossing resisted the Distress Ink, the original stamped image showed through nice and clear.

To finish off, I die cut the sentiment three times, from white cardstock.  I layered them together, heat embossing the top layer with a navy embossing powder and off setting this slightly to give that white shadow


So, my elements used for this challenge are ..... 1. the theme ...... Emboss Resist  2.  Rubber stamping and 3. Acetate Smooshing, or it could be die cutting,  I suppose.

The challenge is open until the 24th of the month, so lots of time to play along.
Check out the CAS Mix Up Blog for more Emboss Resist inspiration from the Design Team and also, pop by say hello to our fabulous Guest Designer this month ....... Brenda (Inkspired to Stamp) is joining us for this challenge. 

Happy stamping!

Thanks for popping by ..... enjoy the rest of your day and have a great week!

July was a busy month for me but, August looks even busier.
We're off out this evening for a birthday dinner ..... our favourite restaurant is 4 today!
Then I've got my big brother and family coming over for a few days on Wednesday, so we'll be off out again then.   
When he goes home I have a crafty day with the girls planned, we haven't had a get together in such a long time.  There's also lots going on with Alex and his pals (school holidays are so much fun!)  And then, we're off again in the van on the 17th, and we don't get back until 3rd September!!!  So, that's August done ......... like I said, a busy month!  I'd better get a move on!

Cheerio until next time .......


Supplies
Stamps: scented message wood mounted rubber stamp (Penny Black)
Inks: Distress Inks - Picked Raspberry, Salty Ocean; Versamark ink
Other: Bright White,  Pea Coat embossing powders (WOW!); thanks thin metal die from my stash (not sure of the brand)

Sunday, 31 July 2022

Oh no! ..... is it really time to start thinking about Christmas .......

Happy Sunday to you ........ 

I hope you're enjoying the weekend.

Dare I say it ......... are you getting that festive feeling yet?  Thinking about making a start on all those Christmas cards!  Well, there is only 146 days to go ..... just saying! 

For all you Sweet Poppy Stencils fans, I've got a little heads up ...... Lucy is back on our TV screens tomorrow with more gorgeous, new, Sweet Poppy goodies ..... yeah! 
There's brand new Sweet Poppy festive stamps and stencils, along with some back in stocks, and a few old favourites, so if you are thinking about Christmas you wont want to miss the show (details and times are at the bottom of this post) 
 
As always Lucy will be working her magic showing us how to get the best from our Sweet Poppy stash, and there'll be lots of gorgeous inspiration from the rest of the Design Team.

I haven't had much time to play with the new Christmas release ....... holidays and family stuff getting in the way, you know how it is.  And it was a bit weird making Christmas cards when the temperatures were soaring outside, and even more so in my craftroom!  But, I did manage to get a few done .....


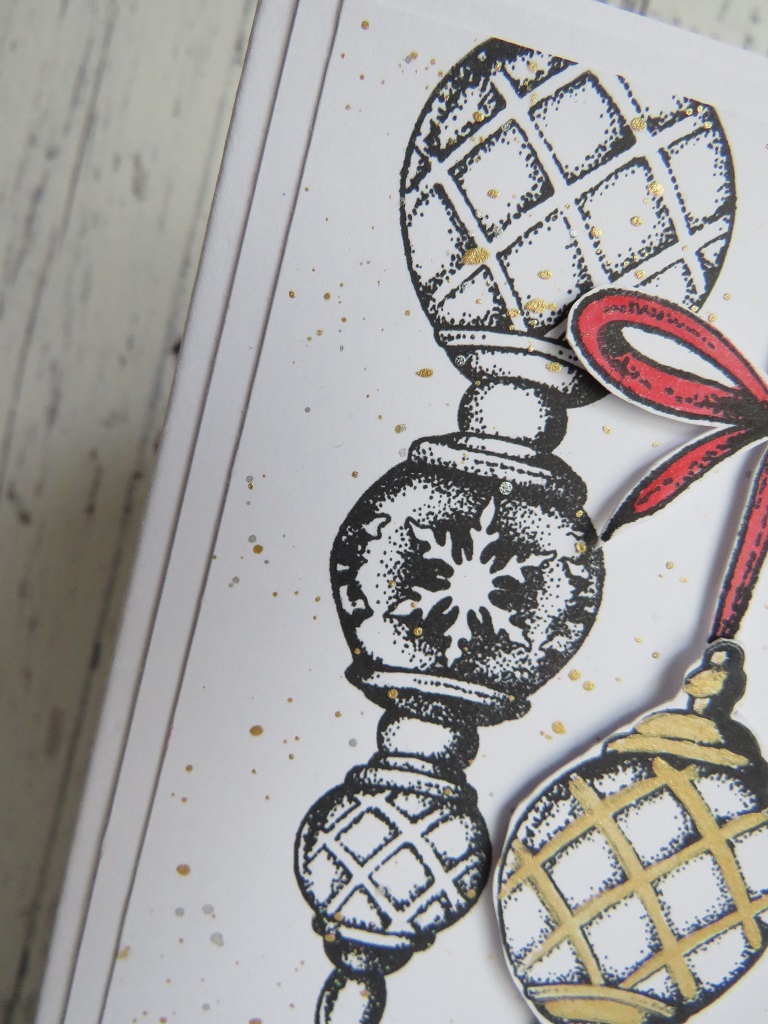
I love this new Victorian Bauble stamp set! ........ you know me and my tree decorations.  You can never have too many pretty baubles!

Using a black ink, I stamped the baubles (you get two different sizes in the set), two of them directly onto a piece of white card cut to fit my card base, and then a third one onto a seperate piece, which I added a touch of gold and silver paint to, and fussy cut.


I also stamped one of the ribbons that comes in the stamp set, coloured that in red and fussy cut, and then attatched both to the front of my card using foam pads to add dimension


A few splatters of gold and silver paint onto the background, 


and a sentiment stamped on the bottom


Really quick and easy to do, great for batch making, which we all do with Christmas cards.  
And, if you're worried about postage, instead of fussy cutting and using foam pads, you could stamp the centre bauble first, create a mask and simply stamp the two in the background over the top to create the same look.

Keep things even more simple by just using one of the stamps ........ classic gold and silver on black cardstock ...... always a winner!


Stamped and heat embossed in gold and then coloured using pearlescent paints ...... I kept it to just silver but, think of all the colours you could use ..... so stylish!


A few matching splatters, and a heat embossed sentiment, and you're done!  A batch of these would be really simple to do.


For this last one, I used the emboss resist technique ....... 


I stamped and heat embossed the baubles in gold, and then used Distress Inks over the top to add the colour ...... Evergreen Bough and Festive Berries (love this combination)


I started blending the colours from the top of the card, and worked down the baubles fading out the colour gradually, as I got closer to the bottom.

I also used a wet paintbrush to 'bleach' out the colour a little, from inside the baubles and the ribbons, before using a Distress Reinker (Festive Berries) to paint the ribbon .......


and I added some fine crystal glitter to the baubles


To finish off I added some of my all time favourite product to use on Christmas cards ........ Chunky White Embossing Enamel ........ I love this stuff!


I simply sprinkle a little where I want the snowy effect, no embossing ink required,  then I gently heat from underneath until the embossing powder begins to melt ...... so effective.


Three very different looks from the same stamp set .....


This is just one of the stamp sets that Lucy will be showcasing tomorrow.  So don't worry, if you're really not in the festive mood just yet, it won't all be about Christmas.
Check out the show times below and tune in.


Thanks for popping by ..... enjoy the rest of your day.

We're taking advantage of the nice weather and having a BBQ later.  Nothing fancy, just getting the family together. 
It was our wedding anniversary yesterday, 34 years since hubby and I tied the knot ...... time flies when you're having fun!
We celebrated with a lovely lunch out yesterday, so it'll be nice having everyone together later.  And, I won't have to do the cooking, which is even better!

Cheerio until next time ........


Supplies
Stamps: Victorian Bauble stamp set (Sweet Poppy Stencils)
Inks: Versamark ink; Versafine Clair - Nocturne; Delicata - Golden Glitz & Slivery Shimmer inks; Distress Inks - Evergreen Bough, Festive Berries
Other: Gold and Silver Embossing Powders (WOW!); Gold paint (PaperArtsy); Quickie Glue Pen; Fine Crystal Glitter; Pearlescent Paints: Chunky White Embossing Enamel (Stampendous)

Wednesday, 20 July 2022

Bright and beautiful ..........

Happy Wednesday .........

Boy has it been hot!!!!!  What an absolutely glorious few days we've been having.   I love the sunshine but, thank goodness there's a breeze this morning and it's a little bit cooler (for now that is) ......... I'm melting!!    

Anyhow, enough about the weather.  Have you played along with this month's Simply Sweet Poppy Stencils Facebook Challenge yet?  There's still time to join in, the challenge is open until the 29th of July.
Just follow the simple rules (you'll find them at the end of this post) and you never know, you could be the next winner of the fabulous £40 voucher to spend on the Sweet Poppy website.

July's theme is ...... Bright & Beautiful.  
Now that can be anything you like, as long as the main focus of your card is a Sweet Poppy stencil.  If you use stamps, and they are other brands then remember to keep them small, just a single word or a simple sentiment is allowed.

It had to be florals for me .......... beautiful, bright coloured blooms! 
Sweet Poppy have lots of  gorgeous flower stencils, it was difficult to know which ones to use.   
In the end I kept things nice and simple, letting the stencil do all the hard work,  and of course the gorgeous bright colours of Distress Inks were perfect for the job


This is the Black Orchid stencil ....... I love this design.

I masked off the leaves using stencil tape, and then blended Picked Raspberry and Abandoned Coral Distress Inks over those gorgeous flower heads


When I was happy with the colour, I then masked off the flowers and used Twisted Citron to colour the leaves ..... so pretty!   As you can see, I wasn't too precise with the masking, there's a little bit of overlap with the colours but that's fine, I quite like the shading


The sentiment was simply stamped over the top using a black Versafine Clair ink.


For my second card, I used one of my all time Sweet Poppy favourites ...... Wild Flowers


I kept to bright, summery colours ....... Distress Inks again in Picked Raspberry, Carved Pumpkin, Squeezed Lemonade and Twisted Citron again ..... so pretty all together.

The stencil has two different sized flowers on it, but for this card, I only used the large one of the two, varying the placement of the stencil to give different heights to each bloom


A simpe sentiment strip attached with foam pads across the bottom .......


and a couple of gems here and there to add a sparkly finishing touch.  
I love these summery colours ...... they're definitely bright and beautiful!

Here are the challenge rules ...... nothing complicated so go on, give it a go.  You have to be in it to win it!


Thanks for stopping by ..... enjoy the rest of your day.
It's back into the craft room for me,  it's not quite as hot in there today.   And guess what ...... it's time to get a little festive I think (oh joy!) ....... Christmas cards it is then!  Ho Ho! Ho!

Cheerio until next time ..........


Supplies:
Card 1
Stencils: Black Orchid (Sweet Poppy Stencils)
Stamps: All Occasion Sentiments #6 (Uniko)
Inks: Distress Inks - Picked Raspberry, Abandoned Coral, Twisted Citron; Versafine Clair - Nocturne

Card 2
Stencils: Wild Flowers (Sweet Poppy Stencils)
Stamps: Positive Vibes #10 (The Artistic Stamper)
Inks: Distress Inks - Picked Raspberry, Squeezed Lemonade, Twisted Citron, Carved Pumpkin; Versafine Clair - Nocturne
Other: Small coloured gemstones from my stash