Showing posts with label Sweet Poppy Stencils and Dies. Show all posts

Saturday, 12 September 2020

Getting a little festive with Sweet Poppy Stencils ......

Good morning ...... it's the weekend!

It's not looking too bad this morning ....... the sun is back, a bit breezy though! 
Have you got anything nice planned?  We're hoping for a quiet one I think.

I'm here with a few more samples using the Sweet Poppy Stencils from the shows coming up next week on Hochanda.
Lucy's back on TV with a whole load of Sweet Poppy goodies.  Pastes, glitters and of course amazing stencils ...... some back in stocks, some favourite designs and some BRAND NEW ones.  Designs suitable for all occasions including Christmas, which is fast approaching.  I think I read somewhere yesterday that there's only 14 more Fridays until the big day ..... now that's scary!

If you were here yesterday you'll have already met the gorgeous Isla ....... the brand new Highland Cooo stencil, designed by the Sweet Poppy in-house designer Emma Cronin (she's so clever!)
It's a fab stencil, great size and perfect for so many occasions ...... even those cards for men!!
I shared some everyday ideas with you yesterday but, how about dressing her up for the festive season 


Just look at that face ...........


Add in a few pretty snowflakes and a touch of glitter ...... 


And finish with a festive sentiment ......


I also added a few ink splatters onto the background.  
And if snowflakes are not your thing, then add baubles instead, she would look amazing ..... and so festive!

Her she is again getting in a tangle with the Christmas lights ...... we've all been there!


Distress inks work so well with this stencil ..... I love the new Crackling Campfire


The sentiment is from one of the Sweet Poppy stamp sets ......


And the cute sprig of holly is a Sweet Poppy Die ......


Once the inks were dry, I drew in the Christmas lights using a gold gel pen, and coloured the bulbs with sparkle pens ....... I just love her!


Here's a quick look at a few more festive ideas using stencils from the shows .....


The beautiful Large Bauble is back in stock along with the matching dies.  Use the stencil and dies together as I have above or, use the dies on their own to create smaller baubles 


The pretty Holly Back Plate is also on the show, great for decorating smaller pieces (I used it to decorate the baubles above) but also perfect for quick and easy cards


And of course a Christmas wouldn't be the same without a gorgeous Poinsettia 


Again with matching dies ....... perfect for all your cardmaking, but why not use it to create your own gift wrap and tags .....


I hope I've given you a few ideas.  Tune in to the shows on Tuesday to see a whole load more from the rest of the Design Team, and of course amazing demos Lucy along with lots of tips and techniques.


Thanks for popping by ..... enjoy the weekend.

Cheerio until next time .......


Products used:
Stencils: Isla,  Large Bauble, Holly Back Plate; Poinsettia
Inks: Various colours of Distress Inks, Delicata Golden Glitz & Silvery Shimmer, Versafine Clair -Nocturne
Stamps: Noel, Joy & Peace A6 stamp sets (Sweet Poppy)
Dies:  Holly Trio Die, Nesting Bauble Dies, Poinsettia Outline Die
Other: Gold Gel Pen, Sparkle Gel Pens (Sakura), Quickie Glue Pen; Crystalina Glitter (Sweet Poppy); Glitter card; Clear gemstones, Stardust Gel Pen, Chunky White Embossing Enamel, Glitter Glue

Saturday, 16 February 2019

Happy Weekend! .....

Happy weekend .....

I hope you're having a good one.
I've been a bit quiet on here the last few days ...... I've been getting my breath back after all the fun of the Uniko Birthday celebrations.  Everything is good though ..... busy, busy, busy as usual. 
I got a sudden urge to Spring clean everything at the beginning of the week (what's that all about!!)
The house is absolutely sparkling!  Windows done, floors done, woodwork polished.  A lovely new bed in the spare room ready for our visitors in April,  and the hot tub is all dusted off and ready to be refilled!  Even the craft room is tidy!!
I also bought myself a new breadmaker, just a small one.  The kitchen has been filled with the smell of freshly baked bread nearly every day, which is lovely ....... the results aren't bad either!

I have been in the craft room too this week ....... doing a little bit of this and that. 
I'm going to start my workshops again I think.  Thanks to the lovely Eileen Godwin I'm feeling all inspired.  She did a fab Facebook video, decorating a calendar page and I so want to do one of my own. 
So, I ran it by my crafty ladies, and Eileen of course, and they all want to create their own calendars so a workshop it is ...... watch this space!

I was also busy with some Sweet Poppy Stencil stuff.  Lucy asked me to re-create one of my previous samples for her .......


Slightly different from the original one, but still pretty.
It's the Change in the Season's stencil on Kraft card, lots of white ink and a touch of sparkle.

Whilst I was waiting for the stencil paste to dry on this one,  I also had a little play with some of the new designs that were still out on my desk.  These will be on Hochanda at the beginning of March.

The Steam Train ...... great for masculinen designs


This is a fab stencil .... a nice large design but, you don't always have to make big cards with the larger stencils.  If you're happier creating something smaller, just use part of the design .....


This is actually the result of a 'happy accident' ...... I never throw anything away if I can help it.
I'd used the stencil previously with the black paste and black glitter on the top, on a piece of cardstock coloured with Brushos but ...... I didn't let the paste dry properly!
As you can imagine the smudge wasn't easy to hide (ooops!) ....... so I just cut it off!


There was still enough of that fab train left though, to die cut using one of my circle dies


You can see there's a couple of bits that overlap the actual circle ......


To do this I first placed the die where I wanted it to be and drew a fine line along the edges of the metal die, either side of the bit that was going to overlap. 
I then fussy cut around the sections of the train on the outside of the lines.  I put the cutting die back in place with the fussy cut sections on the top, and then ran the die through the Big Shot as usual.  The result was a die cut circle with the overlapping bits still attached ..... hope that makes sense!!

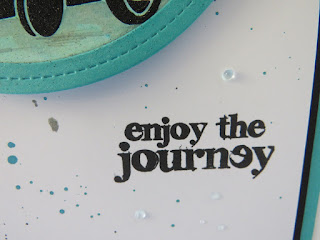
A simple sentiment and a co-ordinating frame .......


And a few splatters of matching ink to finish off


The card above is my 'go to' card size, which is 7x5 inches. 
Here's the same stencil, in full this time, on a large square card


Black paste again, this time with sections highlighted using a Liquid Chrome marker


Has this been fussy cut ...... no.  It's a sneaky peek at a matching die that will be available for the Steam Train stencil .... how cool is that!
It doesn't cut the steam cloud ...... so I've used my sentiment in it's place.


Another of the new designs is the pretty Floral Mandala ....


Used here with Distress Oxide inks .....


a little touch of Stardust Gel Pen to add a bit of shimmer around the edge


And then a hidden sentiment in the middle, die cut using one of the new Sweet Poppy word dies that are coming soon


It also looks great when used with the stencil pastes too .....


I think the date for the Sweet Poppy shows on HOCHANDA is March 6th (the day after my birthday!) at 12pm and 4pm.
New products as well as some favourites, and lots of tips and techniques from the lovely Lucy.

Thanks for popping by ..... enjoy the rest of your weekend.

Cheerio until next time .....

Thursday, 1 February 2018

Sweet Poppy Stencils ...... and dies!

Happy Thursday .....

Pinch and a punch for the first of the month ...... welcome to February!  January didn't hang around did it!!

If you're on Facebook, you may have already seen that there's something exciting going on over at Sweet Poppy Stencils
Not only are there some fabulous new stencil designs available now on the website ...... you'll also find the brand new range of Sweet Poppy 'Buddy' dies ..... whoo hoo!!
Not all of the stencils will have a matching die but, sometimes a particular design needs a 'buddy' .... a little help to cut out the design and give it a 3D look. 
There's six available in the first release and I've been lucky enough to have a play with them. See what you think ...... you might want to grab a cuppa, there's a lot of pictures!

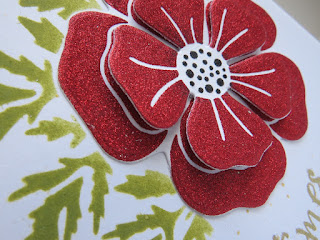
First up, the Large Poppy Head ..... a two piece set which cuts both sizes of petals.


First I used the matching stencil to do the leaves with Distress Oxide ink on a piece of white card


On a separate piece of card I used the stencil again this time with the glossy white stencil paste through the flower part of the design, and sprinkled red glitter on the top whilst it was still wet.
I did this twice so that I could cut the different two layers and make the poppy dimensional


Another beautiful flower design ...... the Poinsettia.  A three piece set this time to create really full dimensional blooms


Again I used the paste through the matching stencil, sprinkled the three layers with crystal glitter and let it dry


Look how beautifully the dies cut, even when you've used the paste and glitter on top too.

The idea is you used the stencil as you normally would to create the design whether that be with inks or pastes etc., then you place the dies on top and cut out your design.  They're really easy to place once you get used to them.  If you've used the paste you can feel where it is when you place the die over the top you just need to take you time.

As you can see I've also used the largest die simply on it's own to cut an extra layer to create my leaves

The pretty Mehndi Flower also has a buddy ...... another three piece set great for layering


I've used the Translucent stencil paste mixed with mica powder to create the soft coloured layers, and I've added in an extra layer to the back, done with white paste and the crystal glitter


I had real fun with this one ...... I created the whole flower three times .... one pink, one green and one glitter, then cut the various layers in each and mix them up on the front of the card using foam pads for the bottom layer the inlaying the rest


If you like the look of the coloured pastes but fancy mixing your own ... well, you don't have to, Sweet Poppy now have 50ml pots of coloured stencil pastes in a whole range of colours. Available as single pots or you can get the set.

OK .... next up Boozy Bubbles (one of my favourites!)  A great tow piece die which I just kknow is going to come in for so many occasions.
The bottle .......


Paste, glitter, die cut and attached on to a simple background using a piece of folded acetate to create a sort of spring so that the bottle actually moves


Just think .... special birthdays, engagements, weddings, anniversaries, congratulations ..... just about anything really.

And of course the glasses ..... perfect for wedding cards


Use the dies to cut apertures .......


Then place the glasses on the inside ....


The pretty Rocking Horse ..... love this too


Pretty in pink ....... and beautiful in blue ....

And last but not least ..... the Biplane and Banner


A canvas this time ..... painted using the Sweet Poppy Shimmer & Sheen Lustre Paint


Clouds added with white paint sponged along the edge of a template cut from copier paper .....


The Biplane is simply Black paste through the matching stencil and I've highlighted here and there with a Liquid Chrome pen


Again I've used acetate to make a spring so that the plane is raised and moves around


Flying the banner behind ......


Simple die cut letters to create the words ......


Phew! 

I believe some of the dies will be on TV at the beginning of March on Lucy's next HOCHANDA show but, if you can't wait until then, Sweet Poppy will be at the Creative Craft Show at Event City Manchester this weekend, or you can find them all on the Sweet Poppy website along with all the brand new stencil designs ..... there's a gorgeous flamingo, can't wait to play with that one once my new craft room is up and running!

Thanks for popping by .... enjoy the rest of your day.
I'd better get back to the packing we move in 5 days .... eeeek!!!  There's already quite a bit of stuff at the new place.  We've been moving all the small things ourselves ...... kitchen stuff, clothes, pictures etc.  Some of hubby's office is there and most of my craft room, it's just in boxes!  I'll be starting unpacking that at the weekend.

Cheerio until next time ....