Showing posts with label Stencils. Show all posts

Monday, 17 August 2026

More Stenciling for CAS Mix Up ........

Happy Monday ........

I hope you had a lovely weekend.  We had family and friends round for a BBQ which was nice, and hubby did all the cooking, well most of it, which was even better!

I've got a little reminder for this month's CAS Mix Up Challenge for you today.  There's still 2 weeks left to get your entries in if you want to play along.

It's a Stencil challenge this month, and the added prompt is ........ Stenciling over Patterned Paper 


Patterned paper is not something that I use a lot of really, but this challenge has been fun.
I've rummaged through my bits boxes and found a few paper pieces and here are the results.

First up ...... a touch of pink


The paper is from the Mixed Media Compendium Paper Pad from Funky Fossil.  I love all the different shades of pink, and the grungy look with the little touches of blue on there.


I've used an old Sweet Poppy stencil over the top. I think it was called Cornflowers, but I couldn't find it on the website so I assume its been retired ..... sorry!

I used black Versafine Clair ink and applied it through the stencil using a sponge, building up the depth of colour gradually.

I added my sentiment using a die cut, coloured blue to bring out the blue already in the paper, and then heat embossed the word friend underneath.


To finish off the card I added a doodled frame around the edge using a black fine liner pen.

Next up, another piece of patterend paper from the same paper pad, just a different colour.  This has more of an Autumnal feel I think


Another Sweet Poppy Stencil used over the top (one of my all time favourites this one) ..... Wildflowers
(this must be retired too as it's not on the website)

I used Distress Oxide Inks this time, a mix of Unchartered Mariner and Villianous Potion.  I used a sponge to apply the inks again, and built up the depth of colour gradually.  
Applying the ink gradually means that you get a cleaner image, not as much risk of the ink bleeding under the stencil.  Takes a bit more time but, I think its worth it.


The sentiment was simply stamped in black and then die cut.


One type of paper I do like to use is book pages, I love text.  And, it makes a great background for stenciling over.
If you do use book pages, just be careful.  Give it a quick glance over first, to make sure there's nothing 'naughty' on there!
In fact, JOFY gave a great tip during one of her recent workshops ........ she likes to use foreign language books, they're not as easy to read, which I thought was a great idea.  Guess what I'm looking for next!!
Not sure where this page came from, but I think it's ok .......


This is a real CAS card.  A circle cut from an old book page, pretty flowers stenciled over the top, then I attached it onto a larger die cut circle (black card), and added a white die cut frame over the top.


A simple sentiment stamped underneath to finish it off.  I used my MISTI for the sentiment and shaped it to follow the edge of the circle.

If you are playing along with this months challenge, please remember to follow the simple guidelines, and keep your cards CAS (Clean and Simple).


Thanks for popping by, enjoy the rest of your week.
It's going to be a quiet one here, well as quiet as it can be.  The Manx Grand Prix started yesterday so it's motorbikes again.  The weather's not playing nice though.  We had rain yesterday (Sunday), so the racing had to be called off ....... not good!

Cheerio until next time .......



Products used

Card 1
Inks ...... Versafine Clair - Nocturne; Versamark Embossing ink, Tumbled Glass DOX (for the die cut)
Stencils ....... Cornflowers - Sweet Poppy (retired I think)
Others ...... Patterned paper; WOW Gold Superfine Embossing Powder, Small 'hello' cutting die, Black Fine Liner pen

Card 2
Inks ...... DOX Unchartered Mariner; Villianous Potion, Versafine Clair - Nocturne
Stencils ....... Sweet Poppy - Wildflowers
Stamps ....... Opposites Attract stamps and matching dies;
Others ...... Patterned paper; 

Card 3
Inks ....... DOX  - Picked Raspberry, Spiced Marmalade, Rustic Wilderness; Versafine Clair - Nocturne
Stencil .......  Imagination Crafts - Butterflyy & Daisy
Other ..... Old Book page; Circle Dies; Stitched Circle Frame Die; Sentiment from my stash

Friday, 12 June 2026

Creating Balance .......

Happy Friday .........

I hope you've had a good week.  It's been a bit quiet here.  
The island is slowly getting back to normal after the TT.  It isn't quite so busy everywhere, not as many motorbikes!  Not that we've been out anywhere.  The weather's not been great (there's a shock!) ....... someone needs to remind the sun that it is June!

We have been busy making plans though.  We're off up to Scotland in just under two weeks, in the motorhome, so we've been making a start on getting things ready ....... lots of lists!
It's nearly two years since we were in the Highlands, so we're really looking forward to the trip.  It's going to be a few favourite places along with a few new ones, it should be fun!

I've also spent some time in the craft room this week which has been really nice.  There's been a bit of everything ....... planning, prepping, tidying up!  I've even made a few cards (more about those later).   I've watched a few YouTube videos, catching up with what's new.  Made a list of craft stash that I really need (haha!), and I've also found time to play in one of my journals (Large Dylusions journal)


Ever since I bought the 8x8 Pebble Stacks stencil from Funky Fossil I've been wanting to use it in a journal, and I thought this clean up page would be the perfect place.

I have quite a few of these sort of pages .... places where I clean off my brushes, or use left over paint and ink.  I also use these spaces to try out new stamps or stencils,  so there's lots of pages with just random colours here and there, and images that don't necessarily go together but, I think this kind of works.

I used Distress Oxide Inks with the stencil to create my pebbles ......  I love the coverage these inks give, and I like how the paint from underneath still shows through some of the colours giving the pebbles the look of some texture.
I also added a bit of shading using Prismacolor Pencils


The words, I came across on Pinterest ........ 


I used the same Distress Oxide Inks to colour some offcuts of white cardstock.  I then die cut the letters using Spellbinders Be Bold Upper and Lower Case Alphabet dies, layering each letter with one cut from plain white cardstock, to add a little a touch of dimension to the page.

A bit of black pen work on, and around the pebbles,  some black and white ink splatter here and there, and I finsihed it all off with a little stamped bird, perched high on the pile of pebbles ..... so cute!


The right balance is always good, sometimes hard to find though. I do think that we manage it most of the time!

Thanks for popping by ........ have a great weekend.
We're hoping for a BBQ on Sunday, so fingers crossed the weather improves.

And, if you're a football fan ......... enjoy the World Cup.  We'll be watching the games here.
C'mon on England!!

Cheerio until next time ........


Products used .......
Stamps ........ Space Reserved Clear Stamps (the bird ) - (Penny Black), 
Inks ......... Distress Oxide Inks - Pumice Stone, Weathered Wood, Speckled Egg, Tattered Rose, Old Paper, Versafine Clair - Nocturne (my go to black ink)
Dies ........  Be Bold Upper and Lower Case Alphabet Dies (Spellbinders)
Other ....... Large Dylusions Journal, White cardstock, 8x8 Pebble Stacks stencil (Funky Fossil). Black Finer Liner Pen

Saturday, 3 June 2023

Welcome to June .......

Happy weekend ........

Welcome to June!   Can you believe we're almost half way through 2023 ....... it's crazy!

I hope you've had a good week.  It's been absolutely glorious here.  We've had beautiful blue skies, and warm sunny days all week, it's been great!! 


Perfect weather for all the islands TT visitors.  
We were up at the Grandstand earlier in the week, to soak up a little bit of the atmosphere ......


grab a cheeky beer, or two, in the Trackside bar .......


and of course, pick up this years stash from the Merchandise tent!


Just need to catch some actual racing now!

Because the sun's been shining I haven't spent any time in the craft room this week ..... naughty of me I know, especially as I should be in there ........... deadlines are approaching!!  Dare I say it ..... Christmas is coming!!!!!  More on all that later.

I have got a little something to share with you though, a journal spread I did before we went away.


This was an online workshop with the lovely JOFY (Jo Firth-Young), started way back in the days of lockdown, and I've only just got around to finishing it (I've actually got a few of those!!)

That's the good thing about the online workshops, once you've signed up to them, the content is always there.  So, if you don't get chance to do them live, you can go back and finish them whenever you like.

I really enjoyed playing around with this, spending a few hours using paints and stencils, and pretty patterned papers, which is something I don't use very often these days (maybe that will all change now!)


creating my little garden of flowers.

 
The flower heads are all hand drawn onto the papers, and then fussy cut and layered together, in true JOFY style, to create these bold, funky styled, blooms ...... love them!


To make them stand out, each one was finished with some penwork, outlining each of the petals and adding little doodled details here and there.


I finished off my pages with some paint splatters and a couple of stamped words and I also added a little ladybug, stamped onto a snippet of card and layered onto one of the leaves ..... so cute!


You can see in the background that some of the stencil work has also been highlighted using a white gel pen ....... small detail but so effective.  Helps to create the look of more layers which is what this workshop was about.

This really was so much fun to do, and what a great way of using up all those pretty patterned papers!

Thanks for popping by ..... enjoy your weekend.
I can just about hear the roar of the bikes ........ time to start the racing!

Cheerio until next time ......

Wednesday, 1 June 2022

We're back!! ..........

Happy Wednesday ......

Can you believe were in June already!!!!  How's your week going so far? 

It's all go here on the island.  What with the TT that's well underway,  and the Queen's Platinum Jubilee weekend coming up, there's loads going on.

This month also sees the return of the CAS Mix Up Challenge! ......... whooo hoo!!!  Have you missed us?
It's so nice to be back after our little break, and we've got a fun challenge for you this month.   
We're kicking things off again with a Stencil challenge.  
There's lots of ways to use stencils but for this particular challenge we'd like to see you use them with Pastes or Gels


There's lots of different pastes and gels out there ..... from simple white embossing pastes, or clear gels that dry glossy or matte, through to glitter pastes, crackle pastes, or gels with different textures in them.  And of course you can always create your own.  Check out the video links on the challenge post for some great tips and techniques.

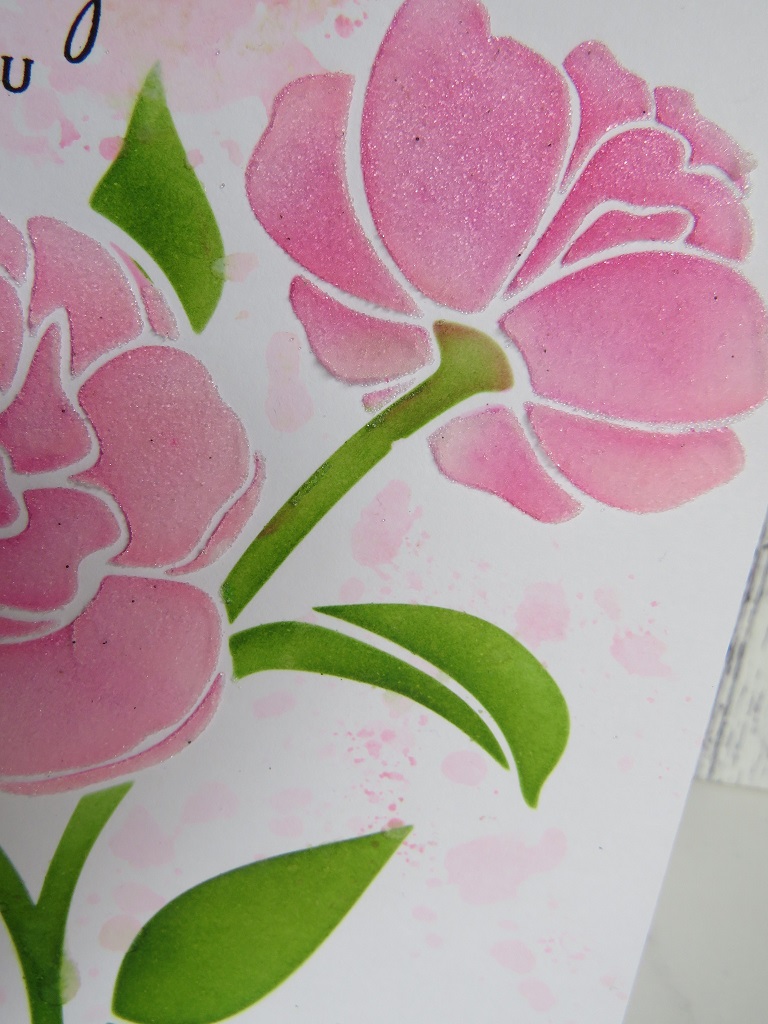
Need some inspiration?  How about a pretty floral card using the new gorgeous Peony stencil from Sweet Poppy


I used Distress Inks first to apply the colour through my stencil


I removed the stencil and cleaned off any excess ink before placing the stencil back over the top of the colour.
I then applied Translucent Stencil Medium to the flower heads, over the top of the ink.  I carefully removed the stencil and whilst the paste was still wet I sprinkled some clear Ultra-fine Glass Microbeads over the top and left it to dry


The ultra-fine beads are tiny, and they give a lovely fine texture whilst letting the colour show through


To add a bit more interest to the background I used a piece of acetate to smoosh a little more of the Distress Ink colours on there


and then finished off with a simple sentiment.


Check out the fabulous makes from the rest of the Design Team and, to celebrate the return of the CAS Mix Up Challenge we have not one, but two amazing Guest Designers this month.  Julie (Crafted by Jules) and Darnell (Djkardkreations) are both joining in the fun, so be sure to pop by and say Hello!

I can't wait to see you all in the gallery ....... it's great to be back!!

Thanks for popping by ..... enjoy the rest of your day.

As I said it's so busy here at the moment, TT fans are arriving by the ferry load everyday and the roar of motorbikes around the island sounds amazing!
Practice week is in full swing and, we got our TT celebrations off to a good start on Sunday evening when we went to see Jessie J .........


We had a great night ...... she was amazing!!!

So, this week we have the long Bank Holiday weekend to look forward too. We've got some friends comming for a BBQ tomorrow, then it's Mad Sunday.   Hopefully we'll get up to the Grandstand at some point over the weekend, and then it's race week next week,  with the Red Arrows coming over on Tuesday, and we have another bank holiday here next Friday, for Senior Race Day ...... its all go!! 

Cheerio until next time ........


Supplies:
Stencil: Peony (Sweet Poppy Stencils)
Inks: Distress Inks - Kitsch Flamingo, Mowed Lawn; Versafine Clair - Nocturne (for the sentiment)
Stamps: better with age (Penny Black)
Others: Translucent Stencil Medium; Ultra-fine Glass Micro beads - clear (Sweet Poppy Stencils)

Friday, 8 April 2022

A quick and easy birthday card .........

Happy Friday ....... I think it's still Friday, but not for much longer

Can you believe it's the weekend already. 
The schools have finished today for the Easter break, so the little man will be around for the next couple of weeks.  He's only got one more term to do at junior school and then it's secondary school in September ...... now where has that time gone!!!!

It's still slow going in the craft room but, as I'm sat here chatting to you I've just noticed that my lap top is covered in paint/ink splatters ...... ooops!  So I have actually done something in there this week ..... not a lot though!  

I have got a birthday card to share with you though, one of those 'suitable for a guy' creations that we all love to make ........


Hubby and I got invited to a birthday BBQ last weekend so it had to be something quick.  
I must confess I did go on to Pinterest for a little bit of 'masculine' inspiration, and Tim Holtz seemed to be a popular choice so, out came my Stampers Anonymous box and the Wine Blueprint set ..... perfect for the job. 

Totally inspired by the cards on Pinterest ....... what did we do before Pinterest!!! I CASE'd this design that really caught my eye (I'm so sorry but, I didn't make a note of the original designer, and now I can't find it again! ....... Thank you!)

I smooshed Antique Linen Distress ink onto a piece of white cardstock, followed by a bit of layered stenciling with the same colour of ink, applied with a stencil brush.  


I added a bit of stamping on there using Aged Mahogany Distress ink and finished the background with a little touch of the same ink brushed around the edges, and a few ink splatters here and there.
(I'd forgotten how much fun creating layered distress backgrounds was)


I stamped the wine glass directly onto the background and added my sentiment above ....... I do love this stamp!

I then stamped the wine glass again, this time onto a piece of white card.  I added a touch of colour using my Karin Brush Markers,  then I fussy cut the glass and attached it over the stamped image.  
Because I'd stamped the image onto the background first, all of the finer details around the glass were already there ..... perfect!


The BBQ was fun and I think John liked his card ..... I hope so anyway!  

Thanks for popping by ...... I know it's late and its way passed by bedtime so I'll say goodnight to you. 
Have a lovely weekend.  

Cheerio until next time ........


Supplies
Stamps: Wine Blueprint (Tim Holtz); Uncorked (MFT) - for the sentiment; the wine rings are from a stamp set from Stamps by Me 
Inks: Distress Inks - Antique Linen, Aged Mahogany; Versafine Clair - Nocturne
Other: Stencils - Numbers, Distressed Harlequin (Tim Holtz); Karin Brush Markers

Tuesday, 5 April 2022

A little bit of playtime in my journal ........

Happy Tuesday ......

Well March is done and dusted .......... Hello April!  
We've got Easter to look forward to this month, a nice long weekend.  And, we're off on another adventure in the motorhome in a couple of weeks so I need to get things ready for that.  Fingers crossed the weather gets better before then ...... it's been quite the mixed bag here the last few days.  
One minute we're sat in the garden enjoying a lovely BBQ in nice warm sunshine then, a few days later ........ it's brrrrrr! back to freezing temperatures and SNOW would you believe!
I knew I shouldn't have changed my wardrobe over quite so soon ..... I needed my woolies again at the weekend.    Oh well, summer is hopefully on the way, it just may take a while to get here.  Now where did I put my boots!

It seems like it's taking me a while to get back to normal in the craft room too.  
I had to take a break last week from all the DT stuff ......... you know how it is, when nothing seems to go right.   The harder you try, the faster the rubbish bin fills up ........ it was not a happy place to be at all.  So, I decided to try playing in my journal, catch up with a workshop or two, and see if I could finish off a few half done pages to see if that helped.

A fabulous Tracy Scott online workshop seemed to do the trick .......... 5 very relaxing days, using nothing but a stencil, and coloured pencils ........ what do you think?


Meet Joseph ........ the Cat of Many Colours, and he was so much fun to create.

All hand drawn in one of my Dylusions journals using one of Tracy's shapes stencils, and then coloured with Prismacolor pencils


A few highlights with a white gel pen adds the finishing touch ......


I love him!

I've had my Prismacolor pencils for years and never really used them that much.  I found them quite hard to work with, and sharpening them was a nightmare ..... they're quite soft so you have to be careful.  But, after doing a couple of workshops with Tracy, and purchasing a new pencil sharpener, I am getting better with them, although I have a long way to go! 

I love how they blend, you have to have a bit of patience as it does take time but, the more you do it the quicker you get.  And the colours are so bright and vibrant, even on coloured cardstock.  Joseph above was done on Kraft card and he took 4 of the 5 online workshop sessions to complete so, on the 5th day we got to do a bonus project, which I drew onto grey card this time ........ still using the same stencil to create the shapes


I've still not got around to colouring it in yet ..... maybe I'll take it with me when we go away in the van!

If you haven't tried any of Tracy's online workshops give one a go, they are so much fun and so easy to follow.  Check out her Facebook page ........ Tracy Scott Creative Cafe for all the details.

Thanks for popping by ..... enjoy the rest of your day.

Cheerio until next time .......
 

Thursday, 25 February 2021

One of Eileen's online workshops ........

Happy Thursday .......

How are you today?  
It's lovely here on the island, the weather has finally noticed that Spring is on its way I think ..... I hope so anyway.  It's nice to see some sunshine.

I've been catching up with some online workshops lately ..... these have been keeping me sane over the last few months!  
My crafty mojo hasn't been up to scratch, I've taken a little time off from some of my DT commitments and I've been spending some days in my craft room just doing things for me, and learning a whole load of stuff too!

Workshops with the very talented Eileen Godwin have been loads of fun.  The link will take you to her Facebook page ......... check it out if you haven't already, she's amazing!

These are my projects from last month's workshop (I haven't done February's yet ..... it's on the list for next week!)


This was right up my street.  Great layering techniques using designer papers, paints, stencils, stamps, inks ..... whatever you've got.  I loved it!!!


If lots of layers aren't your thing,  we created CAS designs too ......


I even managed to save one that I wasn't happy with.  You know how it goes ...... ink where it shouldn't be, colours that weren't blending as I wanted them to.  
You all know I don't like throwing things away so, I went back to it a couple of days later.  Carefully added a touch more ink to get a better blend,  managed to get most of the ink off where I didn't want it (I love my Distress inks!), used a large sentiment stamp over the top, and a few strategically placed gem stones and  ...... voila!!


I Love it!!  There's always a way to fix things!

As the weather seems to be changing for the better ..... fingers crossed ...... it's time to get the van ready again so we can enjoy exploring our little island (and hopefully further afield later in the year!)

Our little motorhome is almost a year old and poor Remi has been sat patiently on the drive all winter.


We have been checking him regularly, we just need to restock the cupboards, top up the gas, give him a wash and polish and then we can get out and about again ........ let the adventures begin!

Thanks for popping by ....... have a lovely day.

Cheerio until next time .....