Showing posts with label ZIG markers. Show all posts

Friday, 13 March 2020

There's still time to play along with the Craft Stamper Challenge .......

Happy Friday .........

I've just realised it's Friday the 13th ........ not that I'm superstitious, well not much anyway.

I hope you've had a good week.
We're travelling home later today after a brief, but busy, trip to the UK. 
It's been a little quiet in The Craft Lane this week, because we've been across to pick up 'the van' finally!   Yes, we have our new motorhome and he's having his first ferry crossing to the Isle of Man.  We've decided it's definitely a He, and we've named him Remi ...... Remi ,the Rapido!

But, enough about 'the van' for now.  It's time for a little reminder about this month's Craft Stamper Challenge.

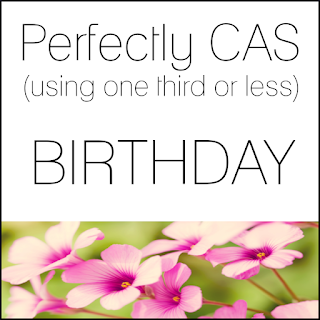
The theme is Anything Goes ..... as long as there's actual rubber stamping on your project somewhere.  Be sure to check out the Craft Stamper Blog for the full challenge guidelines ...... you need to follow those to be in with a chance of winning one of the prizes.

As always we have two prizes up for grabs .......
(1) the Design Winner chosen by the DT.
They will get their winning project published in the Craft Stamper Magazine on a two page spread!!! A winners profile on the Craft Stamper Blog and, an invitation to be a Guest Designer on a future Craft Stamper challenge.

(2) the Challenge Winner ....... randomly chosen from all the eligible entries.
They receive the Blog Challenge Prize and this month it's a cracker!  I wouldn't mind getting my hands on these little babies ......


OK, now for a little bit of inspiration ......


I love these new large stamps from AALL&Create.  Designed by the fabulous Tracy Evans, they're perfect for cardmaking or journaling but also they're a great size for creating pieces of home decor.

I simply took a piece of mop card from my stash, and stamped the full image using a black ink. I love all the details.


I also stamped the flower heads onto some scraps of white card, heat embossed them with a clear powder, and coloured them using ZIG markers before fussy cutting.
I then layered up the flower heads and attached them onto the stamped image using foam pads to add a bit of dimension


I found an old photo frame that fit perfectly ...... well almost.  Not a problem though ...... I just removed the glass from the front and because I'd used foam pads to attach the flowerheads they just fit nicely over the edge of the frame.


I finished off by adding a layer of Glossy Accents to the bottles .....


The challenge closes on Wednesday 25th March so there's plenty of time to join in.
Happy stamping!

Thanks for popping by ..... enjoy the rest of your day and have a lovely weekend.
I'm hoping for a nice calm crossing this afternoon.  We have a cabin though so if it is a little bumpy we can try and sleep through it.

Cheerio until next time .....


Products used:
Stamps: Daisy Elegance #266 (Tracy Evans for ALL&Create)
Inks: Versafine Clair - Nocturne
Others: Clear Embossing Powder (WOW!); ZIG Clean Color Brush Markers; Glossy Accents

Monday, 14 October 2019

We're back!! Just in time for the Perfectly CAS challenge ........

Happy Monday evening ........

Hello there!  It's a little bit chilly over here ........ and where's the sunshine? 

Yes we're back from our little break in Santorini ..... just in time for this month's Perfectly CAS (using one third or less) Challenge
We had such an amazing collection of cards in the gallery for our first challenge last month ..... I'm so glad you enjoyed playing along.


As you can see, this month's theme is another nice and easy one ...... Birthday.
We always need Birthday cards ..... speaking of which I think I need a few this month!

If you fancy playing along ....... follow the theme, keep your designs CAS, and .... only use one third or less, of the space on your card.
Remember the grid ......


I've gone straight down the centre for my birthday card ...... not something I usually do but I love how it's turned out.


I simply stamped the cute little panda, more or less in the middle of my card .....


Added the balloons to the top of him .......


coloured with ZIG Markers, and highlights added with a Stardust Gel Pen .....


I then finished off with my sentiment, stamped directly underneath the panda, keeping everything in that middle third, but still leaving lots of white space.


So, whether you find Clean and Simple easy to create or, when it comes to less is more you're not sure when to stop, using the 'one third or less rule' is definitely the way to go.
Check out the challenge blog for more CAS ideas and inspiration from the rest of the Design Team.

Happy stamping!

Thanks for popping by ..... enjoy the rest of your day.
I'm off now to curl up on the sofa with a hot chocolate, and catch up on some TV. 

Cheerio until next time ......


Products used:
Stamps: Party Like a Panda (Simon Says Stamp)
Inks: Versafine Clair - Nocturne; Distress Oxide Inks - Salty Ocean, Picked Raspberry, Mustard Seed, Peacock Feathers
Others: ZIG Clean Color Brush Markers; Stardust Gel Pen, Stickles Glitter Glue - Crystal 

Saturday, 14 September 2019

Perfectly CAS (using only one third) ........ fancy a new challenge?

Happy Saturday .......

I hope you're enjoying your weekend.

This is so exciting.  In case you haven't heard, there's a BRAND NEW Blog Challenge launching today ......  Whoo Hoo!!!   Well, it's launching on the 15th which is tomorrow I know but, it's based in Australia so it's already tomorrow over there .... if you know what I mean!
The idea is from Kylie (Happy Little Stampers, Addicted to Stamps and More etc) and I'm absolutely thrilled to be part of the Design Team ..... I love CAS!


Do you like creating Clean And Simple (CAS) cards?  Or are they your worst nightmare?  Ever tried to create that perfect CAS design but,  you can't stop adding just that little bit more?
If that sounds familiar, then this is the challenge for you ......


It's all about using just one third (or less) of the gorgeous white space on your card.
Check out the Perfectly CAS Blog for a full explanation of what this means, and all the details on how to play along.

So ..... when I think Clean and Simple (CAS), what comes to mind is .....
  • one main focal point
  • lots of white space
  • minimum layers and embellishments
Sounds simple enough but,  it's not a style that everyone finds easy to create.
Well now it is.  Just imagine your card is divided up like this ....


Now using the grid as a guide, use just one third of your card.
That could be the left or right side, top or the bottom.  You could use the centre horizontally, or right down the middle top to bottom.  You could even go diagonally. 
Saying all that though, it doesn't have to be exact.   Your 'third' could be slightly to the left or the right.  More towards the top or the bottom, or slightly off centre.  As long as you don't use more than one third of the available space you'll be fine.  You'll create a beautifully CAS design every time ..... I hope that all makes sense!

Each month the challenge will have different theme so, as well as keeping things CAS, using one third or less, you must also follow the monthly theme ......


To get things started with our very first challenge, the theme is a nice simple one ..... Flowers.  
We all love pretty floral designs.


I've started at the top third of my card and stamped the pretty floral spray from an Altenew stamp set, off the top edge.


I heat embossed the image in gold, and then coloured it using ZIG markers and a waterbrush


Still keeping in that top third of my card, I added a few ink splatters and some pretty gemstones .....


and finished with a sentiment underneath.


So, are you an expert at CAS? or, is this style completely out of your comfort zone?  Either way why not join in the fun with this brand new Blog Challenge.  I hope to see you in the gallery.

Thanks for popping by ..... enjoy the rest of your weekend.
It's one of my favourite weekends on the island ....... it's the Isle Of Man Food & Drink Festival!!
The Villa Marina gardens have been taken over yet again to showcase all the delicious produce this fabulous little island has to offer.
There's everything from local lamb, beef and pork, to delicious seafood.  Tasty breads, coffees, cupcakes and biscuits.  Cheeses, salamis and spices.  Chocolates, Christmas puddings and ice creams.  Some of the islands eateries are there serving their delicious food .... I had the best beef rib sandwich EVER!!!!   Oh! ...... and there's gin!!


For us foodies, it was the only way to spend Saturday!

Cheerio until next time .....


Products used:
Stamps: Handpicked Bouquet (Altenew); Tiny Words Sentiment Stamps (Simon Says Stamp)
Inks: Versamark ink; Golden Glitz (Delicata ink)
Other: Gold Fine Detail Embossing Powder (WOW!); ZIG Clean Color Brush Markers;

Sunday, 18 August 2019

There's still time to play along with the CAS Stencil challenge .......

Happy Sunday .........

I hope you're enjoying your weekend. 
I've got a little reminder for you of this months CAS Stencil challenge.


Robyn is hosting the challenge this month and she wants us to use ......... Sprays.  Another fun way of using our stencils.
There's a couple of links on this month's challenge post to videos with some great tips for using this technique.


It's a great way of making backgrounds, like I've done here for my Oddball Turtle (I love this little guy!).
I used a simple brickwall stencil, and Distress Oxide Spray.  I love the look of texture you can get from these sprays just by altering how you actually spray them ........ press the spray hard and you get lots of ink, and great coverage, half press the spray and you get a finer mist that creates this great look of texture ..... 


I die cut a circle from a piece of white card, off setting the die over the edge.  I then placed the brick wall background behind, and attached it to the front of my cardblank.

I stamped the turtle onto a piece of white card, used ZIG Brush Markers to colour him,  and then cut him out using the matching die ......


I doodled a few white dots onto his shell, and then attached him to my card using a wobbler.  These little plastic springs add a bit of dimension to your die cuts and also give them a bit of movement when you touch them, they're great fun to use.


To finish off I added the sentiment which comes with the turtle ......


We've got a couple of Guest Designers on the challenge this month ....... Hilary and Amy are joining in the fun so please pop by and say hello.

Thanks for popping by ..... enjoy the rest of your day.
I've been busy in the craft room most of the day.  I decided to give it a good tidy and have a change around.  Not the best idea I've had this weekend ...... it's anything but tidy now!!!  Let's just call it a work in progress shall we.

Cheerio until next time .....


Products used:
Stamps: Oddball Turtle (Stamping Bella)
Inks: Versafine Clair - Nocturne; Distress Oxide Spray - Fossilised Amber
Stencils: Brickwall stencil
Others: Stitched circle die; ZIG Clean Color Brush Markers; Oddball Turtle Die (Stamping Bella)

Friday, 2 August 2019

The Happy Little Stampers CAS Challenge ......

Hello again .......

How was your day?
I've got another blog challenge for you this evening.  It's Happy Little Stampers this time and  their CAS Challenge 


One of my favourite styles.  Clean ...... I do like a lot of white space, and Simple because, sometimes less is definitely more.
As you can see the theme this month is ....... Only One Third.  A nice and easy layout for CAS designs because it means two thirds of the card should be clean.

I've gone for the bottom third on my card ..........


A bit of simple masking, and some acetate smooshing with Distress Inks to create the inky strip across the bottom .......


I stamped the cute little gnome from Stamping Bella, onto a seperate piece of white card and die cut him using the co-ordinating die


I coloured him using ZIG Markers and then attached him onto the bottom of my card


The sentiment comes in the set, and has been stamped in Versafine Clair ink, and I added a few drops of glitter glue to finish off.


There's loads of time if you fancy playing along, the challenge doens't close until midnight (AEST) on 31st August.  And if you need some more inspiration then check out what the rest of the DT have been up to on the HLS Blog.

Happy stamping!

Thanks for popping by ....... have a great weekend.

Cheerio until next time .......

Products used:
Stamps: Flowery Gnome stamp and matching die (Stamping Bella);
Inks: Distress Inks - Picked Raspberry, Mowed Lawn; Versafine Clair - Nocturne
Others: ZIG Clean Color Brush Markers; Clear Crystal Glitter Glue

Friday, 19 July 2019

Uniko Blog Challenge #54 ........

Happy Friday .......

It's almost the weeknd ....... whoo hoo!!!  Let's get is started with a new Uniko Blog Challenge shall we.
It's Challenge #54 and the theme is Flowers.  There's also an optional twist ...... to use Die Cuts


I  was inspired by the colours from the photograph  .......


I love this little bloom from the You Are, Yes You stamp set.
I stamped the flower and leaves randomly over a piece of white cardstock and then coloured using ZIG markers and a waterbrush.


I cut the piece to fit the front of a 7x5 cardblank leaving space for the green border across the bottom


I stamped the sentiment along a strip of white card and attached it on the bottom across the join.

A few dots of Jewel Drops in the white spaces to finish off.


What's your favourite flower?  Stamp it, colour it, or die cut it, and enter Challenge #54 on the Uniko Blog.
You have until midnight (GMT) on the 23rd August to get your entries in so lots of time to play along.
Need some more inspiration? ..... then check out the Uniko Blog and see what the rest of the Design Team, and our lovely Guest Designer Amy Cairns have created.
You'll also find all the challenge details and prize info on there too.

Happy stamping!

Thanks for popping by ..... enjoy the rest of your day and have a great weekend.

Cheerio until next time .......


Products used:
Stamps: You Are, Yes You clear stamp set; Simply Said (Uniko)
Inks: Versafine Clair - Nocturne; Delicate Golden Glitz
Others: ZIG Markers; Jewel Drops (Nuvo)

Thursday, 18 July 2019

Life is better in flip flops! ......

Happy Thursday .......

I hope you've had a nice day.
The rain from yesterday seems to have disappeared which is good, however the forecast for weekend is not so good.  Typical ...... the schools finish tomorrow for the long summer break. Lets hope the weekend is just a blip!
I think I'm still in holiday mood though ..... it's been a tough week trying to get back into the swing of things, but I think I'm almost there.

It's time for a little reminder of this months CAS Stencil Challenge ........


Hosted by the lovely Cathy, our theme this month is all about Alcohol Inks and Alcohol Lift

Alcohol Inks are so much fun to use, and the lift technique works so well with stencils.
Why not give them a go and play along with the challenge.
Check out the links on the challenge blog to some great video tutorials on how to use these inks .... and then have some fun!


Told you I was still in the holiday mood ........ totally agree with this sentiment.  I love my flip flops!!!

I've used my Alcohol Pearls again, on YUPO paper, to create the background.
I applied a few drops of colour onto a felt pad applicator and then swiped the colour across the YUPO


I then used a Tim Holtz stencil and the Alcohol Ink Lift Re-inker to add the sunrays ...... a few drops of the re-inker onto a craft mat, picked up with a sponge applicator tool and then lightly dabbed over the stencil to remove the colour.  Less is more with this technique ..... if you have too much of the Lift ink on your sponge  it will seep underneath your stencil spoiling the design.
Remove the stencil and blot the design with a paper towel ...... DON'T RUB!!  Repeat this a few times to make sure all the excess ink and colour has been removed.  When your paper towel is coming up clean then you can rub over the design to give it a nice finish.


I stamped the sentiment using Archival Ink and framed my sunset efore attaching it on to my card.

I stamped the little flip flops, and heat embossed before colouring them using ZIG Markers.  They were then die cut and attached onto the frame ...... cute or what!


I'm also linking this up to the CAS Mix Up Challenge.  The theme this month is Alcohol Lift Ink so this definitely fits the bill.
Alcohol Ink Lift - check!  Stamping - check! and my choice element ..... die cutting - check!


Thanks for popping by ..... enjoy the rest of your day.
Things are definitley getting back to normal around here ........ I'm off to climb make a start on the mountain of ironing that's appeared.  I'm sure we didn't take that many clothes away on holiday!!

Cheerio until next time ......


Products used:
Stamps: Flip Flop Life stamps and matching die (Newton's Nook)
Inks: Alcohol Pearls - Alchemy (yellow), Splendor (orange), Deception (pink); Alcohol Ink Lift Re-inker; Black Archival; Versamark (for the flip flops)
Others: YUPO paper; Sunray Stencil (Tim Holtz); Gold Embossing Powder (WOW!); ZIG Markers; Stitched Frame Die; Jewel Drops (Nuvo)