Showing posts with label MDF heart. Show all posts

Friday, 6 July 2018

It's almost the weekend ......

Happy Friday folks .......

It is Friday isn't it?  We had a bank holiday here on the island yesterday and I kept thinking it was Saturday ........ now I've no idea what day of the week it is!

Let's go with Friday shall we ....... it's the first one of the month so that means the latest issue of the Craft Stamper magazine hits the shelves today.  It also means that there's a brand new Craft Stamper Take It Make It Challenge too.


As always the theme is Anything Goes ...... as long as there's actual rubber stamping on your projects somewhere.
It can be a card, an ATC or a journal page.  A canvas, or piece of jewellery even.  Or maybe something 3D, or a bit of home decor ..... the choice is all yours.
Just remember to follow the challenge guidelines, which you can find HERE on the Craft Stamper Blog ....... we don't want an amazing project to be excluded from the chance of winning one of the prizes.

Speaking of prizes ........ we have two on offer as always. 
The Design Winner chosen by the DT.  They will get their project featured in the Craft Stamper magazine, along with a winner's profile and also a Guest Designer spot on the CS Blog. 
And then there's a Challenge Winner, randomly chosen from all the eligible entries and they will win the prize on offer this month which is .......

Stephanie Ackerman's Faith Journaling Book ...... plus 2 sets of Documented Faith Stickers

OK ...... now for some inspiration
If you read my blog regularly then you'll know I recently discovered rice papers.  I know .... I'm a little late to the party with these but, I'm now hooked!
They are so easy to use ..... that's if you can bring yourself to tear into the gorgeous designs.   They can transform the plainest of items into something beautiful in no time ......


I've covered a simple MDF heart here, using the whole of the main part of the design.

To start I gave the heart a quick coat of white gesso, let it dry then added a coat of Mod Podge before laying the rice paper over the top.


Isn't she beautiful! The colours in this particular paper are just gorgeous, and the detail is amazing ....


I applied another thin coat of Mod Podge over the top, to seal the rice paper making sure I went right to the edges.
Once this was dry I used a sanding block to take off the excess rice paper around the edge ...... keeping all the pieces of course to use on other projects.
I dry brushed some white paint around the edge to soften it a little ........


and then used my favourite IndigoBlu Vintage Flourish stamp to add some more detail and texture ....
along with a sentiment, both of which were stamped in Versamark ink and heat embossed in gold


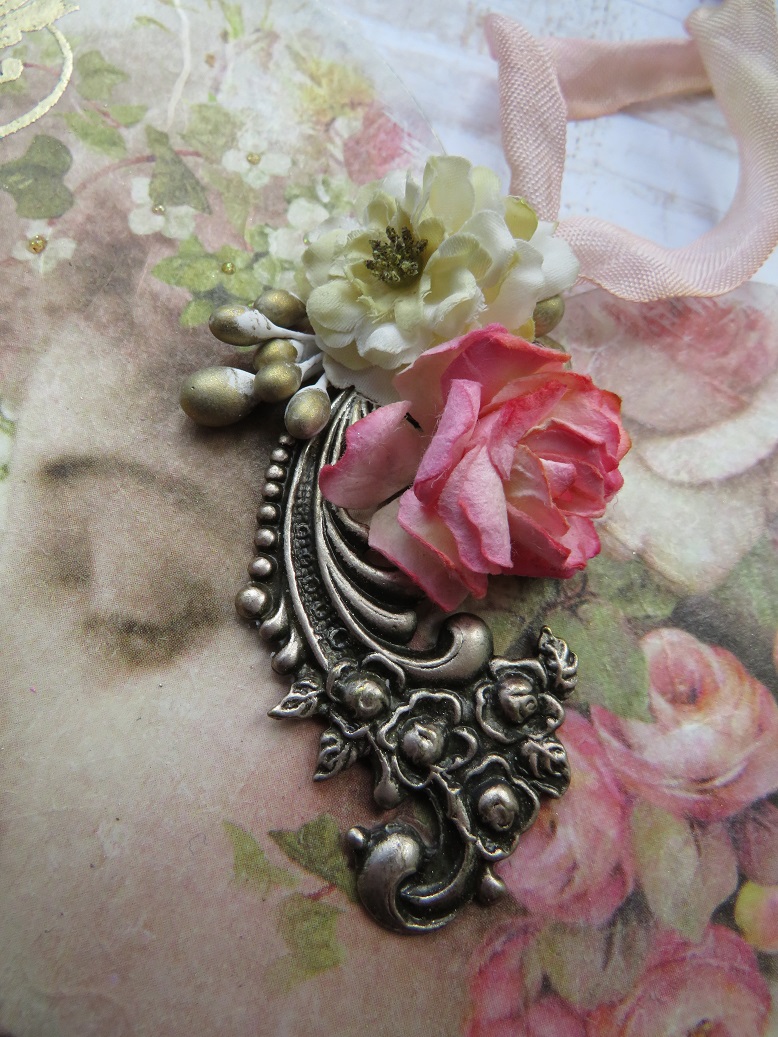
A pretty metal embellishment and some paper flowers, highlighted with a little White Fire Treasure Gold wax, add the finishing touch

The reverse of the heart has been painted ........ 


decorated with a few of the left over pieces of rice paper
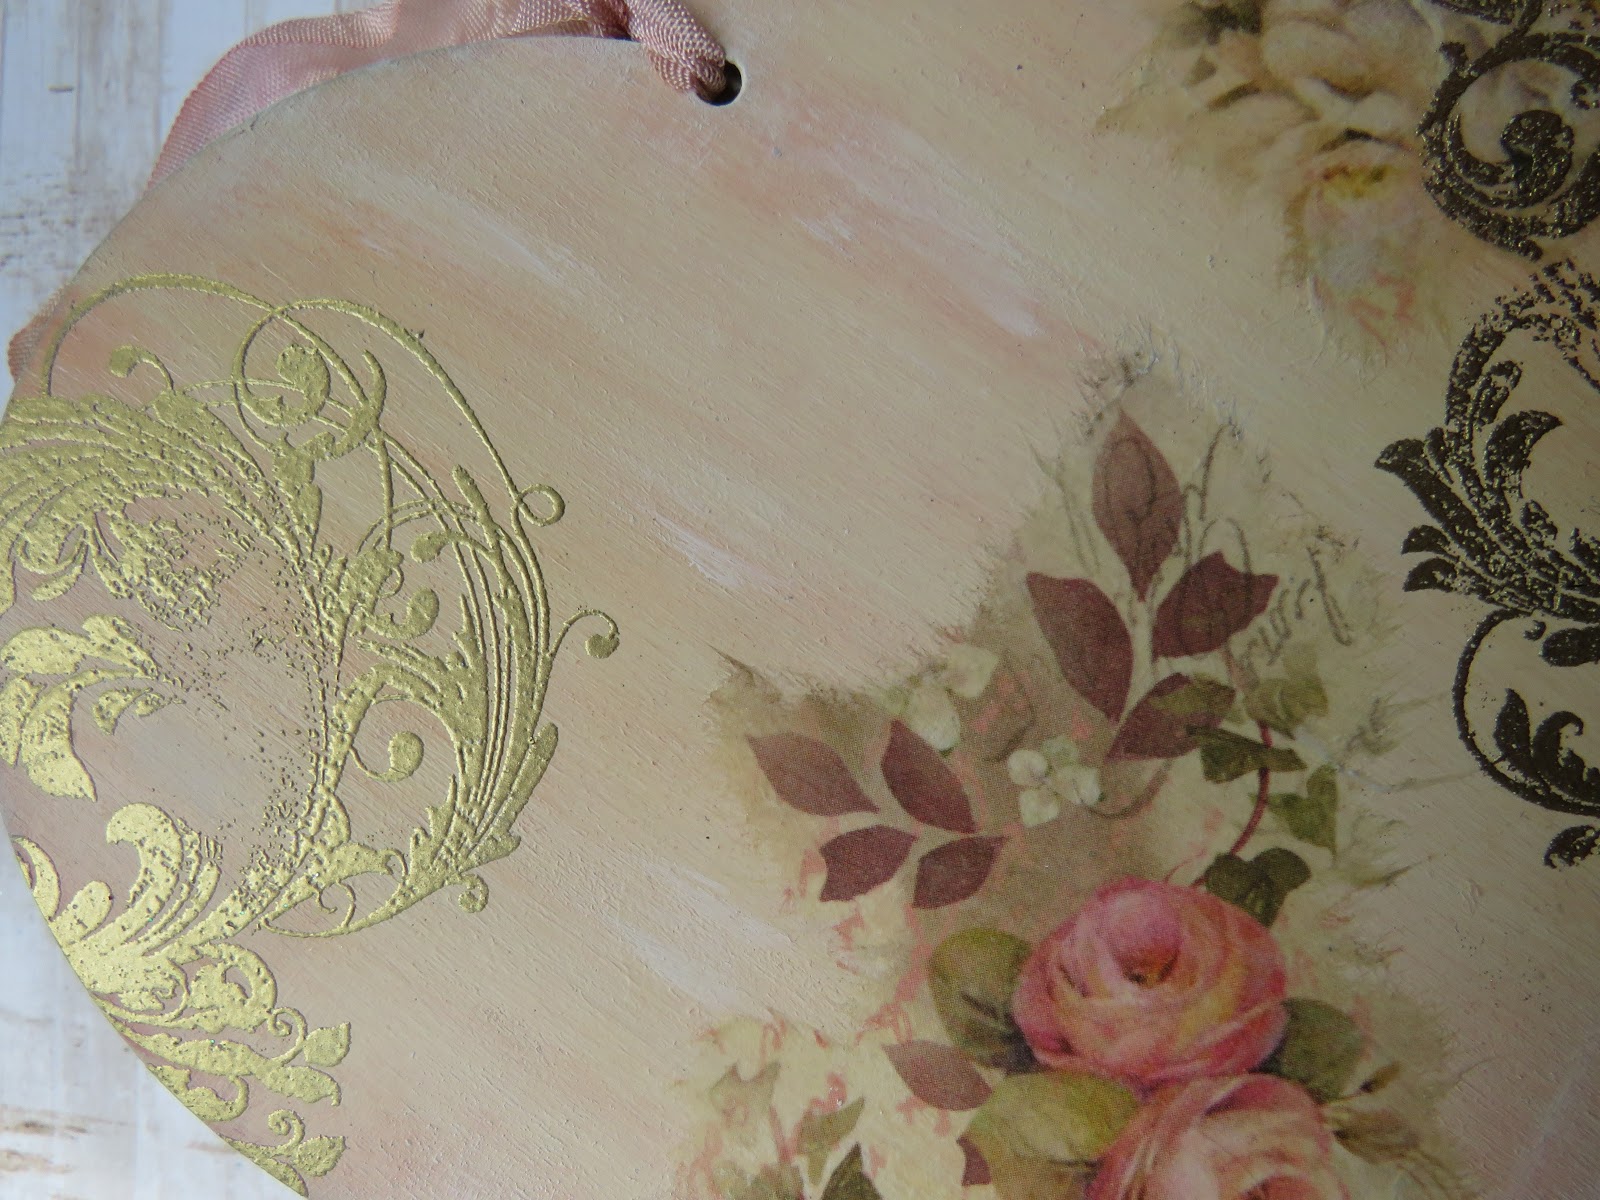

and stamped and embossed with the vintage flourish ...... love it!!


Now it's your turn ....... see you in the gallery!
Check out the Craft Stamper blog for lots more inspiration from the rest of the Design Team.
Happy stamping!

Thanks for popping by ..... enjoy the rest of your day and have a lovely weekend.
The weather forecast is looking good ...... sunshine, sunshine and more sunshine.
And lets hope we get the right result tomorrow in the football ...... I think we're off out to watch the match.  Don't think my nerves can stand a repeat of Tuesday night though .......... come on England!!!

Cheerio until next time .....

Sunday, 6 May 2018

Going for Gold with the Happy Little Stampers Mixed Media challenge

Happy Sunday evening .....

I hope you've had a nice weekend ..... the good thing is, here in the Isle of Man, and the UK, it's not over yet!  We've got a lovely Bank Holiday tomorrow ..... no early Monday morning start, and the weather forecast is looking good! 

It's time for another challenge now though ...... fancy some Mixed Media?  Then pop over to the Happy Little Stampers blog because it's time to get this month's  Mixed Media challenge underway.
The theme for May is ......... GOLD!


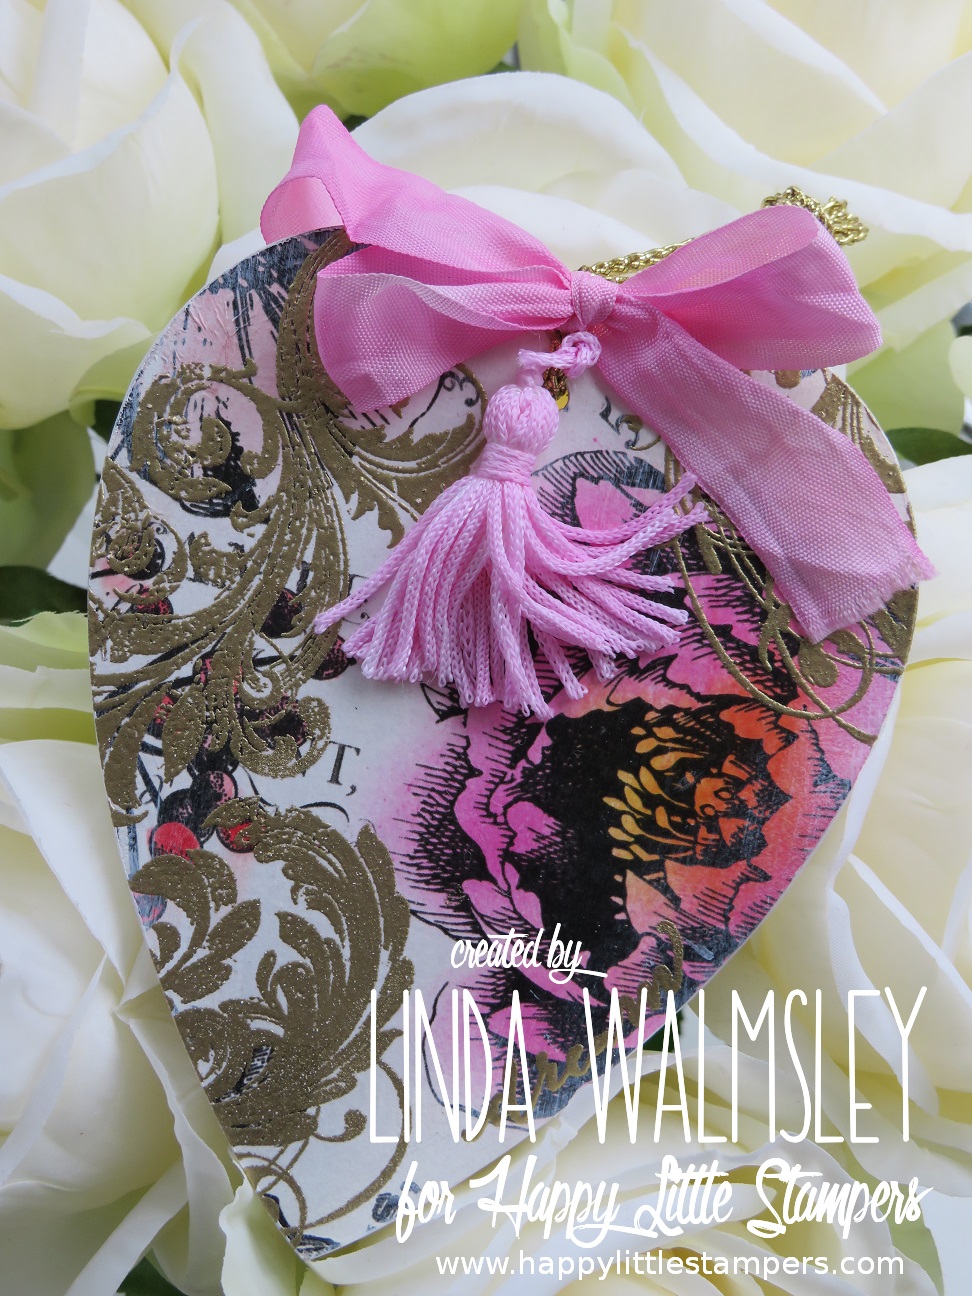
I've gone for adding a little bit of gold heat embossing onto a pretty MDF heart, using one of my favourite IndigoBlu stamps .....


I painted the heart with white gesso, and then covered the front using a piece of the Tim Holtz Botanical Collage Paper 


I added a touch of colour to the paper BEFORE I laid it onto the MDF which had been given a coat of Ranger's Glue and Seal.
I used Distress Inks on the back of the paper so that the colour wouldn't run when I applied the medium again over the top to seal the paper to the MDF.

Once everything was dry I then heat embossed the gorgeous flourish over the top with a gold embossing powder ......


On the back, I gave the heart a coat of a pale grey paint and dry brushed over the top with white to give a worn look .....


and then heat embossed that gorgeous flourish in full, again using the gold powder .....


I love how this looks ..... it could be used as a decoration or why not use it as a beautiful tag on a special gift.

As with all the HLS Challenges there's a $20 Gift Certificate for the Challenge winner, which will be doubled if the winner has used Happy Little Stampers stamps on their project.

Thanks for popping by .... enjoy the rest of your day.  And if you have the Bank Holiday tomorrow .... enjoy it!
We're hoping for a repeat of today .... its been glorious!  We've had blue skies, and sunshine all day ...... it's been lovely.

And yes, the BBQ was on again earlier.  I don't think I've used the kitchen at all this weekend .... it's great!
We popped into Douglas this afternoon ...... went to see Chris in his new place and had a lovely Sunday lunch down there. He's had a busy week but the hard work has paid off .... The British looks fab! 
We popped round to see Lauren too, who was putting together a HUGE trampoline in the garden for the little man .......


guess who had a fun afternoon there! No ...... I'm not talking about me ..... although hubby was quick to try it out!!! 
Then it was back home to enjoy the afternoon sun, sat in the garden with a good book.

We drove along the prom and it was really weird ..... Manannan's Cloak was coming in across the bay .... or was it a heat haze perhaps!!


Manannan's Cloak is this strange wall of mist that occasionally comes in low across the sea and covers the island, supposedly to shroud it and protect it from unwanted visitors.  It's fascinating to watch it come in .....


It obviously did it's job today ....... we're still here!

Cheerio until next time ......

Friday, 5 September 2014

There's a new Take It Make It challenge ...... grab the tissues!

Good morning ....... Happy Friday!

It's the first Friday of the month, and that means there's a brand new issue of Craft Stamper out today - yeah!!
And, if there's a new magazine ........ then there's a brand new Take It Make It Blog challenge too!

Thanks to everyone that played along last month .... as always we had some fab entries. It was interesting to see what all your favourite techniques were.

This month the challenge is all about ......

Stamping on Tissue

This is a great technique to use to decorate items, especially things curved.  By stamping onto the tissue paper first, you can then place your images exactly where you want them ...... following the curves, or even round corners ....... and the stamped image will remain crisp and clear.  Not always easy to achieve when stamping directly onto some surfaces.

I actually used man size tissues for my project .... nothing fancy just everyday white tissues, a great alternative if you haven't got any white tissue paper


I stamped the images onto the tissues using Versafine inks ...... Imperial Purple for Jane, and Onyx Black for the Vintage Flourish (both of these stamps are from IndigoBlu)


I painted an MDF heart with a coat of IndigoBlu's white GeeSso Good,  then added a coat of Pantry White English Cottage Acrylic Paint.

I carefully tore around the stamped images and then split the tissues down to just one ply ..... you don't need to be too accurate with the tearing, the tissue around the edges will disappear once it's been applied to the MDF.

Decide where you want your images and cover the area with a wet adhesive.  I used IndigoBlu's Slap It On, but you can use Mod Podge, PVA, or gel medium ... whatever suits you.
Lay your stamped image onto the adhesive, gently smoothing out the creases.  Don't overwork it, remember it's tissue paper, and it's wet, so it will tear.
Once the image is down, apply another layer of adhesive over the top to seal the tissue, and leave to dry.

Once it's all dry you can then add colour to the images if you like.  Mine don't really need extra colour however I did add a touch of Distress ink (Worn Lipstick) to her cheeks and lips


I then added more colour around the edges using Dusty Concord Distress, and filled in the background using the small Script stamp from Sarah's Choice

I did more of the same to the back of the heart ...... the Vintage Flourish stamped onto tissue and applied to the painted MDF heart as before.  Coloured around the edge using Dusty Concord and then stamped over the background using the Script


I finished off by adding a few highlights to the flourish using a Stardust Gel pen, and a couple of gemstones for a bit more sparkle.


I added some paper flowers to Jane's hair and a pretty organza ribbon to hang it by

Hope you like it.  Now it's your turn.

Still need more inspiration?  Check out the other great projects and ideas from the rest of the DT over on the Challenge Blog.

You have until September 24th to get your entries in, and the winner will be announced on Friday September  26th. Have fun .... and Good Luck!

I'm looking forward to the weekend.   Hopefully it's going to be a nice relaxing one, before things get a little crazy again next week.
Yes,  I'm off on my travels again first thing on Thursday, and as usual, before I board that plane, I've a shed load to do!  Better make a start then hadn't I!!

Thanks for popping by .... enjoy the rest of your day.

Cheerio until next time

Linda 
xx

Thursday, 30 January 2014

No I haven't left the country ......

Happy Thursday!

I thought it was time I took a quick 5 minutes to blog, just to let you know that I am still here, and I haven't left the country (as tempting as that sounds!). 
It's not been a good week ..... Mr Mojo has deserted me and gone into hibernation I think!

With a deadline looming and only half a box of samples done I decided enough was enough yesterday.  I took a much needed break from my craft room and went AWOL!!!
I spent the afternoon with a group of  lovely ladies in someone else's crafty space.  It was so nice to just relax and play ...... I even tried something new!

This is what came home with me when we'd finished, thanks to the lovely Jill Poole whose craft room we took over for four hours or so ......


A pretty MDF heart, covered with Texture Paste and then stamped into while it was still wet.  It was then painted using Lumiere Metallic Acrylic paints, and touches of embossing  powder sprinkled over the top.  The whole thing was then gently heated to set the powder and dry the paint completely, and then finished with a smidgen of Treasure Gold to finish off the edges.  The end result is just gorgeous!!  It was a shame to cover it up really but I added a couple of metal charms and the pretty organza bow .....


and just a few of the Tim Holtz Chit Chat stickers.....

 
When I got home I added a magnet to the back of the heart and it's now sat on my fridge door ..... I love it!
The colours don't come across very well in the pictures, it's actually a really pretty pinky lilac shade with hints of gold and a blue shimmer (I won't make excuses about the lighting not being good etc., etc., it's probably just my bad photography again!)

Not only did I make the heart, but I also had a play, for the first time, with some Friendly Plastic.  Now I've had some of this stuff in my craft stash for ages (thanks to my good friend Sally-Jo), but just never got around to playing with it (like so many other things in there!), until yesterday when Jill  got us making centres to go in flowers on a card we'd made .......


How cool is that! ....... I know ...... you're probably all saying been there, done that ages ago - where have you been LindyLou????  but it was my first time ...... and I was well impressed!!  All we used was a bit of netting to push the Friendly Plastic through, and a piece of copper piping to cut the button shape .... simples.  When I got back yesterday the first thing I did was hunt down my FP stash (Thanks Sally-Jo!), so guess what I'll be doing when all my DT stuff's done!

Here's the finished card ...... a pretty little hidden slider card - something else I hadn't made in a while ....


As you can see, I had a lovely afternoon ...... thanks Jill.

It was back into the old craft room this morning ..... still got loads on the 'To Do' list and it's the last day of the month tomorrow ....... eeeek!!  No Tim Tag done yet either (oh no!!).

Thanks for popping by today.  Hopefully things will settle down a little towards the end of next week and I can try and get back to blogging a little more regularly.

Cheerio for now

Linda
xx

Sunday, 21 April 2013

Bloomin' Great! - new Forever 21 Blog challenge

Morning all,

And a very happy Sunday.  I don't say that very often on here, weekend posts are a bit few and far between from me.   Today is different though, it's the start of the new Indigo Blu Forever 21 Blog Challenge.  This months theme is ............. FLOWERS.  So, get out all those lovely Indigo Blu floral stamps that you all have in your stash, and away you go.

Before I show you my DT creation for this month,  CONGRATULATIONS to (drumroll)............

 Number 12  .........  KERRY

Well done Kerry, enjoy your prize. Thanks to everyone that took part, there were some fabulous creations once again.  I can't wait to see what you all come up with this month.

Here's mine ........
There's just one or two flowers on there!

I've painted one of the MDF folk hearts with Black Gee-So Good then covered one side with a good layer of Kroma Crackle, that's been mixed with a little pink acrylic paint.  I left this to dry for a good couple of days, then covered it with Slap-it-on Matte.
 I love how no two projects are going to be the same using the Crackle, you never know how it's going to turn out. This time I got quite large cracks towards the centre, see how the black shows through.
Once everything was dry, I brushed some silver metalic paint around the edges to give a bit of a contrast.

For my main floral image I chose the beautiful rose from the Clockworks stamp set, (love this). I added in a couple the smalller trailing rose from the same set along with a small flower from another fabulous Indigo Blu stamp set - Live Laugh Love.  It was difficult to choose which floral images to use as there's so many within the Indigo Blu range - Kay loves flowers.

I coloured a piece of white cardstock using pink shades of Pan Pastels, with a touch of pale blue in there and Kay's technique of doing lots of circles of colour all over ......
Doesn't look much at this stage, but bear with me.

I then stamped my flowers randomly all over the card, using a Black Versafine ink ......
Can you can see where I'm going with this now?  It's a quick and easy way to colour lots of images, and you get a bit of shading in there too.  I did the same thing with some green shades and stamped the leaves
Next job is to cut out all the flowers.  This takes a bit of time but I must admit I do like a bit of fussy cutting now and then.  Many moons ago, when I first started crafting (I can just about remember that far back!) decoupage was one of the first techniques I tried.  I do think most crafters give it a go at some point.

Once all your flowers and leaves are cut out, it's time for the fun part - flower arranging!  Now I'm not a florist, I'm more of a 'pop it down and see how it looks' kinda gal.  You just need to play around with the flowers without sticking them in place, until you're happy with the arrangement.  Once everything is on place, carefully glue each individual flower - I used a hot glue gun for this.  You can still get a bit of dimension without having to wait too long for the glue to dry.
You can see I've also added layers to some of the flowers for a bit more depth ........
And I've covered the leaves with a bit of Glossy Accents to give them a shine.
The sentiment is from the Bloomin' Great stamp set, stamped and cut out using one of the circle Nestabilities dies.  It's been layered onto a circle covered with the Mega Flakes to highlight it, layered again onto black and then it's been attached to a cocktail stick, painted with Black Gee-So Good and then glued into place with hot glue.
A pretty ribobn bow, and some white rafia string to hang it with, add the finishing touches.

Hope you like it, and that it's inspired you to enter.  There's another fabulous prize up for grabs so come on, get your Indigo Blu stamps out and create something with a FLORAL theme.

Thanks for popping by today.  Enjoy the rest of your weekend.  It's been lovely here so far, I hope it's nice where you are.

I'm off to spend the day tidying the old craft room.  You can't actually put anything else in there at the moment, every surface is covered in STUFF!! Even my chair!!!  I need to get in there and put everything away, then I can start with a clean workspace tomorrow - well, I can hope can't I.

Have a lovely day.  Cheerio for now, and Good luck in the challenge.

Linda
xx