Showing posts with label Die cuts. Show all posts

Thursday, 30 November 2023

Simply Less is More ........

Happy Thursday ........

Well, here we are on the last day of November. Just a little over three weeks until Christmas ..... Ho! Ho! Ho!
 
We would have been heading for the Cotswolds today if our little festive trip had gone according to plan, and we might have even had some snow on our travels.  I believe there's a little bit of it about in the UK at the moment.  Thankfully there's none here (yet!).  The sun is shining but it is very cold!❄
We did make the right decision to cancel the trip though.  This flippin' cold bug has been brutal, and it's still hanging on.  We are slowly beginning to feel a little better though, so it's not all bad!

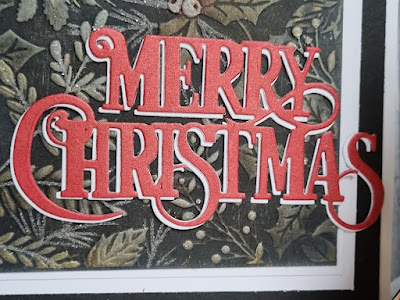
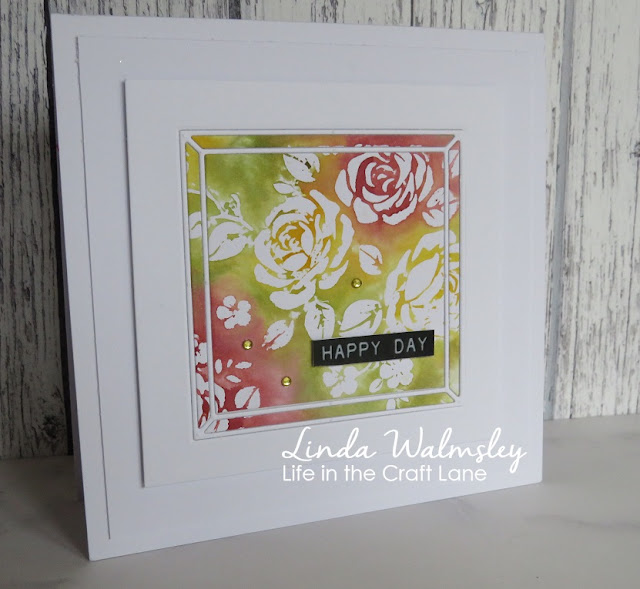
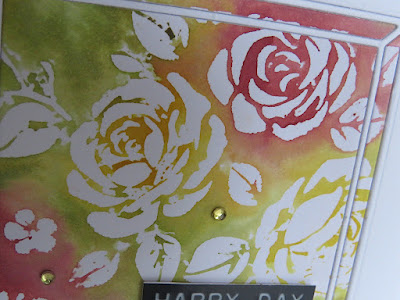
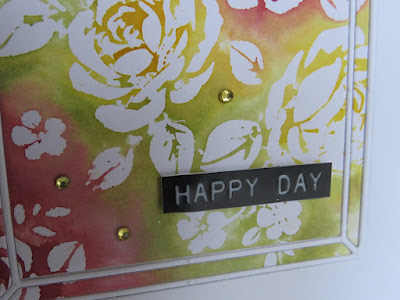
Today I'm playing along with the Simply Less is More Blog challenge ..... it's the last one for 2023!


The theme is 'D' is for ..... Deck The Halls (since we didn't go away, there's been quite a bit of that here recently!)


Very clean and simple (CAS), and really quick and easy once all the die cutting had been done.

I got the idea from Spellbinders, and the lovely Yana Smakula's blog.  At the time, I didn't have the actual die that she used but, I did have the Spellbinders Be Bold Alphabet die set which is the same font, just a little bit smaller.

I die cut all the letters from festive coloured cardstock and glitter foam sheets (Spellbinders) and then mixed and matched them to create my tree shape


A die cut star on the top, a simple stamped sentiment underneath, and a few gold ink splatters give the finishing touches.


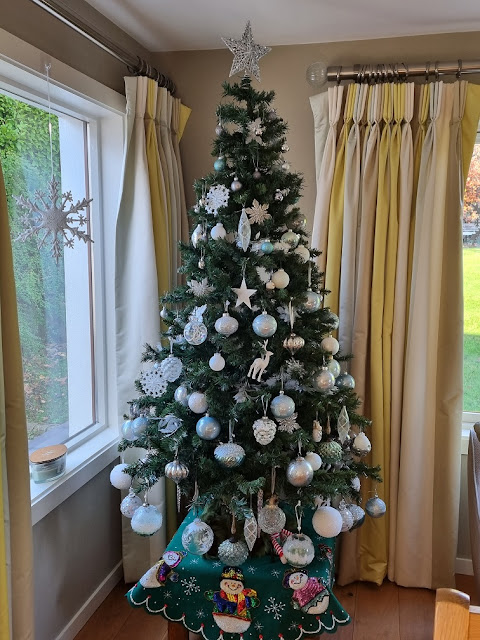
Decorating for Christmas always starts with the tree/trees in our house.  The first one went up a few weeks ago .......... I know, it was a little early but, we were supposed to be going away and I didn't want it all to do when we got back!


I love it when these come out of the box! .......


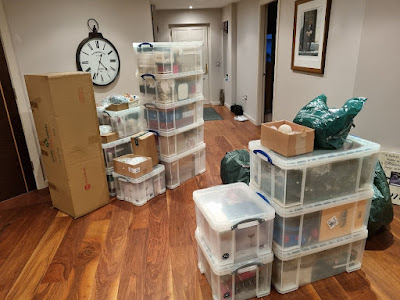
 And because we didn't go away, I had a date with Mr Buble, and this happened over the weekend ........


It took ages to get finished but ......... it's done!


I think I'd better get writing some of those Christmas cards now.

Thanks for popping by, enjoy the rest of your day.
Stay cosy and warm.

Cheerio until next time ....... 

Saturday, 21 October 2023

Hot Pink and Lime for Seize the Birthday ........

Yeah! it's the weekend. Happy Saturday .......

I hope you've had a good week.  Only nine more to go until Christmas ...... just saying!

We've actually started thinking about the festive season a little more this week.  
On Wednesday, the local garden centre launched their Christmas displays.  Well you know me, I love looking at Christmas decorations so, I had to pop in and check out the pretty colours for this year, and see what was new.  After all, there's always room for one more bauble on the tree! Or nine as it turned out!  You see I very, very rarely buy just one, it has to be at least three matching ones.  Then I have to finish with an uneven number in my basket so, nine it was! Like I said, you can never have too many baubles!

Then, on Thursday we went to the Christmas Wine Tasting event at our favourite little place in Douglas.
We had a lovely evening (I think!).  Many, many nice wines and bubbly were tasted, so that's one thing off the list ......... the drinks for Christmas dinner are sorted! 

Anyhow, enough of all that.  You'll be pleased to know that I have also spent time in the craft room again this week.  I'm enjoying getting back into the swing of things, albeit slowly!

I'm playing along with some Blog Challenges again.  First up is Seize the Birthday  
I got a lovely surprise when my card was chosen as the Winner in the last challenge  (I was so pleased that there just may have been a little happy dance in the craft room!)

It's their usual 'Anything Goes' Birthday challenge, and this time the Toppings option is a Colour Challenge.  Hot Pink and Lime ........ nice!


My first thought was flowers.  So, I did a quick rummage through my die cuts and this is what I came up with ......


Tim Holtz Wildflower Stems #1 Thinlits dies, cut from white cardstock, which I coloured using inks directly from the ink pad onto the die cut.  Picked Raspberry Distress Oxide for the flower head


and Twisted Citron oxide for one of the leaf stems and Verdant Versafine Clair for the rest ..... love the combination!

I added some detail onto the background using a stencil and the pink and green Oxide inks again, applied very lightly with a stencil brush this time, to give just a touch of colour.


I then attached the flower and stems over the top and finished off with a stamped sentiment, a few hot pink and lime enamel dots here and there, and a cute little twine bow


I'm always a bit of a pink girl, so I loved how it turned out

The challenge is open until Tues 24th Oct so there's still time if you fancy playing along.

Thanks for popping by ..... have a lovely weekend.
We've got nothing planned this weekend so, I think it's just going to be a quiet one at home.

Cheerio until next time ......


Friday, 17 December 2021

And ....... they're done!

Happy Friday ........

Well, that was cutting it fine ..... my Christmas cards are done!  I think.
Can I apologise now for any that arrive late.  Oh! and also the two birthdays that I forgot this week too ....... sorry ladies!  I'm not doing very well am I.  Cards are on their way, I promise.  I'm going to blame it on the booster jab that set me back 48 hours!!
    
Every year I find myself saying the same thing ....... I'm not going to leave my Christmas cards to the last minute but, here I am again, a week to go and I'm still busy in the craft room.  It's tags and gift wrap next though ...... the fun bit!

Here's the last of my Christmas cards for 2021.  
First up,  a copy of a design I did last year I think, updated with this year's favourite festive die.  I do love a snowflake, or two!


Lots of stamping and heat embossing, using Tim Holtz's snowflake stamps in various sizes.  


I did a whole batch of these, and becasue I used the MISTI to do the stamping they didn't take that long at all.


A mixture of sparkly gold, silver and white embossing powders for the larger flakes, with a few tiny snowflakes just stamped inbetween to fill any gaps.   And then lots of white paint splatters over the top


I layered the die cut sentiment to add a bit of dimension, gave it a touch of sparkle with some fine crystal glitter,  and then attached it over the top of my snowflakes ........ love it!


I love it even more with a bit of mat and layering, for one or two special cards.


My final card for this year was made especially for the team at our favourite little wine bar/restaurant ......


Says it all really!

Thanks for popping by ..... enjoy the rest of your day, and have a lovely weekend.
I'm off to the post office now!

Cheerio until next time ........ 

Monday, 13 December 2021

12 days until Christmas ........

Happy Monday! ........

Well, that's my booster jab all done and dusted before Christmas.  Lets hope it's like the other two ...... no nasty side effects! 

I hope you all had a lovely weekend.  I can't believe there's only one more before the big day ....... are you ready for it?  We did make a start on the all important Christmas gravy yesterday.  Bless Jamie Oliver for his delicious Get Ahead Gravy base ..... works a treat every year!

I've got some more Christmas cards to share with you today ....... batch making is a wonderful thing!

Here's that new die again, told you I would be using it a lot .........


Same card, just added a change of colour to the die cut sentiment.

The bunch of mistletoe is from a Julie Hickey stamp set called Under the Mistletoe ........ it fits perfectly on these 7x5inch cards.
I stamped and heat embossed in Platinum onto black cardstock, and then used pearlescent paints to colour it in


A few splatters of white paint onto the backgrounds and then I added the die cut sentiment ....... simple!
The gold one above is just coloured with Delicata Golden Glitz ink, applied direct from the ink pad.
The red and green versions were coloured with inks and then heat embossed with a sparkly clear embossing powder


And the white one was just glittered ....... so quick and easy.  The only thing that took the time was painting the mistletoe!


Here's another easy design, this time with an embossing folder ......... I'm loving black cardstock at the moment!


This embossing folder is ......... Holiday Greenery from Simon Says Stamp.  I've simply run it through the Big Shot with a piece of black cardstock.  I then used various inkpads (metallic) to add the colours, gently swiping each one over the top of the raised areas.


A little bit of mat and layering to frame the piece, and to finish I added a touch of Tim Holtz's Clear Rock Candy Glitter to highlight pieces of the greenery and of course, added my favourite die cut sentiment, cut twice, one coloured (Delicata Ruby Red metallic ink), one not, and then layered to give a shadowed look


Really easy cards ......... which is great if you've left things a little late like I have,  I love how they've turned out though.  

Wouldn't this make a great Christmas card ...........  can you believe Arthur's 3 month's old today!


and these are just a couple of photos from his first photoshoot ...... cute or what!

First family photo 💖


Thanks for popping by ...... enjoy the rest of your day.  
Time for a coffe and a mince pie I think

Cheerio until next time .......


Monday, 22 November 2021

It's started! ...........

Happy Monday .........

It's a bit of a chilly one here.  We've had our first frost this morning ......... brrrrrr!  Winter is coming!

Did you have a nice weekend?  It was a bit of a quiet one here so I decided to round up all the Christmas decorations ready to make a start on the trees.
Ooops! It looks like the day we moved in, again ...... there's boxes everywhere!  
Have we really got that many baubles ..........


Apparently ..... yes we have!  

I did make a start ...... the first tree was up in no time and not a bauble in sight


Then Mr Buble arrived, and Lauren joined in, and the first decorated tree is done ...... I think!
Looking at it in the daylight it might just need a few extras here and there.


Anyway, enough of the trees, I've got two cards to share with you for the final challenges this year at CAS Mix Up and CAS Christmas

CAS Mix Up is a Stencil challenge this month with the theme .....Stencil Monoprinting


Here's a really quick and easy card using a stencil monoprint that I found in my stash, along with a pretty frame die from Penny Black


The print was done by applying Distress Inks directly from the ink pad onto the stencil, spritzing with a little water, and then laying the inky stencil down onto a piece of watercolour card.
Mop up any excess ink, gently lift the stencil, and voila!!  One piece of pretty printed cardstock.


I used the Penny Black die to ........ a) cut out the frame from the centre of a square of white card, and b) to cut the frame from the printed card.
I then placed the white die cut frame back into the square card and inlaid the coloured pieces to create the complete square.


  I mounted this on a larger square cardblank, added a simple sentiment and a few sparkly gemstones.


CAS Christmas is all about ...... Christmas Critters


You can't get much more CAS.  The background was an embossing folder with just a touch of added glitter


Stamped and die cut this little guy ......


Added some colour using ZIG Markers ....... stamped my sentiment on the bottom of the card and attached the polar bear off to the side


Another Christmas card done!

Thanks for popping by ..... enjoy the rest of your day.
It's time to sort through those boxes and get another tree done I think ......... are you ready Mr Buble!? 

Cheerio until next time ........


Products used:
CAS Mix Up
Stencil: Floral Layering Stencil (Tim Holtz)
Inks: Distress Inks - Aged Mahogany, Peeled Paint, Mustard Seed
Other: Framed die (Penny Black); Sentiment Strip (Simon Says Stamp); Self adhesive gems

CAS Christmas
Stamps: Polar Bear Pals (My Favourite Things); Christmas Time 3 (Tim Holtz) - for the sentiment
Inks: Versafine Clair - Nocturne; Versafine - Crimson Red
Others: Polar Bear Pals Die-namics (My Favourite Things); Quickie Glue Pen; Fine Crystal Glitter; ZIG Clean Color Brush Markers

Monday, 15 November 2021

CAS Mix Up Challenge ........

Happy Monday ........

I hope your week has got off to a good start.
We've reached the middle of November already, so that means it's time for a quick reminder for this month's CAS Mix Up Challenge.  Don't forget, this will be your last chance to play along for this year ...... there's no challenge in December.

Loll is our host, and is rounding things up for 2021 with a fun stencil technique ..... Stencil Monoprinting


If you're new to this technique and need a few tips then check out the CAS Mix Up Blog where you'll find links to some useful videos.  You'll also find lots of fabulous inspiration and ideas from the rest of the Design Team on there too.

Stencil monoprinting is all about applying inks onto your stencils, spritzing with a little water, and then using the stencil to print your design onto your card.  
This gives you a negative image of your stencil ...... instead of applying colouring through your stencil, you're actually colouring the background ...... cool or what!

You can then use the whole design for a quick and easy card or, why not use the prints with your dies. 


My balloon is die cut from a stencil monoprint.

I inked up the stencil using Distress Inks direct from the ink pad, spritzed with water and then laid the stencil onto a piece of white cardstock.


Once it was dry I used a large oval die to cut the balloon.
I then attached this to my card slightly off the top edge, added a little bow to the bottom and hand doodled the rest of the string using a matching gel pen.

I added my sentiment in two halves ........ first another die cut coloured using the same Distress inks and heat embossed with a clear sparkle embossing powder


And then simply stamped the rest undernearth using a black ink.

To finish off the card I added a touch of sparkle to the letters on the balloon using a glue pen and fine crystal glitter.


Die cutting is also a great way of using up any of your stencil monoprints that didn't turn out quite as planned!!

The challenge is open until November 24th so there's still time to get your entries in.

Thank you to all of you who have played along with the challenges in 2021, it's always a pleasure to see you in the gallery, and I do hope you'll be back to join us in 2022. 

Thanks for popping by ...... enjoy the resrt of your day

Cheerio until next time .......  
 

Products:
Stencil: Jumbled letters stencil from my stash (sorry, not sure of the brand - no packaging!)
Inks: Distress Inks - Picked Raspberry, Wilted Violet; Versafine Clair - Nocturne (for the sentiment)
Other: Quickie Glue Pen; Fine crystal glitter, Purple Gel Pen, Happy Die (Winnie & Walter); Clear Sparkle Embossing Powder (WOW!); Large Oval Die from my stash