Showing posts with label Watercolouring with ZIG Markers. Show all posts

Sunday, 1 November 2020

Off the Edge for CAS Mix Up .........

Happy Sunday ........

Welcome to November!
It's the beginning of a new month again ......... I don't know about you but I think October flew by!  
Of course the first of the month means the start of new blog challenges ..... yeah!!

First one up for me is ........... the CAS Mix Up Challenge.  


It's our final challenge of 2020 (sigh!), and our host this month is ........ the lovely Bonnie.  
She's given us the theme Off the Edge and, it's a Watercolour challenge.  That means some form of watercolouring must be the main element of your design, and remember ..... keep things Clean and Simple (CAS)


Off the Edge is one of my favourite techniques, and I do use it quite a lot.  Just by taking a stamp. or even a stencil design, just off the edge of your card gives a bit of a different look 

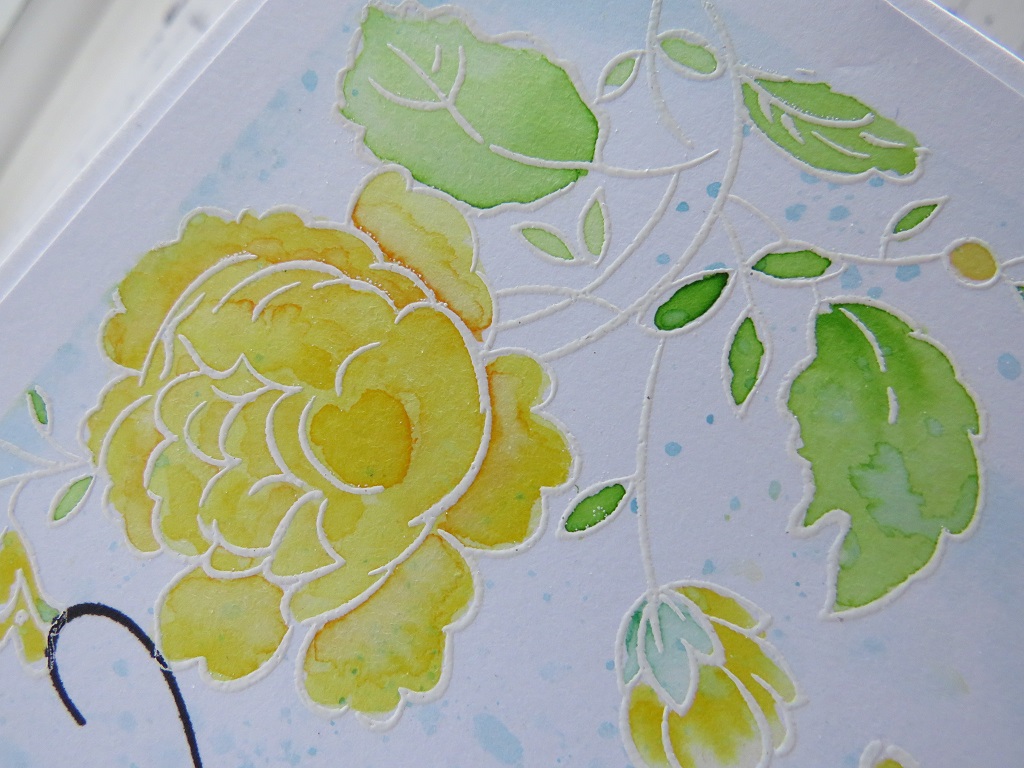
I used this pretty floral design from Unity stamps ....... stamped it with a black ink and then heat embossed with a clear powder.  I like to do this when I'm watercolouring stamped images, it helps to stop the inks bleeding over the lines


I used ZIG Clean Color Brush Markers in Autumnal shades, and a waterbrush to add the colour.  

I painted the petals first with clean water and then added a touch of colour from the pen and used my waterbrush to move the colour around, building up the depth gradually, and adding a touch of shading in places


I added some splatters of ink onto the background .....


 a simple sentiment ........


and a little bit of the same stamp off the edge at the bottom of my card


We have a fabulous Guest Designer this month ...... Michelle (I Card Everyone) is joining in the fun so be sure to pop by and say hello.  

The challenge runs until the 24th November and I'm looking forward to seeing all your Off the Edge designs in the gallery.

Thanks for popping by ...... enjoy the rest of your day.
We've been busy sorting out a couple of rooms and tidying cupboards, and the garage ....... getting rid of stuff we have no idea why we've been hanging on to.  I mean how many remote controls, for TV's we no longer have, do we need?!!!  And power cables ...... you yes, we had loads of those!  
Anyway we now need a trip to the recycling centre next week.

This is all because Lauren and the little man are moving back home for a while ...... long story but, it'll be nice having them here ........ so we need to make some space for all their stuff!
And in the process this has happened ........ ooops!
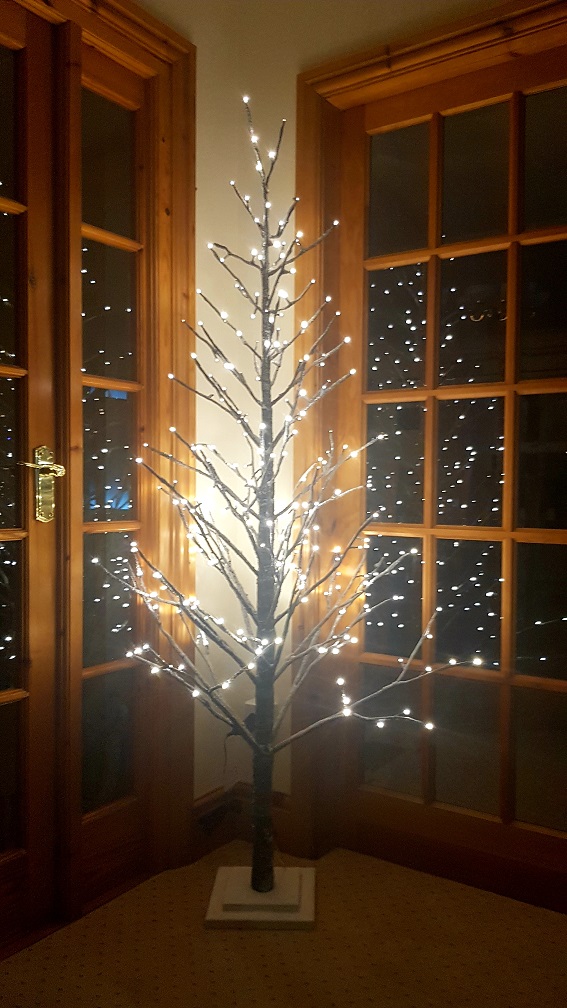

A little earlier than usual but,  at least I haven't started decorating the actual Christmas tree ........ yet!  Those decorations are in a different wardrobe!

Cheerio until next time .......


Products used:
Stamps: You are Forever Beautiful (Unity); happy snippets (Penny Black)
Inks: Versafine Clair - Nocturne, Delicata Metallic ink - Golden Glitz
Other: Clear Embossing Powder (WOW!); ZIG Clean Color Brush Markers, Water Brush

Saturday, 1 August 2020

Life is better in flip flops! ..........

Hello ....... it's me again

It's the first of August so, that means we have a brand new challenge over at CAS mix Up
This month our host is Loll, and we have a Watercolour challenge for you, with the theme .... Beach


I don't really do a lot of actual watercolouring ...... you know with paints and stuff!  I keep trying, the results are not brilliant though so I'll stick to what I know ....... watercolouring with my ZIG Markers!


Life is definitely better in flip flops .......... and even more fun if you wear them on the beach!

This little stamp and matching die set is soooo cute!
I stamped the flip flops using a waterproof ink and then rainbow coloured them all using my markers and a waterbrush ..... this was so quick to do


I stamped the sentiment, die cut that using a stitched circle die and attached it to the centre of a square card blank.


I die cut the flip flops and arranged them in pairs around the sentiment, attaching them using foam pads to add dimension ........


I think I need a rainbow of coloured flip flops .... how cute do these look!

I've spent the last few months wearing flip flops ....... and on the odd occasion when I did need shoes it took me a while to find a pair!!

We have a fabulous Guest Designer this month ....... Brenda (Inkspired to Stamp) is joining in the fun so please stop by and say Hello!

Thanks for popping by ..... enjoy the rest of your weekend.
We're spending ours at Ballamoar Campsite, up in Ballaugh.  Yes, we're out in the van again.
We had all weathers yesterday ..... beautiful blue skies, and warm sunshine when we arrived,  a little windy at times, and then an almighty downpour just as we were cooking dinner ..... outside!
I think the weather forecast called it a sharp shower!!!  Shower .... we were soaked.  Thankfully it didn't last long and we were able to continue cooking, although note to self ...... when its windy don't use your fancy table mats outside.  Especially when there are glasses of red wine on them.
You guessed it ...... hubby left the table with his plate, the wind got under the table mat and launched his wineglass across the table.  It hit my glass, knocked that over and both lots of red wine ended up all over me!!!!!  Oh well, that's one linen shirt I won't be wearing again, and my favourite pair of jeans don't look too good now either.  At least hubby thought it was funny!
We did have a nice sunset though ......


We also have a new toy to try out too.  We've bought a portable power source for the van, we're hoping this will help in allowing us to go 'off grid' for a few days ..... no electric hook up!!
We already have a solar panel. and two leisure batteries, and a gas supply so we're not too bad.  This just means we have an alternative to charge phones and laptops etc., we won't need to use the batteries in the van therefore we can remain self sufficient that little bit longer.


It's doing OK so far .... we had the little man with us yesterday and he's christened it the 'ugly box' which I thought was a bit harsh., but that's what it will be called in the future!
 OK ..... so it's not pretty to look at but it is useful.  It was definitely put through it's paces yesterday and it's hardly used any of its stored power ..... a good purchase I think!

Thanks for popping by ..... enjoy the rest of your day.
The weather's been great today, we've been out and about exploring and now its time to cook dinner back at the van, whilst watching the FA Cup Final.  It's Arsenal v Chelsea ...... come on boys you can do it!!!

Cheerio until next time ......


Products used:
Stamps: Flip Flop Life (Newton's Nook)
Inks: Versafine Clair - Nocturne (for the sentiment)
Others: ZIG Clean Color Brush Markers, Water brush; Flip Flop Life Die (Newton's Nook); Stitched Circle die (Stampin Up!)

Friday, 4 October 2019

It's the first Friday of the month .........

Happy Friday .......

It's almost the weekend ..... whoo hoo!!  I hope you've had a good week.
It's been a bit crazy around here but, only one more sleep then it's time for some R&R!  That's if I ever get the suitcases packed!  At the moment I've got my pj's, toiletries and a swimming costume in there, oh and my flip flops .... I suppose I could manage with those at a pinch!
We don't actually fly to Santorini until Sunday morning, but we're flying over and staying at Gatwick tomorrow night .......... I've still loads of time to pack!

Before all that though, it is the first Friday of the month so, that means it's time to launch October's Craft Stamper Take It Make It Challenge


As always there's no particular theme to follow ....... it's Anything Goes.  Anything that has actual rubber stamping on there that is .... so NO DIGIs please!
You can find all the guidelines for the challenge over on the Craft Stamper Blog, along with the details of this months prizes.  There's also some amazing projects on there from the Design Team
if you need a little inspiration to get you started.

Before I get full of the Christmas spirit and go all festive, which will no doubt happen once I get back from holiday (I hope anyway ...... I've still got all my Christmas cards to make!  I've got a pretty floral design using one of my favourite stamps at the moment from Altenew .....


I masked off around the edges of a piece of white card using low tack tape.  I stamped the pretty floral image onto two opposite corners (I do like working on the diagonal), and heat embossed in white.


I used my ZIG Markers to add colour to the flowers and quite a bit of water.  I like to paint the petals with water first, then add a touch of colour using the pens and then, add a little more water to my paintbrush to move the colour around giving a nice watercolour effect ..... great for adding shading too!


I used the acetate smooshing technique to add the background colour ....... smooshed Distress Ink onto a craft mat, spritzed with water and then used a piece of acetate to pick up the colour and then 'smoosh' it on to the background .....


All this, by the way, was done with the masking tape still in place around the edges.
Once everything was dry then the tape was removed, and I was left with this lovely framed look, without having to add another layer of card.

A simple stamped sentiment in the centre, and a few sparkly sequins finish it all off.


The challenge is open until Oct 23rd so there's plenty of time to get your entries in.
As always we have two fab prizes on offer ......
1.  The Design Winner ..... chosen by the DT.  Their winning project will be featured in the Craft Stamper magazine along with a Winner's Profile, and they will also be invited to be a Guest Designer on a future challenge.
2.   The Challenge Winner ..... randomly chosen, will receive this month's fabulous challenge prize
Two x Prima Redesign Moulds ...... In the Garden and Leafy Blossoms.  How pretty are those!


Happy stamping!

Thanks for popping by ...... have a lovely day and enjoy your weekend.
I'm off to finish up in the craft room and then try and get it tidy ..... if that fails I can always close the door and no-one will be any wiser!!
I'll also be back again later with one more blog challenge for you, then it's sun, sea and greek salads for me!!

Cheerio until then .......


Products Used:
Stamps: Handpicked Bouquet (Altenew); Special Sentiments (Penny Black)
Inks: Versamark ink; Versafine Clair - Nocturne; Distress Ink - Tumbled Glass
Others:White Detail Embossing Powder (WOW!); ZIG Clean Color Brush Markers; Low Tack Masking Tape; Sequins

Thursday, 15 August 2019

A midweek get together .......

Happy Thursday .......

The weekend is in sight ...... and the sun is shining, although it's not supposed to last. 
We were hoping to have a BBQ on Sunday, but if the forecast is right it's not going to happen!
Oh well!

I had a lovely day yesterday though ..... surrounded by my craft stash, and in the company of good friends.  And, there was cake of course!

It was workshop day.  Not usually held midweek, we all kept thinking it was Saturday ..... confused or what!!
We did complete two more pages on our calendars though ....... they're all coming along nicely.

There was a bit of everything yesterday ...... rubber stamping and heat embossing, watercolouring using ZIG Markers.


Pretty floral images in soft pastel shades ...... the embossing helps to keep the watercolour in place for a nice crisp finish


Not to worry though, if you do go over the edge ....... just add a little more water and make it part of the background, for a more softer look


And used the acetate smooshing technique to add colour onto the backgrounds ....... always fun to do, and very effective.


We used large sentiment stamps ...... they make great focal points and they were perfect for these quick and easy calendar pages


Smooshed Distress Inks again for the backgrounds, a little bolder this time though, with a touch of metallic gold in there.  The hardest part of these pages was, choosing which colours to use .....


We did a bit of Ink splattering, and a touch of doodling around the sentiments using a glue pen and glitter .....


Black fine liners, gold gel pens, enamel accents or crystal glaze ....... I even added a touch more colour to the little banners on the bottom using the Distress inks again


I think we're going Autumnal for the next lot of pages.  Rich, warm shades ........ with trees and leaves perhaps.  Hmmm ...... better get my thinking cap on!

Thanks for popping by ...... enjoy the rest of your day.

Cheerio until next time ......


Products used:
Stamps: Hello Lovely (Concord & 9th); Sentiment stamps from Inkylicious; Be the Reason - Lil'inker stamps
Inks: Versafine; Distress Inks -  Stormy Sky, Shaded Lilac, Picked Rapsberry, Mustard Seed, Spiced Marmalade,Peacock Feathers, Twisted Citron,Wilted Violet; Versafine Clair - Nocturne; Delicata Golden Glitz
Others:  A4 Calendar (PaperMill Direct); ZIG Clean Color Brush Markers; Acetate for smooshing, Gold & white gel pens, Stardust Glitter pen, Fine crystal glitter, Enamel Accents, Crystal Glaze

Tuesday, 2 July 2019

It's a special day today ......

Happy Tuesday ......

Can you believe we're half way through the year already!!
July's not a bad month though.  It's hubby's birthday coming up, our wedding anniversary at the end of the month and ..... we're off on holiday on Friday ....... whoo hoo!!  Lets hope the sun keeps shining.

But, enough about all that ..... today's a special day for a very special lady in Blogland.  The lovely Darnell (djkardkreations.com) is celebrating her birthday ........

Happy Birthday to you
Happy Birthday Darnell
Happy Birthday to YOU!!

The ladies over on the CAS Watercolour Challenge are marking the occasion with a special surprise event on the launch of this month's challenge. 


As you can see, the theme is ...... Bouquet of Flowers.  
Now come on ladies ......  we all love to receive a beautiful bouquet on our birthday ..... or any day for that matter!   So ...... I'm joining in the fun and wishing Darnell a very, very Happy Birthday, with a bouquet of pretty pink roses


These have all been stamped and heat embossed in gold, and then watercoloured using my ZIG Markers


I then fussy cut them all, and arranged them on the front of my cardbank.  The leaves have been glued directly onto the card, and the roses attached with foam pads, to add a little dimension.


I added the sentiments across the centre .....


And finished with a few splatters of ink and some dots of glitter glue ...... gotta have some sparkle for a birthday


I hope you have a fabulous day Darnell ........ sending lots of Birthday hugs  xx

Hubby and I thought we would also celebrate Darnell's birthday, so we off out this evening. 
Also the fact that there's nothing in the fridge that I fancy cooking means that we're going Thai tonight ..... yum!
Well, there's no point in me doing a load of shopping is there, we're going away on holiday on Friday morning!

Thanks for popping by ...... enjoy the rest of your day.

Cheerio until next time .......


Products used:
Stamps: Pure Florals - Rose (Uniko stamps); Simple Strips (Taylored Expressions)
Inks: Versamark; Delicata Golden Glitz;
Others: Gold Embossing Powder (WOW!); ZIG Clean Color Brush Markers, Glitter Drops (Nuvo)

Wednesday, 19 June 2019

Time for a Twofer .... which turned into a Four-fer!!!

Happy Wednesday ........

This week is flying by ....... I've been busy in the craft room though.  It's almost time for our annual family holiday so I'm trying to get organised!!
Two weeks on Friday you'll find me on a boat on the Norfolk Broads.  Well actually two weeks on Saturday ..... two weeks on Friday we'll be on a slightly bigger boat, sailing across to the UK, but more about all that some other time.

Last week was workshop weekend.   We took a break from the calendars and had a great time creating cards with Jennifer McQuire's Floating Die Cut Frames technique.
I must say I am hooked on this at the moment, and I think a few more ladies are after last Saturday.

It was a busy day, with lots of stamping, a whole load of colouring and plenty die cutting of course.
We did find time for cake though .....


I used Altenew stamp sets that had matching dies, and ZIG markers for my all of my colouring

I even did a little bit of heat embossing


Stamped sentiments to finish off ......


And a few little gold ink splatters here and there.


I love how you get a twofer everytime .......


Change things up and use different shapes to create the apertures ...... this was my favourite pair from the day


I love this stamp set ...... it's Ruffled Flowers from Altenew,  and of course the matching dies make it so easy to cut them all out


I added a die cut sentiment on this one ......


And of course, another pretty little twofer


In fact ....... from this set of die cuts I actually made FOUR cards, that's 2 sets of twofers!!
These were made from all the cut off pieces from around the edge of the original panel ...... they  just too pretty to throw away


I added the little bees so that I can link these two cards up to this month's Twofer Card Challenge ......


First up ..... a little Thank You card


Smaller than I usually make ..... this is 6x4 inches, but I was using up leftovers.

I arranged the left over die cuts over a panel of white card cut to the size of my card front.  I then covered them with some Glad Press & Seal ...... if you're not familiar with this it's a bit like cling film, but sticky. and then
I ran this through my Big Shot to die cut the centre panel.  The Press & Seal holds everything in place ....... it's fab!  Check out Jennifer McGuire's video it explains everything.

Once you've die cut the centre out, remove the white card from the back, turn over the remaining piece of Press & Seal and put foam pads on the back of all the die cut pieces making up the frame. This then goes onto the front of your card ..... the Press & Seal holds everything in the right place .... clever eh!


Once the die cuts are stuck down, carefully peel off the Press & Seal, and your die cuts will look as if they are floating ...... I love it!!!
The little bees are from a Stampin Up! set called Dragonfly Dreams ..... I'm not sure if it's still a current set.

And here's the twofer ......  a Birthday card made using that die cut centre panel


A simple frame around the edge, and a sentiment banner to finish off


You have to give this technique a go ..... it's so much fun!

Thanks for popping by ..... enjoy the rest of your day.
It's lovely here today, the sun is shining and it's warming up nicely.  It's about time though, it is June afterall!
No sitting in the sun just yet though, it's back to the craft room for me and I'm about to go all festive!
Don't worry, its for a magazine later in the year so I'm not going all Ho! Ho! Ho! just yet!!!

Cheerio until next time .......


Products used:
Stamps: Ruffled Flowers, Leaf Canopy (both with matching dies ) Altenew; Dragonfly Dreams (SU) Penny Black sentiment stamps; Birthday Messages (Mama Elephant)
Inks: Versafine Clair - Nocture; Versamark; Delicata Golden Glitz;
Others: Hello Die (Altenew); Nestabilities die - circles, rectangles, ovals: Gold Embossing Powder (WOW!); ZIG Clean Color Brush Markers; Pearl Drops (Nuvo); Small crystal gemstones