Friday 19 June 2020

It's the end of the week already ........

Good morning! ......

Happy Friday to you.  I'm up nice and early this morning, we've got the little man coming today. 
It's his last day at home before all the children are back in school on Monday ...... not sure if he's happy about that or not.  I know his Mum's looking forward to it!

Just a quick reminder that Sweet Poppy Stencils are back on Hochanda today ..... 10am this morning (better get a move on for that show!), and then again at 2pm this afternoon.
Lucy will be showing lots of tips and techniques on using the whole of the Sweet Poppy range.  There's back in stock items, some favourite stencils and, there's a couple of new designs ........ it's time to get a little festive!

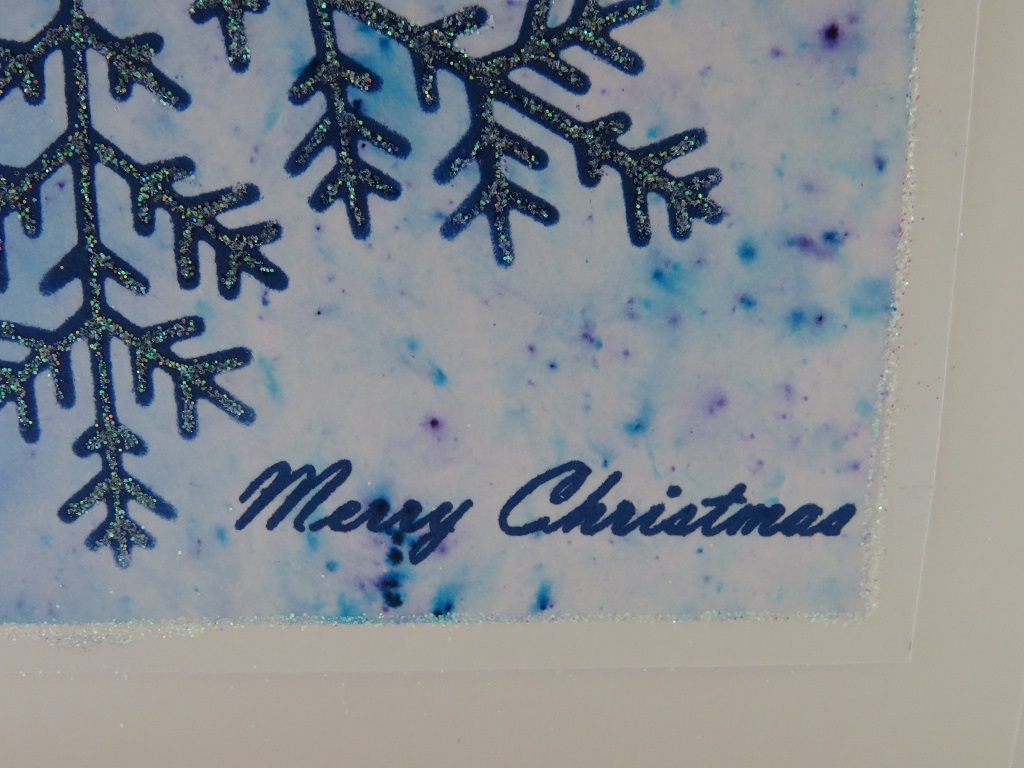
If you read yesterday's Blog post you'll have seen the pretty new Snowflake design ....... you can never have too many snowflakes! 

Today, it's all about the new Lamp Post ...... how pretty is this!


I simply stenciled the lamp post onto my card using a black ink, and then created the winter scene behind.

A touch of Distress Ink blending around the edges on the top part of the card and a few splatters of water to create the snowy sky ......


A simple piece of copier paper cut to create a mask for the hillside,  and a few festive trees stamped along the edge


A little more Distress Ink to add the glow from the lamp ......


And a little touch of glitter here and there to add some sparkle .....


I finished off with a sentiment and a sprinkling of Chunky White Embossing Powder


Whenever I add this chunky EP I always just sprinkle it on the top of my designs and then gently heat it from UNDERNEATH.  This way the powder doesn't blow all over the place, and once I see it start to melt I take the heat away so that it doesn't melt completely flat.

If you don't fancy making a whole winter scene, the lamp post looks great on it's own, for really quick and easy cards .......


Stenciled with black ink and just a touch of colour ........


Add a festive sentiment and some of that chunky white embossing power .....


Even add a bit of dimension by layering up the pretty bow


How about more than one lamp post ........ I think this is my favourite


You don't always have to use all of the stencil design ....... and I like to take the stencil off the edge of my cards


As before, stenciled in black, a touch of colour for the glow and a bit of festive sparkle


All finished off with a sentiment.


There'll be lots more ideas and inspiration on the shows from Lucy and the rest of the Design Team ..... we've all been very busy!
Enjoy!

Thanks for popping by ...... enjoy the rest of your day and have a lovely weekend.
I'm off to make a quick coffee and then I'll have to do a deal with the little man for the TV remote!

Cheerio until next time .......


Products used:
Stencils: Lamp Post (Sweet Poppy);
Inks: Versafine Clair - Nocturne; Shades of Blue Distress Inks; Delicata Metallic ink - Golden Glitz
Stamps: Christmas Trees (Clarity Stamps); Sentiments are from Christmas Blessings and Joy & Peace stamp sets (Sweet Poppy)
Others: Fine crystal glitters (Sweet Poppy); Gold Embossing Powder (WOW!); Chunky white Embossing Powder (Stampendous)

Thursday 18 June 2020

Sweet Poppy Stencils .......

Happy Thursday ........

This week is flying by.  I hope you're having a good one.

We had a bit of a Walmsley Wednesday last night ...... good food, delivered from our favourite restaurant (who by the way are opening again on the 29th of this month ..... whoo hoo!!! BIGGER than before I believe, which is great news) There was wine involved, and a fun group video chat with the kids!  Great night ...... not so great morning!   

The lovely Lucy and Sweet Poppy Stencils are back on Hochanda tomorrow ......... Friday 19th June at 10am and 2pm.
There'll be some back in stocks, some old favourites and of course some brand new stencil designs.
There'll be lots of tips and techniques, and more from the Sweet Poppy range.
And, just in case you're starting to get that festive feeling then you might just find something for this years Christmas designs ...... Ho! Ho! Ho!

Here's a quick look at a few ideas using the brand new Christmas stencils .......
Warning! ..... lots of photos, you might want to grab a cuppa


There's always room in our stash for a pretty new Snowflake and this one is gorgeous. Look at the detail ........


Don't tell anyone but ..... I think there's a matching die coming very soon which makes it even better.
It's a great size, making it perfect for quick and easy designs.

For this one I applied Versamark ink through the stencil onto a piece of teal coloured cardstock and then heat embossed with a clear powder.


I spritzed the card using Distress Oxide Sprays ....... I used a little bit of Tumbled Glass, Evergreen Bough and my new favourite Distress colour .... Speckled Egg.


Once this was dry I placed the card in between two pieces of copier paper and ironed over the snowflake with a warm iron ........ NOT a steam iron.  This melts the embossing powder, the copier paper soaks it up removing it from the coloured cardstock. 
The result is a pretty image of the snowflake which is now flat, and has this sort of soft suede look to it

I added a touch of sparkle using fine crystal glitter, a few splatters of white ink and heat embossed my sentiment in silver


Another easy way to create backgrounds is using Brushos ...... little pots of pigment powders that when spritzed with water give gorgeous effects, that are different every time .......


I've used the stencil over the top, with a blue Versafine Clair ink pad


A touch of glitter and a simple sentiment to finish off


What about Kraft card ........ I love the look of white on Kraft


The snowflake heat embossed in white ......


Couldn't resist adding the glitter again.

I used white cardstock on the bottom, cut with some stitched edge dies to create a space for my sentiment.


And finished with some white paint splatters


Use the snowflake to create your gift tags too ......


Similar process to the card above except, I used Chunky White Embossing Powder for the falling snow ......


and I added a touch of gold embossing powder around the edges


Phew!  That's a lot of photos.  I think I'll leave it there for now and share the Lamp Post designs with you later.

Thanks for popping by ..... enjoy the rest of your day.
Time for another coffee I think!

Cheerio until next time .........


Products used:
Stencils: Snowflake (Sweet Poppy Stencils)
Inks: Versamark; Distress Oxide Sprays; Versafine Clair - Blue Belle, Nocturne; Distress Inks; Hero Arts Unicorn White Pigment ink
Stamps: Joy & Peace, Noel stamp sets (Sweet Poppy)
Others: Clear, White and Gold Embossing Powders (WOW!); Quickie Glue Pen; Crystalina, Red, Glitter (Sweet Poppy); Brusho Powders; White paint (for the splatters); Chunky White Embossing Powder

Monday 15 June 2020

Embossed Vellum for the CAS Mix Up challenge ........

Happy Monday .......

It's time for a quick reminder about this months CAS Mix Up challenge ....... if you haven't played along yet don't worry there's still time to join in the fun.

Susan is our host this month, and wants us to use Embossed Vellum on our cards.


Vellum is something I don't use that often but when I do I love the effects you can get, especially when you use an embossing folder.


Simply choose your design, place the vellum in the EF and run it through your machine.  The results are so pretty, sort of a Pergamano look ......... just a lot easier to do.


I used a floral design embossing folder, and then I added in a touch of extra detail to the flowers and leaves.  Working on the back of the embossed design, I used a very small ball tool to add some 'whitework' to the petals.
You do have to be a little careful doing this, not too much pressure or you'll tear the vellum where its been embossed.

The background is a piece of card I found in my bits box ...... looks like a bit of emboss resist with a script stamp and some Brushos.  You can just about make out the design showing through the vellum.

I then layered the two pieces together and added a simple black frame around the edge ....... 1. to give a nice finished look to the embossed panel and 2. to hide the adhesive underneath!


A simple sentiment stamped underneath was all it needed to finish off.

The challenge is open until June 24th so you've just over a week left to play along.
Remember to keep your designs CAS, follow the theme (Embossed Vellum), and you must also include some rubber stamping and ONE OTHER Mixed Media Element on your card ...... mine was Brushos.

Thanks for popping by ..... enjoy the rest of your day.

We've had major changes today here in the Isle of Man ...... no more social distancing!!!
It's been over three weeks since we've had any new cases of COVID-19 on the island so things are getting back to our 'new' normal, which is great news. 
Shops etc., are opening, restaurants and bars are slowly coming back to life, and kids are being phased back into school.  Our borders are still well and truly closed though, and anyone returning to the island must still quarantine for 14 days. We're not saying the island is virus free but .... we're getting there! 
I must say I'm in no rush to find myself in crowds of people ........ being surrounded by my family and close friends is enough for me at the moment.

Stay safe everyone.

Cheerio until next time ......


Products used:
Stamps: Tiny Words Birthday (Mama Elephant); Script stamp used on the background
Inks: Versafine Clair - Nocturne (for the sentiment); Versamark (for the emboss resist background)
Others: Sizzix Embossing Folder - Botanicals; Clear Embossing Power used on the background; Brusho's - a pink and a yellow shade

Sunday 14 June 2020

Leave a little sparkle .........

Happy Sunday evening .......

I hope you've had a nice weekend.

It's time to launch the latest Perfectly CAS Challenge.  You know the one ...... CAS designs using just one third (or less) of the space on your card ..... easy!
Or maybe not.  Perhaps you struggle with Clean and Simple (CAS) designs ....... can't quite keep to the 'less is more' or, maybe all that white space is just a little too scary! Well, if you keep to the one third rule you really can't go wrong.  Check out the Perfectly CAS blog for lots of inspiration and fabulous CAS designs.

The theme for this challenge is ...... Sparkle


I do like a touch of sparkle ........whether it's from glitters or pretty gemstones, sparkly inks or even embossing powders.

I also have a thing for large sentiment stamps ..... perfect for creating CAS designs.


I simply stamped the words directly onto the front of my card using a gold metallic ink and keeping to that centre third of the card


I then sprinkled a sparkly gold embossing powder over the top and heat set ...... so pretty!


A few tiny gemstones and a splattering of gold and silver ink onto the background and I'm done ..... simple!


How will you add your sparkle?


A NOTE FOR ALL YOU PERFECTLY CAS FANS ......

Perfectly CAS will be taking a break after this challenge, but don't worry we'll be back again in the New Year.
Here's a little note from the lady that does all the hard work ........

A QUICK NOTE TO OUR REGULARS

We are going on hiatus after our June Challenges. After 8 years of running challenge blogs, I need a break :) So, all my challenge blogs will be having a 6 month holiday at the close of the June challenges. Thank you for your understanding!

Kylie


We've been out in the motorhome again this weekend ..... down in the south of the island this time.  We've had a lovely, quiet weekend ....... well, apart from when the family came to visit on Saturday!! We've been at a place called Glendown Farm Campsite, inbetween Port St. Mary and Port Erin.


We arrived on Thursday afternoon so we've had three nights there. The weather wasn't great but it didn't spoil our fun.  It rained Thursday evening and some of Friday ....... but we did manage a walk into Port Erin once the rain stopped (I needed some new jigsaws!)
Saturday was completely different though ..... it was glorious! 
As I said, the family came to visit us .... to eat mainly!  And I actually did an online journaling workshop with Tracy Scott in the morning, in the van!!


I didn't make any mess either, which was a bonus!

Last week wasn't great so it was nice to get away for a while and just chill for a few days.
I won't go into too much detail but ...... my father-in-law passed away on Wednesday.  We knew it was going to happen at some point but, that doesn't prepare you for when the call actually comes. And because of all the travel restrictions etc., at the moment we haven't been able to get across to the UK yet.  Hopefully we can sort everything next week and be there for the funeral.

Thanks for popping by ..... enjoy the rest of your day.

Cheerio until next time ......


Products used:
Stamps: Leave a Little Sparkle (STAMPlorations)
Inks: Golden Glitz, Silvery Shimmer Metallic Inks (Delicata)
Others: Unicorn Magic Embossing Powder (WOW!) 

Thursday 4 June 2020

It's very quiet over here .......

Happy Thursday ........

I hope you're all well.
We would have been in Florida this week if the world hadn't been in lockdown, and ...... our little island would have been getting busier by the day with the IOM TT.
It would have been Practice Week this week ....... the roar of the bikes and the atmosphere would have been building nicely but, there'll be none of this going on unfortunately


Instead, it's all very quiet ...... no visitors, and no extra motorbikes!   But at least the sun was shining.


I say was, because it looks like the glorious weather is about to change ........ just in time for the weekend! 
Of course the weather was going to change ..... as of this week restaurants and cafes on the island have been allowed to open up and serve food ...... al fresco! 
Not everywhere is preparing open, but those with outdoor areas are getting ready to serve food and drink again ........ outside!  It's nice to see local businesses getting back to some sort of normality.
Oh .... and our McDonalds (we only have the one on island) caused absolute chaos yesterday when they opened their drive thru.  I believe there were queues of upto two hours, and longer,  just to get a burger!  It would have been easier to go to the butchers, buy the meat and make your own!

The islands restrictions continue to lift slowly ..... we haven't had any new cases of the virus since May 20th, and it was announced yesterday that we currently have no active cases on the island ..... yeah!! 
We're still being very careful though .... our borders remain closed, and there's no large gatherings allowed ...... although I don't think the campsite we were on at the weekend were sticking to that particular regulation ....... it was VERY BUSY!!!

We were in Kirk Michael this time, at Glen Wyllin.  A lovely big campsite, close to the sea,  and the weather was fantastic.

We watched the sunset on the beach ........


 Lauren and the little man joined us for the afternoon ......


And I did a little bit of outdoor cooking ......


Day 2 and the whole family joined us ......


So we spent the day at the beach ......


I even got my feet wet ......


No camping in the van this weekend as the weather's not looking too great.  Hopefully I'll get to spend some time in the craft room instead.

Thanks for popping by ........ enjoy the rest of your day

Cheerio until next time .......