Showing posts with label glitter. Show all posts

Sunday, 25 September 2022

Back with a little sparkle for the Simply Sweet Poppy Stencils Challenge ........

Hello again ...... I'm back!

Happy Sunday!  I hope you're enjoying your weekend.

Well, it's been a while ....... can you believe it's almost 6 weeks since I blogged!  And almost as long since I've been in my craft room.  
I don't think I've ever taken a break for so long before.  It's actually been really nice ......  no pressure, and no deadlines to work to.  I didn't even pick up a craft magazine.  I did take a small craft bag with me in the motorhome but, I can't say I did much with that either.  

But, I need to get back in the craft room at some point so, this weekend I've had a good old sort out and a tidy up, re-arranged my desks and now I'm raring to go ..... ish!
I've lots of new goodies to play with, DT work to be getting on with, and of course there's all those festive makes to get started on ........ only 13 weeks until Christmas,  oh my! the tree will be going up next!

Anyhow ........ the end of September is approaching fast, so that means there's only a few days left to play along with this month's Simply Sweet Poppy Stencils Facebook Challenge.
The theme this month is ........ Sparkle is My Favourite Colour
Who doesn't love a touch of sparkle, and the good thing is, it really can be any colour you like! Christmas cards just wouldn't be the same without some sparkle and shine now would they.


Not sure the sparkle comes across in this picture ...... glitter is a real nightmare to photograph!

I inked through the gorgeous Sweet Poppy Snowflake Bauble Trio stencil using Distress Inks ....... Stormy Sky, Chipped Sapphire and Dusty Concord


Then I used a Quickie Glue Pen over the top of each snowflake, and sprinkled with fine crystal glitter.
Like I said, hard to photograph but so pretty when the light catches in real life. 
Using the clear crystal glitter allows the colour of the inks underneath to show through but, you could use coloured glitters on top if you wanted too for a more intense colour.


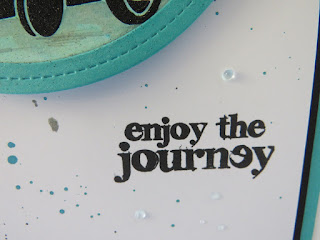
I added a few ink splatters on to the background using the same colours of Distress, and then heat embossed my sentiment on the bottom.  


Another quick and easy design, this time using the pretty Snowflake Aperture Circle stencil, again with Distress Inks (Stormy Sky & Chipped Sapphire) 


The aperture stencils are so useful, perfect for creating detailed frames on your cards 


(sshh ..... don't tell anyone ..... have you spotted the sneaky peek of a brand new design coming soon? You are going to love this new stencil!)

I inked the snowflake circle with my Distress inks then, cut a simple mask from a piece of copier paper to create the hillside for my winter scene in the centre.  
With the mask still in place I used the gorgeous, brand new Fir Tree stencil  to create the forest in the background, and then I used Versamark ink through the design and heat embossed the centre tree over the top


To finish off I used fine crystal glitter to hightlight the snowflakes in the circle and added a little touch to the tree

Sparkle isn't just for Christmas cards though, a touch of glitter makes any card extra special ......


I used Distress Ink Reinkers to colour the background, applied with a paintbrush and lots of water onto watercolour card  (Forest Moss, Carved Pumkin, Spiced Marmalade & Scattered Straw)


Once it was all dry I used the Blissful stencil over the top with Black ink (Versafine Clair - Nocturne)
and then used a fine tip glue pen and glitter to highlight along the tree branches


A few spatters of gold ink onto the background and a simple sentiment on the bottom ...... job done!


I think I'm ready for Autumn now ...... the sumer has been amazing but, it's time for cosy nights in, hot chocolate and snuggly woolies!

The challenge is open until the 29th of the month so you need to be quick if you want to be in with a chance of winning this months prize.
Check out the rules below and ........ Happy stenciling!


The last few weeks have flown by ........ We had our longest trip in the motorhome including a music festival (more about all that later).  There's been the usual family gatherings, with a few birthday celebrations along the way, including Arthur, who was one ...... now that year's gone fast!  And, as I'm writing this blog post I've heard that he's taken his first proper steps this morning ....... yeah!!!  


It was also Alex's birthday, he was 12.  He's also started secondary school which is scary ...... doesn't seem five minutes since he was taking his first steps!!


We've also had Arthur's baptism,  and I've had Covid ..... again!!

Let's hope October is a little quieter!

Thanks for popping by ....... enjoy the rest of your weekend.

Cheerio until next time ........  


Tuesday, 20 August 2019

Merry and Bright ........

Happy Tuesday ........

OK ...... next time I have the bright idea of changing my craft room around, will someone please stop me!!!!  I only wanted to move the tables and now it's turning into a major operation.  I've even been looking at the possibility of new furniture!!

Of course to move the tables around, everything had to come off them. Not a problem, there was plenty of room to put it, all organised, on the floor and still be able to move around.  That was the easy bit!! 
Putting it all back once the tables had been moved, now that's a different matter.
As I was moving everything I thought I would tidy/clear out as I was going along ...... made sense.
After a few deep breaths some old, very dry ink pads finally went in the bin (gasp!), my box of card bits had a clear out (oh no! I'll probably need that tiny piece of designer paper now ..... after all, it had only been in there FOR EVER!!) and I'm now having a re-think about my die storage!  Well .... that's the rest of my week sorted!

Before all the chaos started I did find time to play with some of the NBUS (Never Before Used Stuff!) that has been mounting up recently in the craft room. Some of which is perfect for playing along with this month's CAS Christmas challenge ......


I must confess Christmas cards are not high on my to do list at the moment ......... I've got a holiday to go on yet! 
However, this pretty die from Crafter's Companion did catch my eye ...... it's called Decadent Snowflakes from the Gemini Create-a-Card range ........ isn't it pretty! Great for quick and easy festive designs too!


It's a beautifully detailed panel ..... which by the way, cut's like a dream through my Gemini machine.

I simply cut it from plain white card stock, trimmed it around the edge and then layerd it over a piece of card I'd found in my bits box.  I think it was possibly a mop up piece, coloured with Brusho ..... just what I was looking for.


I used a glue pen over each of the snowflakes, and then sprinkled with fine crystal glitter ..... it took a little bit of time to do, but it was worth it, it's so sparkly in real life!


A simple sentiment is all it needed to finish off


Stamped in a blue shimmer ink, and then heat embossed with a sparkly powder.

Well that's one Christmas card done!

Thank you for popping by ...... have a lovely day.
It's back to the 'tidying up' for me ...... well, I'm actually going to be packing my craft bag ready for tomorrow.  One of my lovely crafty friends had a birthday yesterday ....... Happy Belated Birthday Carol! 
We're keeping the celebrations going with a crafty get together/birthday bash tomorrow, and we've decided it's about time we had a play with our Gelli Plates which should be fun.  And of course, there will be cake!
Now I just need to figure out what I need to take with me.

You can also find me on the Uniko Blog today with a little DT inspiration.  Nothing festive going on there ....... although I suppose it could be, in different colours!   Why not pop over and take a look.


Cheerio until next time ......


Products used:
Stamps: Merry & Bright was a freebie with a magazine some time ago
Inks: Delicata pigment ink pad - Sapphire Blue; 
Other: Decadent Snowflakes Create-a-Card Die (Crafters Companion); Neutral Ultra Shimmer Embossing Powder - WOW!; Quickie Glue Pen; Ultrafine Crystal Glitter

Saturday, 16 February 2019

Happy Weekend! .....

Happy weekend .....

I hope you're having a good one.
I've been a bit quiet on here the last few days ...... I've been getting my breath back after all the fun of the Uniko Birthday celebrations.  Everything is good though ..... busy, busy, busy as usual. 
I got a sudden urge to Spring clean everything at the beginning of the week (what's that all about!!)
The house is absolutely sparkling!  Windows done, floors done, woodwork polished.  A lovely new bed in the spare room ready for our visitors in April,  and the hot tub is all dusted off and ready to be refilled!  Even the craft room is tidy!!
I also bought myself a new breadmaker, just a small one.  The kitchen has been filled with the smell of freshly baked bread nearly every day, which is lovely ....... the results aren't bad either!

I have been in the craft room too this week ....... doing a little bit of this and that. 
I'm going to start my workshops again I think.  Thanks to the lovely Eileen Godwin I'm feeling all inspired.  She did a fab Facebook video, decorating a calendar page and I so want to do one of my own. 
So, I ran it by my crafty ladies, and Eileen of course, and they all want to create their own calendars so a workshop it is ...... watch this space!

I was also busy with some Sweet Poppy Stencil stuff.  Lucy asked me to re-create one of my previous samples for her .......


Slightly different from the original one, but still pretty.
It's the Change in the Season's stencil on Kraft card, lots of white ink and a touch of sparkle.

Whilst I was waiting for the stencil paste to dry on this one,  I also had a little play with some of the new designs that were still out on my desk.  These will be on Hochanda at the beginning of March.

The Steam Train ...... great for masculinen designs


This is a fab stencil .... a nice large design but, you don't always have to make big cards with the larger stencils.  If you're happier creating something smaller, just use part of the design .....


This is actually the result of a 'happy accident' ...... I never throw anything away if I can help it.
I'd used the stencil previously with the black paste and black glitter on the top, on a piece of cardstock coloured with Brushos but ...... I didn't let the paste dry properly!
As you can imagine the smudge wasn't easy to hide (ooops!) ....... so I just cut it off!


There was still enough of that fab train left though, to die cut using one of my circle dies


You can see there's a couple of bits that overlap the actual circle ......


To do this I first placed the die where I wanted it to be and drew a fine line along the edges of the metal die, either side of the bit that was going to overlap. 
I then fussy cut around the sections of the train on the outside of the lines.  I put the cutting die back in place with the fussy cut sections on the top, and then ran the die through the Big Shot as usual.  The result was a die cut circle with the overlapping bits still attached ..... hope that makes sense!!

A simple sentiment and a co-ordinating frame .......


And a few splatters of matching ink to finish off


The card above is my 'go to' card size, which is 7x5 inches. 
Here's the same stencil, in full this time, on a large square card


Black paste again, this time with sections highlighted using a Liquid Chrome marker


Has this been fussy cut ...... no.  It's a sneaky peek at a matching die that will be available for the Steam Train stencil .... how cool is that!
It doesn't cut the steam cloud ...... so I've used my sentiment in it's place.


Another of the new designs is the pretty Floral Mandala ....


Used here with Distress Oxide inks .....


a little touch of Stardust Gel Pen to add a bit of shimmer around the edge


And then a hidden sentiment in the middle, die cut using one of the new Sweet Poppy word dies that are coming soon


It also looks great when used with the stencil pastes too .....


I think the date for the Sweet Poppy shows on HOCHANDA is March 6th (the day after my birthday!) at 12pm and 4pm.
New products as well as some favourites, and lots of tips and techniques from the lovely Lucy.

Thanks for popping by ..... enjoy the rest of your weekend.

Cheerio until next time .....

Wednesday, 14 November 2018

Guest Designer of this year's 12 Tags of Christmas with Loll and Friends

Happy Wednesday evening ......

Yes it's me again!   As you all probably know by now, and if you don't then where have you been?!!!! ....... it's the time of year when the lovely Loll Thompson hosts her 12 Tags of Christmas with Loll & Friends


It's year number 5 for this fun event, but sadly, this is the final one.
So, whether you're a regular to this event or, you've never played along before, this year is your last chance!

We're at Day 10, and there's been some amazing tags so far ..... so much gorgeous inspiration. Check out the blog ......  I promise you, you won't be disappointed.

As you know I've been playing along all week, but today, I'm thrilled to say it's my turn to be Guest Designer ...... thanks for having me again!


When Loll invited me to share in the event, this little guy had just appeared in the craft room. 
He's called Bundled Up ..... he's from Penny Black ....... and he's just sooo cute!!! I love him .... can you tell!


I've stamped him here onto Kraft cardstock using Distress Oxide inks and I think he looks fab!


I did use my MISTI,  stamped one colour at a time,  and built up the image gradually. 
So, I stamped the hat and his eyes with Black Soot, added the holly and the berries using Peeled Paint and Festive Berries, his carrot nose with Carved Pumpkin,  then I did the scarf with the red again ..... you see what I mean.

Once I was happy with the depth of colour, a quick blast with the old heat tool to make sure the ink was dry, and then I went over the top of the inks using Prismacolor Pencils in the same shades, to give a more solid, detailed look


To colour his face and body I used PaperArtsy's Snowflake Fresco Finish Acrylic Paint mixed with a little water, and finished with a white Prisma pencil over the top.

I heat embossed the sentiment across the bottom ......


A little bit of white ink dusted around the edges of the tag, lots of chunky white embossing powder to give the snowy effect, and some crystal glitter for a little icy sparkle to finish.

 
The festive red berries are Nuvo drops ......

I've had so much fun playing along with all the 12 tags events ..... thank you again Loll, for having me as one of your Guest Designers ..... it's been an absolute pleasure.

I do hope you can join in the fun, and make this final event the best one ever!
Full details, and a list of prizes up for grabs can be found over on Loll's Blog.

There's still lots of time to play along.  I know we're nearly at the end of the 12 Days of inspiration tags but, the actual link where you can add your own tag is open until November 23rd.

Happy stamping!

Thanks for popping by ..... enjoy the rest of your evening.

Cheerio until next time .....

Saturday, 27 October 2018

Introducing ...... Scandinavian Christmas & Christmas Folk Snowflake stencils along with NEW Simply Said Blocks - Christmas

Happy weekend! ......

More NEW products from the Uniko range to tempt you with this morning.  It's stencils this time, two brand new designs ....... Scandinavian Christmas, a pretty design filled with traditional Christmas images.  Use it whole to create a fabulous background, or just use part of it to decorate baubles or Christmas trees for example (the poinsettia on here is just gorgeous!)

We've also got the beautiful Christmas Folk Snowflake ...... another pretty all over design that can be used as is, or chop it down and just use part of it.

There's also a great little sentiment stamp set ....... Simply Said Blocks - Christmas.  I love this range, they are so useful, and this new set is full of festive sayings, perfect for all those Christmas cards.


Now for some inspiration .......  I don't know about you but, not only did I see a snowflake design in the new Christmas Folk Snowflake stencil, but I saw a pretty poinsettia too.  It's great when products have multiple uses ...... it's what I call value for money!


I used white stencil paste through the design and sprinkled over with red glitter whilst the paste was still wet.


I cut it down to fit on the front of a 6x6 inch card blank (with a bit of matting and layering) and I added a dot of gold glitter glue to each of the 'poinsettia' centres.


One of the Simply Said Blocks stamped in gold ink was perfect for my sentiment, and I added a little twist of gold thread behind.

Scandinavian Christmas .........


Just look at all those cute little images ..... add a touch of sparkle to them with some crystal glitter


and of course, those Simply Said Blocks go so well too .......


Thanks for popping by today .... I hope you're enjoying seeing the new release.  Got any favourites yet?

There's still more to come ........ check out the Uniko Blog each day until the big release on Tuesday next week. You'll find links to all the Design Team blogs on there too, for more ideas and inspiration.
Have a great weekend.  The sun is shining here this morning .... looks a little chilly out there though.
Time to dig out the gloves and boots I think.

Cheerio until next time .......
PS ..... if you're in the UK, don't forget to put your clocks back tonight!