Showing posts with label AlteNew Stamps. Show all posts

Tuesday, 15 February 2022

CAS Mix Up Challenge ...........

Happy Tuesday ........

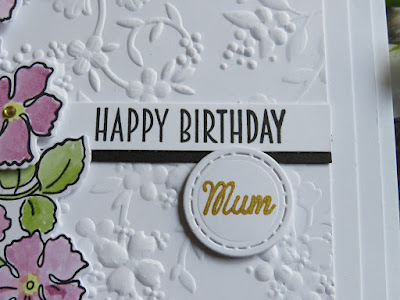
Belated Happy Valentine's too 💕 ....... I hope you had a nice day!

It's the middle of February, so that means we're half way through this month's CAS Mix Up Challenge

It's a Mixed Media challenge this month.  Susan's our host, and she's chosen Faux Cloisonne as the theme .......


If you're thinking ...... what's faux cloisonne? (like I did) then don't worry .......

 Susan's Message
For my challenge I would like you to recycle glossy Magazines, Advertising material or you could use Designer Paper that has been hiding in your stash.  Most cards I have seen are embossed with Gold embossing powder but you could use other colours too. 
 
You can also check out the CAS Mix Up Blog,  where you'll find links to some videos showing how to use this technique.

Now I don't buy that many glossy magazines so, I had to really look hard for something to use.  In the end I found a couple of pages in one of our motorhome club magazines.

The next problem I had was deciding on which stamp to use.   Before I ran out of magazine pictures to use (it's not often I throw things in the bin but, boy was this a challenge!!) ..... here's one that survived the cut

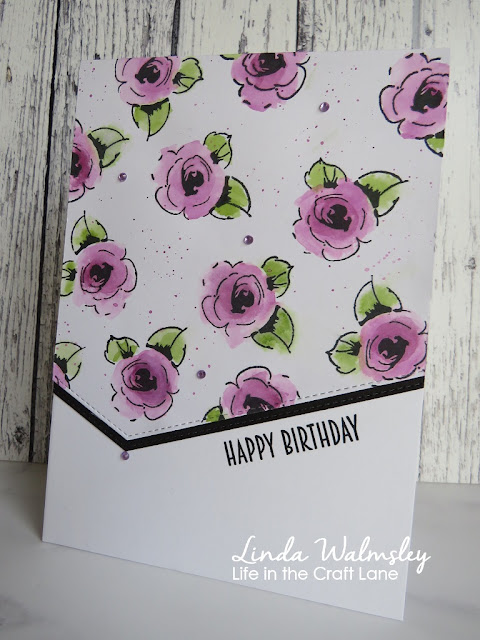
(Faux Cloisonne, Stamping,  & Watercolouring)

I stamped my image onto white card, watercoloured the little bunny and the background,


and then used the faux cloisonne technique for the bunny's umbrella.   
Stamped the umbrella part onto my magazine page, heat embossed in gold and fussy cut.  I then paper pieced the umbrella onto the stamped image ...... 


A simple, fun technique, and a great way of adding extra colour to your designs.  I will definitely be using the faux cloisonne technique again ...... I just need to get my hands on some glossy mags!!

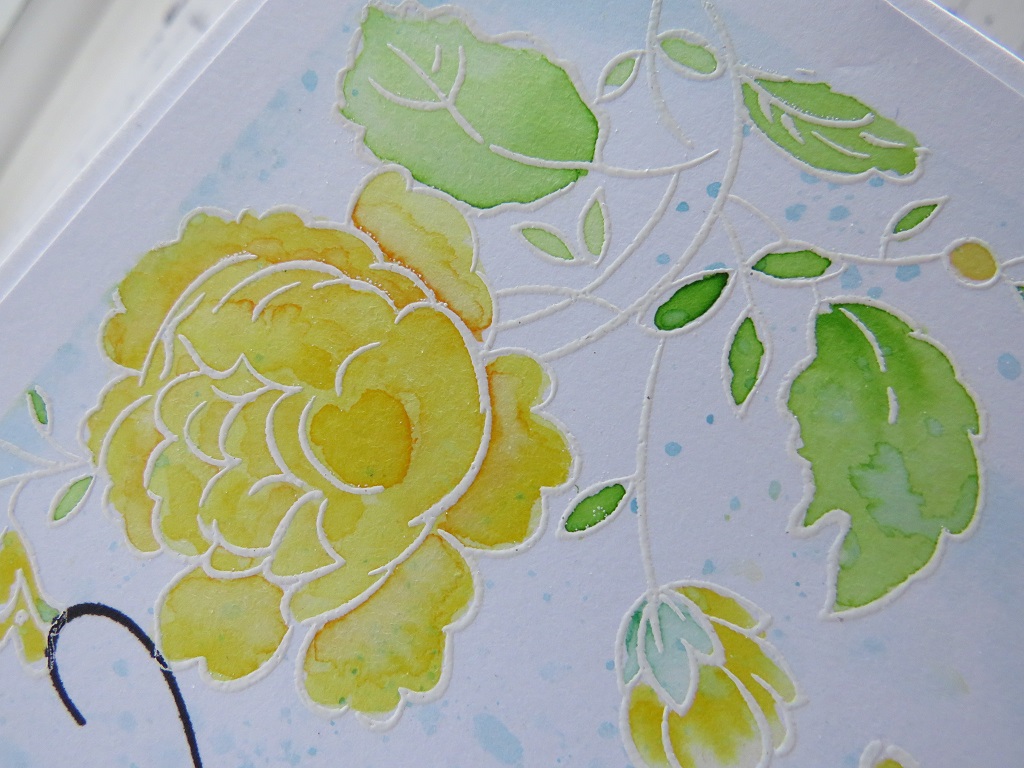
Another way of doing Faux Cloisonne is to use pearlescent paints with your gold embossing
(check out the link to the Lindsey Weirich video on the CAS Mix Up Blog)
Here's my take on that .......

(Faux Cloisonne, Stamping, Heat Embossing, & Ink Splattering)

Black card stock, and a pretty Altenew stamp ....... love it!


Go on ..... why not give it a go and join in with this month's challenge. 
You have until the 24th of the month to get your entries in.  Just remember to include the Challenge Theme, Rubber Stamping, and at least one other Mixed Media technique on your entry.

Happy stamping!

Thanks for popping by ...... enjoy the rest of your day.

Cheerio until next time ........


Supplies
Card 1
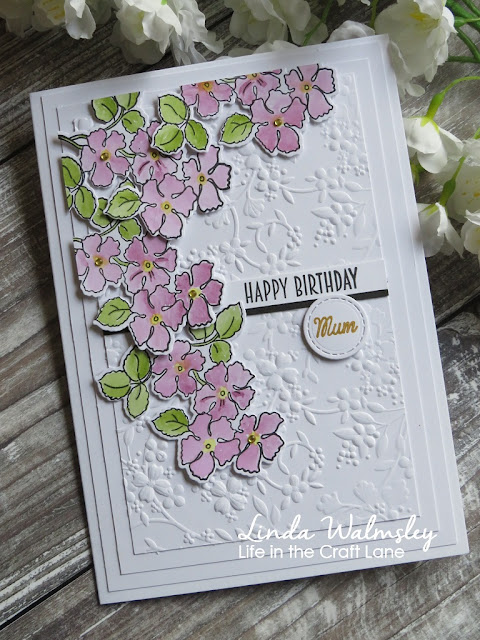
Stamps: All weather Friends (Anita Jeram - Colorado Craft Co.)
Inks: Versafine Clair - Nocturne; Delicata Metallic Ink - Golden Glitz; Versamark; Distress Inks to watercolour with 
Others: Gold Embossing Powder (WOW!); ZIG Markers to Watercolour with; Magazine page

Card 2
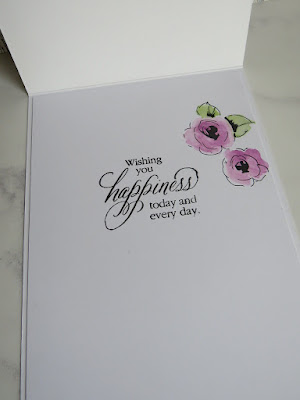
Stamps: Everlasting Happiness (Altenew)
Inks: Versamark ink; 
Others: Gold Embossing Powder (WOW!); Pearlescent Paints

Saturday, 15 January 2022

Loose watercolouring for CAS Mix Up ........

Happy weekend to you .......

Have you got anything nice planned?
The weather's not been very good here today but hey! I suppose it is January. 
Can you believe we're already half way through the month ...... crazy I know!
  
Mid month always means there's a reminder for the CAS Mix Up Challenge.  
Jenny is our host for January, and the theme is .......... Loose Watercolouring


This is a really fun technique, it makes watercolouring easy.  You don't need to be too careful putting your colours down, and the effect can be quite arty looking.


It's a great technique for keeping things CAS too ....... and a perfect way of colouring flowers!

I stamped the pretty florals randomly over a piece of white cardstock, gthen used the technique to add the colour


First, I painted the flower with clean water, then added a touch of colour using a ZIG marker to the centre and let the water spread the colour around.  I helped the process along a little using a paintbrush to make sure the colour covered the whole flower.
Once this layer was dry I did the same again, using the same markers to add some depth of colour and  shading to each of the flowers.

A few ink splatters in the background add a bit more interest


I die cut the bottom of the card to give a fancy edge, added a layer of black card for contrast and  stamped my sentiment underneath.   I also added a few sparkly gemstones to finish off


I even remembered to do the inside ........
                     

The closing date for the challenge is 24th January so there's still plenty of time to play along.

Thanks for popping by ........ enjoy the rest of your weekend.
We've got a dinner party for 10 this evening and the best part of it is ......... I don't have to cook!!!!

It's Lauren's birthday on Monday, and to celebrate she's invited a few friends round and we've booked the amazing Leela's Kitchen to come and do the cooking for us. 
This is a company on the island that makes delicious indian food,  has their own range of spices and sauces, which are amazing!  They do a delivery service with take aways thalis, cookery classes, and tailor made dinner parties, which we thought would be something a little bit different.  
I'm really looking forward to it ........ it's always nice when someone else does the cooking!
I'd better go and get the kitchen ready for him!

Cheerio until next time ......


Supplies:
Stamps: Painted Flowers (Altenew); Happy Birthday Sentiment (Happy Little Stampers); Sentiment inside the card (Penny Black)
Inks: Versafine Clair - Nocturne;
Others: ZIG Clean colour Brush Markers; Self Adhesive Gem stones

Thursday, 13 January 2022

Happy Birthday Mum! ..........

Happy Thursday ........

I hope you've had a lovely week. 
It's been a quiet one here but, thankfully we can all start getting back to normal again as slowly one by one, we are all now COVID free again ...... yeah!!  
Just as well really, because birthday celebrations start at the weekend.

January is always a busy month for us ...... both kids have January birthdays, there's a couple from my my crafty friends this month too, and starting things off is my mother-in-law, it's her birthday today ......  Happy Birthday Mum!  
I don't think she reads my blog but I do know that she has received her card, so I'm safe sharing it with you


I kept things nice and simple ....... a pretty embossed background using one of the folders from Simon Says Stamp (Blossom Field)


The stamps are from Altenew (Ruffled Flowers), watercoloured using ZIG Clean Color Brush Markers (just got my hands on 30 brand new colours and they are gorgeous!), and then the flowers were all die cut using the matching dies ....... no fussy cutting needed!


A simple Happy Birthday sentiment added on strip of cardstock, strategically placed to hide the join on my embossed background ........


The finished card size was A5,  and the embossing folder wasn't quite big enough so, I simply embossed two pieces of white cardstock, cut them down to fit,  and joined them in the centre, hiding the join with the sentiment ..... simple!

And look ...... I did the inside too!


Well that's one birthday card done ...... better get back in the craft room to make some more.

Thanks for popping by ....... enjoy the rest of your week

Cheerio until next time .......


Supplies ......
Stamps: Ruffled Flowers (Altenew)(also matching dies); Sentiment stamps from my stash - front of card; Better with Age stamp set (Penny Black) - sentiment inside
Inks: Versafine Clair - Nocturne; Delicata - Golden Glitz
Other:  Blossom Field Embossing folder (Simon Says Stamp); ZIG Clean Color Brush Markers

Wednesday, 15 April 2020

There's still time to play along with this month's CAS Challenges .......

Happy middle of the week ......

We've had another lovely sunny day here, and I've done absolutely nothing!!
I did go into the craft room this morning, put a few things away, moved stuff around a little bit on my desk, and then walked straight back out again ....... it was too nice to be in there.  Instead I grabbed my laptop and Kindle, a bottle of sun cream and headed outside.  It's been lovely catching up on emails, watching some FaceBook Live craft videos, and just enjoying this nice weather.  Might even go in the hot tub later!

First, I have got a quick reminder for you, about a couple of this month's CAS Challenges.
We like to give you a few more ideas mid way through the challenges just incase you need a little bit of inspiration.

First up ..... the CAS Mix Up Challenge, where the theme this month is Bleaching


Don't forget to check out the links on the CAS Mix Up blog to some useful videos on using this fun technique.


You might think using bleach on your cards is not for you.  I know I'm not that keen on the smell, and even though you can get odourless ones these days there are other ways of achieving the same look.
I like to use plain old water, and Distress Inks, it works a treat. 

I stamped the flowers across the centre of a piece of white cardstock, heat embossed the image in gold, and then blended Distress Ink over the top.


Using a paintbrush and some clean water, I 'bleached' out the colour from the leaves.
I simply painted the water onto the leaves and then mopped it away with a piece of paper towel removing the Distress Ink too.  The more water you apply, the more colour you will remove


Once it was dry I fussy cut around the bottom edge and then attached it to the top the front of a card blank, leaving white space at the bottom to show off the fussy cut edge


I stamped a sentiment on there and finished off with a few sparkly gems


Next up .... the CAS Stencil Challenge
This month the theme is Gilding Flakes. Not a product known for using with stencils but, they work.


I've gone for a 'less is more' approach on this design with just a touch of gilding flakes on the stenciled detail in the background.

I smooshed a little Distress Ink onto the centre of a white cardblank using a piece of acetate, and then stenciled over the top with some texture paste.


Once this was dry I placed the stencil back over the paste and used my finger to apply a little bit of glue to the surface ...... not too much, and I wasn't that careful about applying it as I wanted a sort of grungy look, I didn't want to completely cover the texture paste.

I removed the stencil and then applied the Gilding Flakes.  A gentle rub over to make sure they had covered all the glue, then I took a sponge and rubbed away any excess


I stamped the butterfly onto a piece of mop up card and added a touch more colour to it using some coloured pencils before fussy cutting around the edge


He was attached onto the card, and I finished with a sentiment


 I think we could all do with some happy thoughts right now!

There's still plenty of time to get your entries in for all the CAS Challenges, and if you need more inspiration then check out what the rest of the Design Teams have been up to.

Thanks for popping by ..... enjoy the rest of your day.
I'm off to create something in the kitchen now, not quite sure what yet.  I'm thinking a chilli maybe with a nice bottle of Malbec.  Well it is World Malbec Day on Friday this week ..... we've already booked our special menu for Friday night, freshly prepared and delivered from our little place in town ...... looking forward to that.

Cheerio until next time ........


Products used:

CAS Mix Up
Stamps: Precious Peony (Altenew); Special Sentiments (Penny Black) 
Inks: Distress Ink - Picked Raspberry; Versamark Ink; Versafine Clair - Nocturne
Other: Gold Embossing Powder (WOW!); Clear Glitter Gems

CAS Stencil
Stamps: Flutters 2 (Inkylicious); Happy Thoughts (Penny Black sentiment)
Inks: Versafine Clair - Nocturne; Distress Ink - Picked Raspberry
Other: Tim Holtz Stencil - Stripes; Texture Paste (Ranger); Flitter Glu, Gilding Flakes (IndigoBlu) 

Tuesday, 14 April 2020

Perfectly CAS (using only one third or less!) Challenge ......

Happy Tuesday .....

It is Tuesday isn't it!?  I'm having real trouble remembering what day it is .... thank goodness it tells me on my mobile phone!!

I hope you all had a good Easter ..... probably not the one you planned but, at least the weather was nice.

It's time for challenge #8 for Perfectly CAS (using only one third ..... or less)

CAS (Clean and Simple) ....... not everyone's cup of tea, and not always that easy to achieve.
It's all about white space, minimum layers and very little in the way of embellishments, and if you stick to the one third or less rule, then you can't really go wrong.


The theme this month is Masking ......


I decided to use a few different stamps, and a bit of clever masking to creatre a pretty layered look


I stamped my sentiment first, followed by the butterflies.  You can see I stamped the butterflies quite close to the words.
Remember ....... when using multiple stamps to create a layered, or collage look, the image that you want on top, or at the front, needs to be stamped FIRST, and then masked.  This makes anything that you stamp over the top, look as though it's underneath once the masks have been removed (hope that makes sense!)

So, I created masks for the butterflies, just from simple Post-It notes. 
Tip ....... when stamping onto Post-It notes make sure that some of the image is stamped with the sticky strip underneath, that way your mask has something to help keep it in place


I masked off the butterflies and also the words ..... again just with a simple Post-It note cut to size.
I then stamped the foliage over the top before removing all the masks


I used ZIG Markers and a water brush to add some colour, and to define the sentiment  I drew along the edge of where the mask had been using a gold marker pen, creating the look that my sentiment was on a seperate piece of card.


I finished off with a few splatters of gold ink on the front, and added a little bit of detail to the inside


I look forward to seeing your designs in the gallery.

Thanks for popping by ..... enjoy the rest of your day.

Cheerio until next time .......


Products used:
Stamps: Flutters 2, Sentiment stamp (Inkylicioous); Wallpaper Art -foliage (Altenew)
Inks: Versafine Clair - Nocturne; Delicata - Golden Glitz (splatters)
Others: ZIG Clean Color Brush Markers, Gold Metallic Marker pen 

Friday, 4 October 2019

It's the first Friday of the month .........

Happy Friday .......

It's almost the weekend ..... whoo hoo!!  I hope you've had a good week.
It's been a bit crazy around here but, only one more sleep then it's time for some R&R!  That's if I ever get the suitcases packed!  At the moment I've got my pj's, toiletries and a swimming costume in there, oh and my flip flops .... I suppose I could manage with those at a pinch!
We don't actually fly to Santorini until Sunday morning, but we're flying over and staying at Gatwick tomorrow night .......... I've still loads of time to pack!

Before all that though, it is the first Friday of the month so, that means it's time to launch October's Craft Stamper Take It Make It Challenge


As always there's no particular theme to follow ....... it's Anything Goes.  Anything that has actual rubber stamping on there that is .... so NO DIGIs please!
You can find all the guidelines for the challenge over on the Craft Stamper Blog, along with the details of this months prizes.  There's also some amazing projects on there from the Design Team
if you need a little inspiration to get you started.

Before I get full of the Christmas spirit and go all festive, which will no doubt happen once I get back from holiday (I hope anyway ...... I've still got all my Christmas cards to make!  I've got a pretty floral design using one of my favourite stamps at the moment from Altenew .....


I masked off around the edges of a piece of white card using low tack tape.  I stamped the pretty floral image onto two opposite corners (I do like working on the diagonal), and heat embossed in white.


I used my ZIG Markers to add colour to the flowers and quite a bit of water.  I like to paint the petals with water first, then add a touch of colour using the pens and then, add a little more water to my paintbrush to move the colour around giving a nice watercolour effect ..... great for adding shading too!


I used the acetate smooshing technique to add the background colour ....... smooshed Distress Ink onto a craft mat, spritzed with water and then used a piece of acetate to pick up the colour and then 'smoosh' it on to the background .....


All this, by the way, was done with the masking tape still in place around the edges.
Once everything was dry then the tape was removed, and I was left with this lovely framed look, without having to add another layer of card.

A simple stamped sentiment in the centre, and a few sparkly sequins finish it all off.


The challenge is open until Oct 23rd so there's plenty of time to get your entries in.
As always we have two fab prizes on offer ......
1.  The Design Winner ..... chosen by the DT.  Their winning project will be featured in the Craft Stamper magazine along with a Winner's Profile, and they will also be invited to be a Guest Designer on a future challenge.
2.   The Challenge Winner ..... randomly chosen, will receive this month's fabulous challenge prize
Two x Prima Redesign Moulds ...... In the Garden and Leafy Blossoms.  How pretty are those!


Happy stamping!

Thanks for popping by ...... have a lovely day and enjoy your weekend.
I'm off to finish up in the craft room and then try and get it tidy ..... if that fails I can always close the door and no-one will be any wiser!!
I'll also be back again later with one more blog challenge for you, then it's sun, sea and greek salads for me!!

Cheerio until then .......


Products Used:
Stamps: Handpicked Bouquet (Altenew); Special Sentiments (Penny Black)
Inks: Versamark ink; Versafine Clair - Nocturne; Distress Ink - Tumbled Glass
Others:White Detail Embossing Powder (WOW!); ZIG Clean Color Brush Markers; Low Tack Masking Tape; Sequins

Saturday, 14 September 2019

Perfectly CAS (using only one third) ........ fancy a new challenge?

Happy Saturday .......

I hope you're enjoying your weekend.

This is so exciting.  In case you haven't heard, there's a BRAND NEW Blog Challenge launching today ......  Whoo Hoo!!!   Well, it's launching on the 15th which is tomorrow I know but, it's based in Australia so it's already tomorrow over there .... if you know what I mean!
The idea is from Kylie (Happy Little Stampers, Addicted to Stamps and More etc) and I'm absolutely thrilled to be part of the Design Team ..... I love CAS!


Do you like creating Clean And Simple (CAS) cards?  Or are they your worst nightmare?  Ever tried to create that perfect CAS design but,  you can't stop adding just that little bit more?
If that sounds familiar, then this is the challenge for you ......


It's all about using just one third (or less) of the gorgeous white space on your card.
Check out the Perfectly CAS Blog for a full explanation of what this means, and all the details on how to play along.

So ..... when I think Clean and Simple (CAS), what comes to mind is .....
  • one main focal point
  • lots of white space
  • minimum layers and embellishments
Sounds simple enough but,  it's not a style that everyone finds easy to create.
Well now it is.  Just imagine your card is divided up like this ....


Now using the grid as a guide, use just one third of your card.
That could be the left or right side, top or the bottom.  You could use the centre horizontally, or right down the middle top to bottom.  You could even go diagonally. 
Saying all that though, it doesn't have to be exact.   Your 'third' could be slightly to the left or the right.  More towards the top or the bottom, or slightly off centre.  As long as you don't use more than one third of the available space you'll be fine.  You'll create a beautifully CAS design every time ..... I hope that all makes sense!

Each month the challenge will have different theme so, as well as keeping things CAS, using one third or less, you must also follow the monthly theme ......


To get things started with our very first challenge, the theme is a nice simple one ..... Flowers.  
We all love pretty floral designs.


I've started at the top third of my card and stamped the pretty floral spray from an Altenew stamp set, off the top edge.


I heat embossed the image in gold, and then coloured it using ZIG markers and a waterbrush


Still keeping in that top third of my card, I added a few ink splatters and some pretty gemstones .....


and finished with a sentiment underneath.


So, are you an expert at CAS? or, is this style completely out of your comfort zone?  Either way why not join in the fun with this brand new Blog Challenge.  I hope to see you in the gallery.

Thanks for popping by ..... enjoy the rest of your weekend.
It's one of my favourite weekends on the island ....... it's the Isle Of Man Food & Drink Festival!!
The Villa Marina gardens have been taken over yet again to showcase all the delicious produce this fabulous little island has to offer.
There's everything from local lamb, beef and pork, to delicious seafood.  Tasty breads, coffees, cupcakes and biscuits.  Cheeses, salamis and spices.  Chocolates, Christmas puddings and ice creams.  Some of the islands eateries are there serving their delicious food .... I had the best beef rib sandwich EVER!!!!   Oh! ...... and there's gin!!


For us foodies, it was the only way to spend Saturday!

Cheerio until next time .....


Products used:
Stamps: Handpicked Bouquet (Altenew); Tiny Words Sentiment Stamps (Simon Says Stamp)
Inks: Versamark ink; Golden Glitz (Delicata ink)
Other: Gold Fine Detail Embossing Powder (WOW!); ZIG Clean Color Brush Markers;