Showing posts with label Distress Inks. Show all posts

Monday, 18 December 2023

I'm usually a more traditional girl but ...........

Happy Monday .........
 
Have you had a nice weekend? 
It's beginning to look a lot like Christmas.  Just seven more sleeps to go until the big day ...... Ho! Ho! Ho!  Things are about to get a little crazy around here!   

The last of my Christmas cards are done (phew!).  One of the jobs on the list for today was to get them in the post so, it's now fingers crossed that they all get there in time!  I can't believe I'm so late!!

Now, you know me, I'm quite the traditional girl when it comes to Christmas cards ......... snowmen, snowflakes, baubles,  and Christmas trees (lots of trees!!).  
Pretty poinsettias, a Christmas wreath, and I do love my festive reds and greens.  So, when I saw the theme for the final challenge this year, over at the Color Hues Challenge BlogI thought I'd give it a try.
What do you think? ........ I kinda like it


Pink and Silver ...... definitely not my go to Christmas colours but, it works.


The embossing folder I used is the pretty 3D Holiday Floral Swag from Spellbinders ...... I love it!!

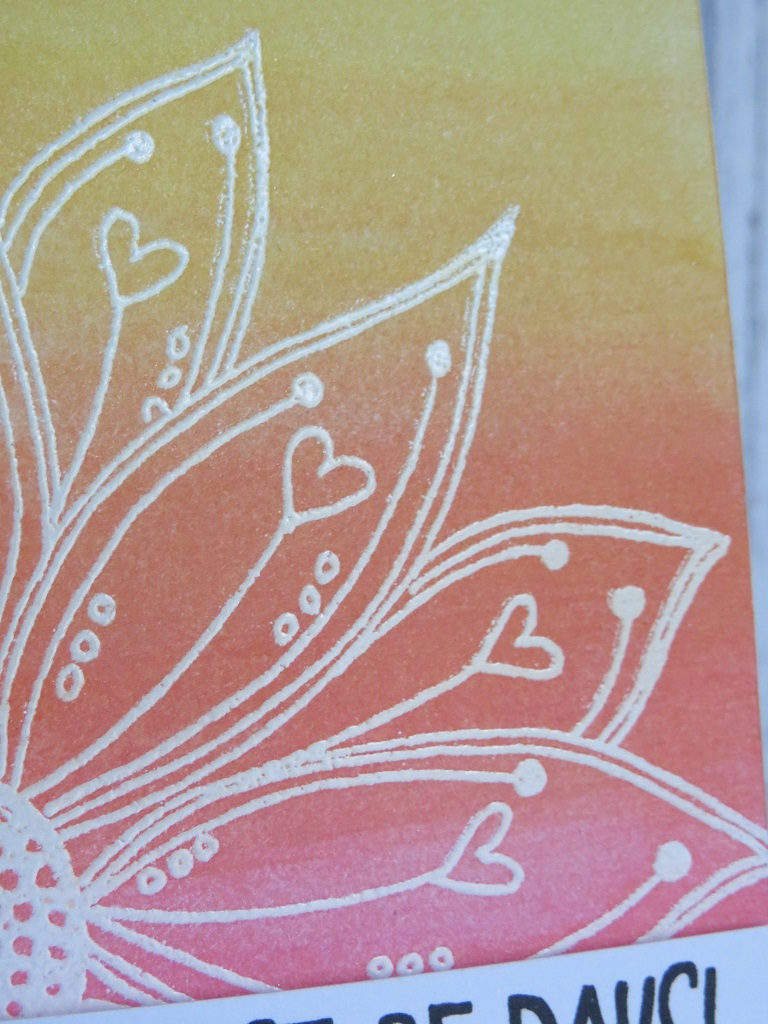
I simply ran it through the Big Shot, using white cardstock, then blended Distress Inks over the design (Spun Sugar and Picked Raspberry),


fading out the colour where my sentiment was to go.


I heat embossed the sentiment in silver and added a few dots of white Enamel Accents


To finish off, and give the card a more snowy look, I splattered with a little bit of white paint


Here's another version of the same card but, just a little bit different .......


This time it was Spun Sugar Distress and Worn Lipstick, going a little more red instead of pink


and I changed the sentiment ever so slightly ........ 


I think I prefer the sentiment this way.

Anyhow, Pink and Silver is now definitely on my festive combo list!
And, as it's the first time I've used this embossing folder I'm also hooking up to Darnell's NBUS (Never Before Used Schtuff!) Challenge


Thanks for popping ..... enjoy the rest of your day.
I'm off to put my feet up for five minutes with a cuppa and a festive mince pie ...... yum!


And, just in case I don't get chance to blog again before the big day ............  

Have a Wonderful Christmas!

Cheerio until next time ......

Thursday, 28 September 2023

Happy Birthday Jenny .........

Happy Thursday ......... I think!

It's been a funny old week, not sure what day it's been for most of it ...... Wednesday was Thursday, I thought today was Friday, roll on the weekend!!

I have been in my craft room though, which is a good thing.  
It took me a while to get anything done because, after the big tidy up a few weeks ago I couldn't remember where anything was!  I'll get there, eventually.  
It was also a bit weird having hubby in there too (did I mention we're now sharing an office!!)  

Anyway, I had a very special card to make (even made a box for it too!) because, one of my lovely crafty friends had a very special birthday earlier this week .......
 

Yes, it was Jenny's 80th birthday ....... WOW!  so you can understand why it had to be a special card.

It's 8x8 inches finished size (not a size I make very often) and I couldn't find any 8x8 envelopes (goodness knows where I've put those!!!) hence the box.

I used the pretty Blooming Branch stamp set from Pink Fresh Studio.  Stamped and heat embossed in gold onto white cardstock and then coloured using Distress Inks and a water brush.


I stamped and coloured the image a few times, and then cut them out using the co-ordinating cutting die


I stamped my greeting in the centre of a piece of white cardstock


and then arranged the die cuts around the edges to form a frame, overlapping them in places to add a touch of depth and dimension


Once I was happy with the arrangement,  I attached the die cuts using foam pads and then trimmed off the excess around the edges, keeping any larger pieces that I cut off.  I did a bit of matting and layering before attaching the panel to the front of my cardblank.

A few splatters of gold ink and some pretty gemstones finished off the front nicely.


Inside the card, I stamped and coloured the pretty floral branch again and I also used one of the die cut pieces I'd trimmed from the front of the card


I was so pleased when I actually remembered how to make a box ....... first attempt too!!  


I kept things clean and simple, but matched the card perfectly!

Can I just say, I'm loving the new Polished Embossing Powders from WOW!, they are soooo shiny!  They come in Gold and Silver, Regular and Super Fine and they are gorgeous! If you love your heat embossing, you need to try them.

Well that's it for now.  
Thanks for popping by ...... enjoy the rest of your day.

Cheerio until next time .......


Sunday, 25 September 2022

Back with a little sparkle for the Simply Sweet Poppy Stencils Challenge ........

Hello again ...... I'm back!

Happy Sunday!  I hope you're enjoying your weekend.

Well, it's been a while ....... can you believe it's almost 6 weeks since I blogged!  And almost as long since I've been in my craft room.  
I don't think I've ever taken a break for so long before.  It's actually been really nice ......  no pressure, and no deadlines to work to.  I didn't even pick up a craft magazine.  I did take a small craft bag with me in the motorhome but, I can't say I did much with that either.  

But, I need to get back in the craft room at some point so, this weekend I've had a good old sort out and a tidy up, re-arranged my desks and now I'm raring to go ..... ish!
I've lots of new goodies to play with, DT work to be getting on with, and of course there's all those festive makes to get started on ........ only 13 weeks until Christmas,  oh my! the tree will be going up next!

Anyhow ........ the end of September is approaching fast, so that means there's only a few days left to play along with this month's Simply Sweet Poppy Stencils Facebook Challenge.
The theme this month is ........ Sparkle is My Favourite Colour
Who doesn't love a touch of sparkle, and the good thing is, it really can be any colour you like! Christmas cards just wouldn't be the same without some sparkle and shine now would they.


Not sure the sparkle comes across in this picture ...... glitter is a real nightmare to photograph!

I inked through the gorgeous Sweet Poppy Snowflake Bauble Trio stencil using Distress Inks ....... Stormy Sky, Chipped Sapphire and Dusty Concord


Then I used a Quickie Glue Pen over the top of each snowflake, and sprinkled with fine crystal glitter.
Like I said, hard to photograph but so pretty when the light catches in real life. 
Using the clear crystal glitter allows the colour of the inks underneath to show through but, you could use coloured glitters on top if you wanted too for a more intense colour.


I added a few ink splatters on to the background using the same colours of Distress, and then heat embossed my sentiment on the bottom.  


Another quick and easy design, this time using the pretty Snowflake Aperture Circle stencil, again with Distress Inks (Stormy Sky & Chipped Sapphire) 


The aperture stencils are so useful, perfect for creating detailed frames on your cards 


(sshh ..... don't tell anyone ..... have you spotted the sneaky peek of a brand new design coming soon? You are going to love this new stencil!)

I inked the snowflake circle with my Distress inks then, cut a simple mask from a piece of copier paper to create the hillside for my winter scene in the centre.  
With the mask still in place I used the gorgeous, brand new Fir Tree stencil  to create the forest in the background, and then I used Versamark ink through the design and heat embossed the centre tree over the top


To finish off I used fine crystal glitter to hightlight the snowflakes in the circle and added a little touch to the tree

Sparkle isn't just for Christmas cards though, a touch of glitter makes any card extra special ......


I used Distress Ink Reinkers to colour the background, applied with a paintbrush and lots of water onto watercolour card  (Forest Moss, Carved Pumkin, Spiced Marmalade & Scattered Straw)


Once it was all dry I used the Blissful stencil over the top with Black ink (Versafine Clair - Nocturne)
and then used a fine tip glue pen and glitter to highlight along the tree branches


A few spatters of gold ink onto the background and a simple sentiment on the bottom ...... job done!


I think I'm ready for Autumn now ...... the sumer has been amazing but, it's time for cosy nights in, hot chocolate and snuggly woolies!

The challenge is open until the 29th of the month so you need to be quick if you want to be in with a chance of winning this months prize.
Check out the rules below and ........ Happy stenciling!


The last few weeks have flown by ........ We had our longest trip in the motorhome including a music festival (more about all that later).  There's been the usual family gatherings, with a few birthday celebrations along the way, including Arthur, who was one ...... now that year's gone fast!  And, as I'm writing this blog post I've heard that he's taken his first proper steps this morning ....... yeah!!!  


It was also Alex's birthday, he was 12.  He's also started secondary school which is scary ...... doesn't seem five minutes since he was taking his first steps!!


We've also had Arthur's baptism,  and I've had Covid ..... again!!

Let's hope October is a little quieter!

Thanks for popping by ....... enjoy the rest of your weekend.

Cheerio until next time ........  


Monday, 15 August 2022

The CAS Mix Up challenge ..........

Happy Monday! .........

Welcome to a new week .... and a busy one at that!

Time for a quick reminder about this months CAS Mix Up Challenge.
It's a Mixed Media challenge this month which means you need to include some stamping on your card,  you must follow the challenge theme which for August is ........ Emboss Resist, and you must also include one other Mixed Media element ......... you can find a list of ideas for that on the CAS Mix Up Blog
 

The theme this month was chosen by our host Nancy, and is a really fun technique to try.
If you're not familiar with it and haven't tried this before, then check out the links on the CAS mix Up Blog post ..... there's a few different ways you can do this.


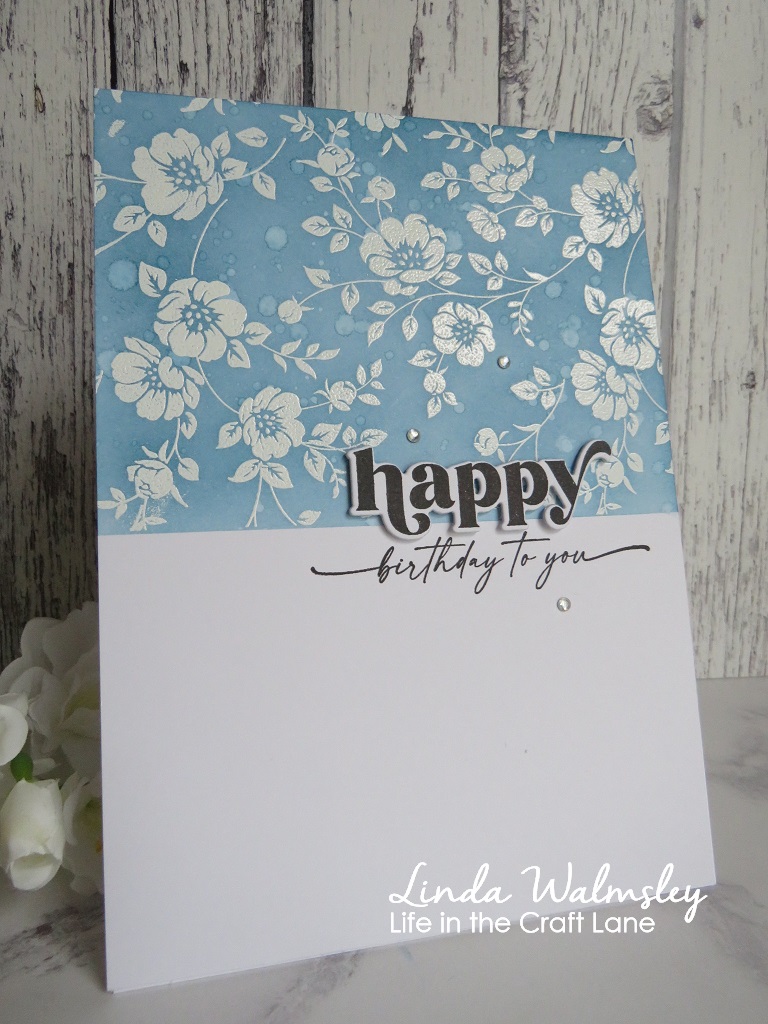
For this card I started by masking off the bottom section of my card front.  I then stamped the pretty floral design across the top using Versafine ink.  I then sprinkled on some white embossing powder and heat set. 


With the bottom part of my card still covered,  I blended Uncharted Mariner Distress Ink over the top of the heat embossing ....... I think this is my new favourite shade of blue!

Once I was happy with the colour, I gently buffed over the top of the embossing with a paper towel to remove any excess the ink from the design.  The embossing powder had resisted the Distress ink so the white  came through nice and bright again.


For a little bit of added interest I splattered the card with a little bit of clean water.  I let it sit for a few seconds to react with the Distress Ink then I mopped up the excess with a paper towel, leaving this pretty speckled look ...... I never get tired of doing this.  It's such a simple technique that works so well, every time.

I added part of my sentiment stamped and die cut on the top, finishing it off with some stamping underneath and a few little gemstones for a touch of added sparkle!


Here's another one I did using the same Emboss Resist technique, only this time I used watercolour paints over the top 


I heat embossed the flower first, then blended the watercolour paints over the top


The embossing did take on a little bit of the colour from the paints so it's not quite as white as I would have liked but, it still looks pretty


To keep it CAS I added a sentiment strip over the bottom edge and a few pretty gemstones


I do hope you give this technique a go. 

Happy stamping! 

Well the weather forecast here for yesterday was spot on ........ the heatwave definitely broke last night!  
At around 4am we had the most spectacular thunderstorm that lasted for the best part of an hour ..... and Lauren slept through it all!  Alex on the other hand ended up in our room!  
The lightening woke me up first before the huge crash of thunder, right over the top of us ..... boy was it loud, and scary!!  
And the rain ........ the gutters on the house just couldn't handle the amount of water coming down and there was literally a waterfall coming off the roof!  
We did get up to check around the house ..... and the van!  Thankfully no damage was done, apart from a couple of mains switches had tripped off, which meant some of the house was in darkness but, other than that everything was OK ..... thank goodness.  And things are a little cooler today which is great, I've still lots to do before we go away.
  
We're off in the van again on Wednesday, for our longest trip so far.  We're away for 17 nights this time,  starting with a music festival ...... should be fun!   
It's not just a pleasure trip though, it's business too.  Turns out that hubby needs to work for some of the time, including a day, or possibly more, in London.  Fingers crossed it stays nice and cool for that!

Thanks for popping by ..... enjoy the rest of your day.

Cheerio until next time .........   


Supplies
Card 1
Stamps: Vines & Roses (Tim Holtz - CMS298); Opposites Attract (The Greetery) for the sentiment
Inks: Versamark ink; Distress Ink - Uncharted Mariner; Versafine Clair - Nocturne
Other: White Embossing Powder (WOW!); Oppostie Attracts Die (The Greetery); Self- adhesvie gemstones

Card 2
Stamps: Be Happy stamp set (Julie Hickey Designs)
Inks: Versamark ink; Versafine Clair - Nocturne
Other: White Embossing Powder (WOW!); Altenew Watercolour Paints; Self-adhesive gemstones

Monday, 1 August 2022

Emboss Resist for CAS Mix Up!

Happy Monday! .....

Well, July was a bit of a whirlwind month ......... welcome to August!

A new month, means we have a new CAS Mix Up Challenge.  
It's Mixed Media month, and the lovely Nancy is our host.  The theme she's chosen for August is ......
Emboss Resist ......... one of my favourite techniques.

If you're not familiar with this, or you need some inspiration, then check out the CAS Mix Up Blog.  On there you'll find lots of ideas from the Design team and links to some really great videos on different ways of doing this really fun technique.


Emboss Resist will work with lots of different mediums ....... ink pads, spray inks, pigment powders such as Brushos, paints, watercolour markers, but one of my favourite things to use is Distress Inks.  Because they react so well with water, the embossing resists the ink colour really easily.  
There's so many different ways of using Distress inks too ..... straight from the ink pad, blended with brushes for example or, as I've done for my inspiration piece ....... acetate smooshing!
 
I stamped the pretty floral bouquet onto a piece of white cardstock using Versamark ink, and then heat embossed in white.
 

Hmmm ........ white embossing on white cardstock?  Not an easy thing to see but, with the emboss resist technique all will be revealed in the end! 

I then swiped my Distress ink pads onto a craft sheet ...... Picked Raspberry and Salty Ocean .......
and spritzed the ink with a little water.
I used a piece of acetate to pick up the colour and then laid it onto my cardstock, over the top of the embossed image, pressing lightly with my fingertips to move the ink around a little, making sure that the whole of the embossed image was covered


I repeated this for both colours of ink, building up the depth of colour gradually. 
You can see I wasn't careful about keeping clean edges, I wanted more of the random, splattered look.  
I also overlapped the two colours to give some shading here and there 


Once I was happy with the colour, I moppped up any excess ink with a paper towel and then gently buffed over the embossed image to remove any residue left from the inks.  
Because the embossing resisted the Distress Ink, the original stamped image showed through nice and clear.

To finish off, I die cut the sentiment three times, from white cardstock.  I layered them together, heat embossing the top layer with a navy embossing powder and off setting this slightly to give that white shadow


So, my elements used for this challenge are ..... 1. the theme ...... Emboss Resist  2.  Rubber stamping and 3. Acetate Smooshing, or it could be die cutting,  I suppose.

The challenge is open until the 24th of the month, so lots of time to play along.
Check out the CAS Mix Up Blog for more Emboss Resist inspiration from the Design Team and also, pop by say hello to our fabulous Guest Designer this month ....... Brenda (Inkspired to Stamp) is joining us for this challenge. 

Happy stamping!

Thanks for popping by ..... enjoy the rest of your day and have a great week!

July was a busy month for me but, August looks even busier.
We're off out this evening for a birthday dinner ..... our favourite restaurant is 4 today!
Then I've got my big brother and family coming over for a few days on Wednesday, so we'll be off out again then.   
When he goes home I have a crafty day with the girls planned, we haven't had a get together in such a long time.  There's also lots going on with Alex and his pals (school holidays are so much fun!)  And then, we're off again in the van on the 17th, and we don't get back until 3rd September!!!  So, that's August done ......... like I said, a busy month!  I'd better get a move on!

Cheerio until next time .......


Supplies
Stamps: scented message wood mounted rubber stamp (Penny Black)
Inks: Distress Inks - Picked Raspberry, Salty Ocean; Versamark ink
Other: Bright White,  Pea Coat embossing powders (WOW!); thanks thin metal die from my stash (not sure of the brand)