Thursday, 7 April 2016

White space ..... but not WHITE space

Happy Thursday .......

How are you today?  It's another busy one here in the old craft room .... I've got two posts for you today!
I'll be back later with the start of another challenge for the month of April but first a little 'Me' time.
I'm playing along with this weeks Less is More challenge ....... yeah!!!   Missed the last two .... not a happy bunny!

It's a Colour Challenge this week ....... and the focus is on WHITE SPACE, or rather NOT WHITE SPACE!!!

Leaving white space on a card can sometimes be a problem ...... the Clean and Simple style requires a lot of white space ..... that means an area of the card that has no image, no layers and no embellishment ..... not as easy as you may think!
Me .... I love this style, but sometimes my designs don't end up as CAS as I would have liked!!!

The challenge this week is to still have the 'white' space however, it has to be coloured ..... I can do that ......
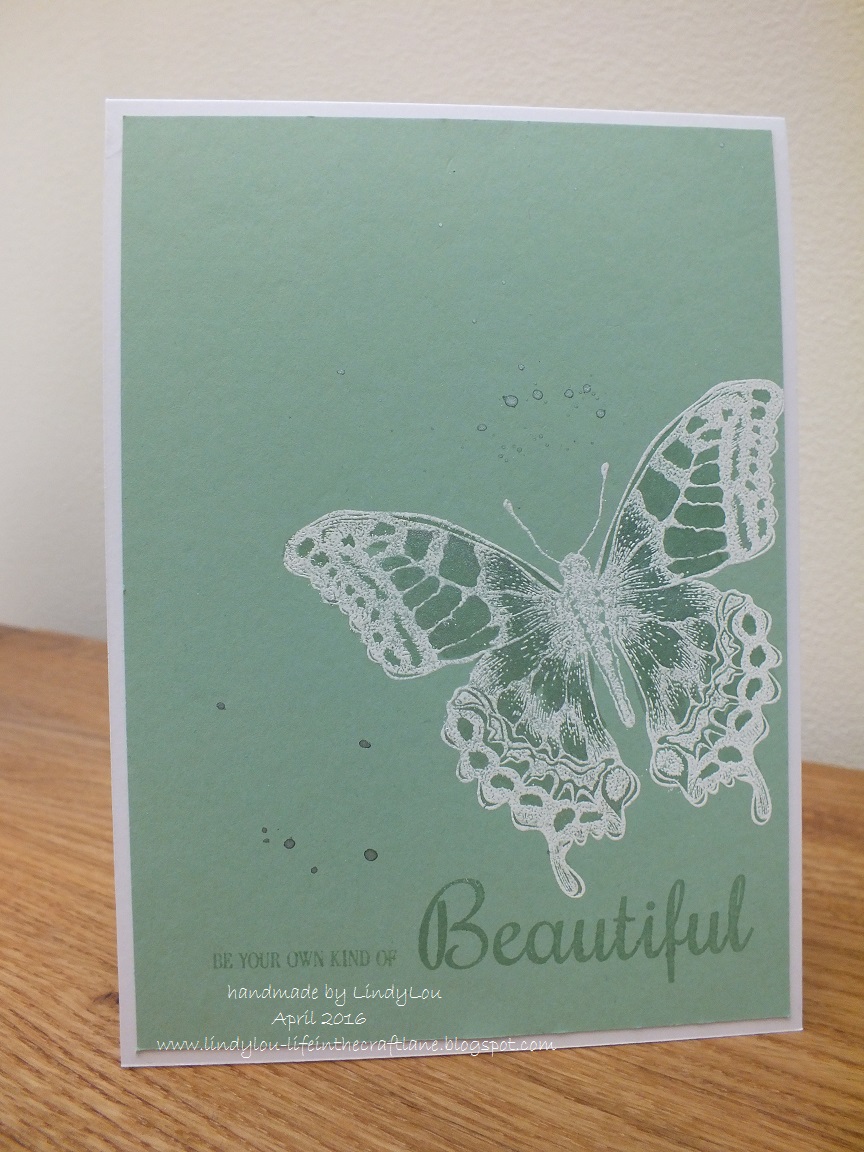

I love this colour from Stampin Up! ..... Mint Macaron and I really like the white embossing on the top.
I simply cut a piece of the SU cardstock to fit the front of my card blank.  Stamped the beautiful butterfly from the Tim Holtz stamp set Perspective and embossed it using a fine detail white embossing powder


Then using the Stampin Up! ink pad in the Mint Macaron shade, I stamped the words along the bottom, from the All Occasions Sentiments set by Uniko (who, it just so happens, are this months sponsors for Less is More)


I also used the ink pad to add a touch more colour to the butterfly.  I swiped some of the ink onto my craft sheet and instead of spritzing with water, I used Perfect Pearls instead and it gave this gorgeous shimmery wash to the butterfly


Me being me though, couldn't stop there (this is what I mean when I say my designs don't end up as CAS as they should be!) Because there was ink left on my craft sheet I just had to get my brush and add a few splatters here and there didn't I!!!

That beautiful butterfly also makes an appearance on the inside


This time .... stamped using the Mint Macaron ink and colour washed with the shimmery mix ..... so pretty when the light catches it ...... not sure the photo has captured it though.


Oh well .... I'd better get a move on .... the list is long today.  I'll be back later with another challenge for you ..... see you then.

Thanks for popping by ....

Cheerio until next time

Linda
xx

Wednesday, 6 April 2016

Things with Wings ........

Happy Wednesday ......

This week is flying by.  Touch wood, fingers crossed and all that ........ everything is going according to plan, but I probably shouldn't have said that.

It's time to launch another challenge over on the Happy Little Stampers Blog .... this time it's the turn of the Mixed Media Challenge.  We've got a great theme for you for April ..... it's all about ..... WINGS


Birds. butterflies, dragonflies, moths.  Angels or fairies or anything else you can come up with that's got wings.

Now I love butterflies and I do like to make home decor projects so ...... I've got a little altered frame for you, to hopefully inspire you to join in the fun.  Don't forget, there's prizes up for grabs .... but more about that later.

This frame has been lying around the old craft room for a while.  I found it in one of my tidying sessions ...... and it looked a whole lot different than it does now.


I took the whole thing to pieces, ripped out what was in there and started again! It's amazing what a sanding block and a coat of gesso can cover up!!

The frame itself  was decorated using texture paste through various stencils, and then the whole thing was given a couple of coats of black gesso


Once this was dry I then dry brushed over the top with a silver metallic paint, to bring out all the detail of the texture paste


I covered the backboard of the frame with some old book pages and then stamped the beautiful butterfly from Tim Holtz over the top.
A touch of colour was added using Distress Inks and a little water, being careful not to wet the book pages too much


A bit of dimension was needed so ...... I covered a piece of Clearly for Art Modelling Film with another book page and then stamped the butterfly onto it.  Coloured it using the Distress Inks again and then fussy cut around it.
If you've never used Clearly for Art before, it's a bit like a cross between thick acetate and shrink plastic .... only it doesn't shrink!  When you heat it you can mold and shape it whilst it's warm and then as it cools it will hold the shape.  The good thing is, if you don't like the result .... heat it again and re-shape it ..... cool or what!!
I added a little heat to my butterfly, just to raise the wings a little.


A simple saying finishes everything off nicely ......


To make the words stand out against the text of the book page, I painted over where I wanted to stamp with a little bit of watered down, white gesso, stamped the words over the top and then added just a touch of colour.

Well ..... there you have it ..... and it really was simple to make.  
Are you ready to enter the challenge, or would you like some more inspiration?  
Pop over to the Happy Little Stampers Blog .... there you'll find some fabulous projects from the rest of the Design Team, along with all the details of this months challenge.

As always the challenge is sponsored by the HLS store


And because April is HLS's birthday month the prizes are ......

a $30 gift certificate for the challenge winner (nice!)
and then
a $10 gift certificate for each of our favourites (yeah!)

Get those entries in .... you never know it could be you!

Happy Birthday Happy Little Stampers!!

Thanks for popping by ..... enjoy the rest of your day.  
I'm off to grab a glass of something chilled, put my feet up and relax with Dr McDreamy.  Yes I'm watching Grey's Anatomy again!

Cheerio until next time

xx

Monday, 4 April 2016

Festive Die Cuts .........

Happy Monday ......

It's the start of a brand new week ..... although it's a bit late in the day I know.
It's been a busy old day ..... trying to get back to normal (whatever that is!!) after hubby's week off work.
I've been catching up with things like housework, paperwork, the mountain of washing that appeared when Lauren and the little man came home from their holidays.  Speaking of the little man ..... he's still on school holiday so I'm on Grandma duty too,  and of course there's this month's Design Team projects to get done.  The beginning of the month is always a busy time ...... blog challenges etc.,  but hey! I wouldn't have it any other way.

Speaking of challenges .... it's time to launch this months Happy Little Stampers Christmas Challenge
Our theme for April is ....... Die Cut/s


We all love them ..... whether it's the thin metal dies or the chunky Bigz versions.  We've all got lots of them, and if you're anything like me they don't always get used!!  Well ..... now's your chance. Have a look through your collection and see what festive designs are in there ..... or why not use a non-Christmas die and make it festive.

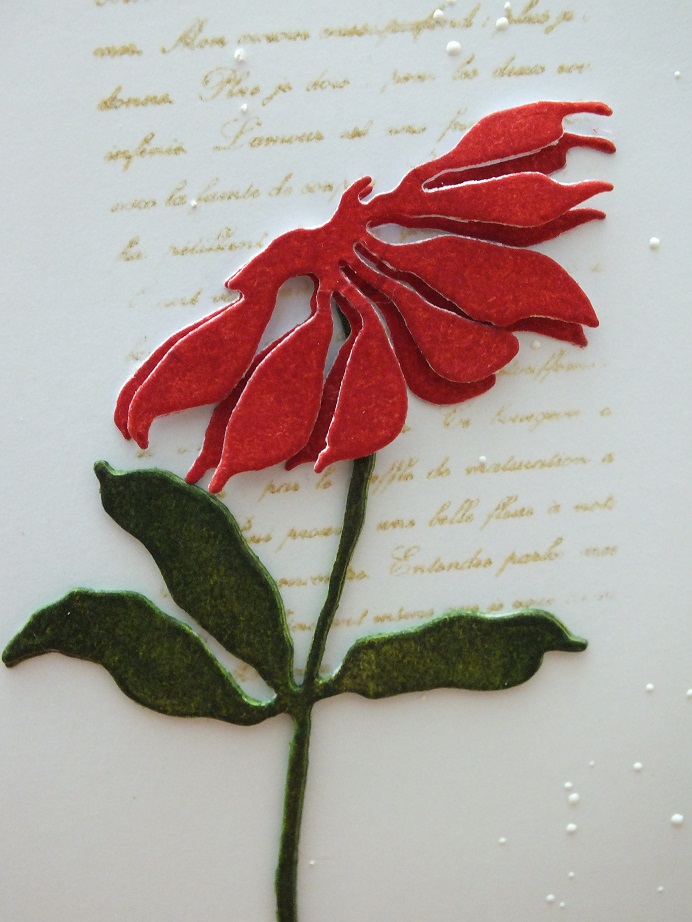
I've got a nice, easy CAS design for you this month ..... using a die by Penny Black called joyful
This one is a Christmas design .....  a pretty poinsettia ..... but I suppose it could be any number of flowers really depending on what colours you used.


I cut the die twice, from plain white cardstock, coloured the pieces using Distress Inks, then layered them together to give a bit of depth


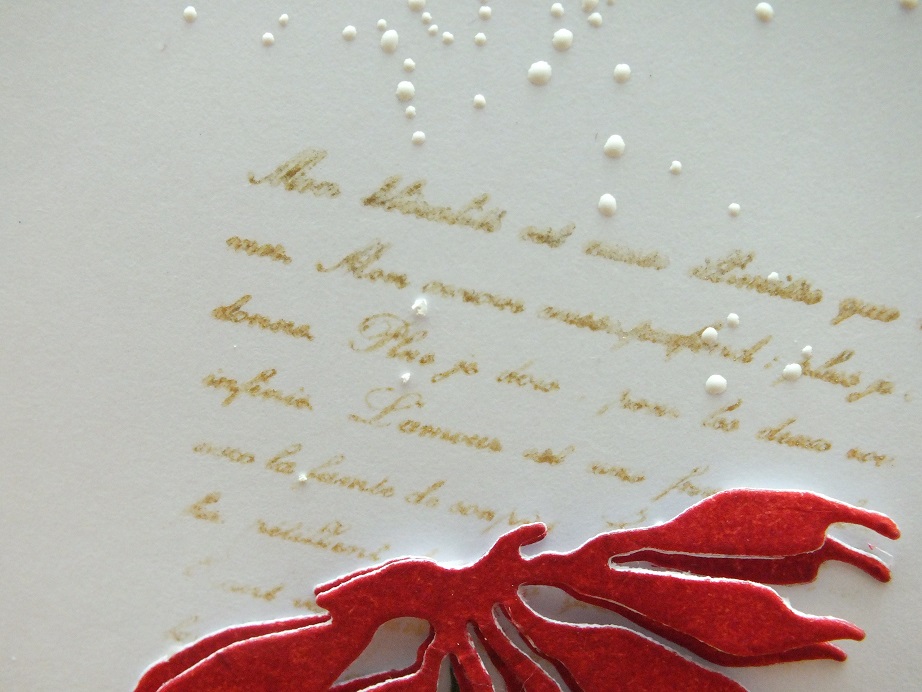
I stamped the pretty text from the HLS Thinking of You set onto a piece of white card using a Gold ink to create a bit of a background for my poinsettia


I attached the bloom over the top and added a nice festive sentiment (HLS  Mixed Christmas Sentiments)


And then to finish off I sprinkled on some Fran-tage Chunky White Embossing Enamel to give the look of falling snow ..... love this stuff on Christmas cards.


Now it's over to you ..... what will you create?

If you need some more inspiration pop over to the HLS Blog, there'll you'll find some fabulous designs from the rest of the DT as well as our Guest Designer for this challenge, the lovey Christine from Splitcoast Stampers

Don't forget it's also Birthday Month for Happy Little Stampers and we're celebrating for the whole of April ........ watch out for prizes and giveaways!
As always the challenge is sponsored by the HLS store .....


And this month the challenge winner will receive a nice $30 Gift Certificate to spend in the store
and
there's also a $10 Gift Certificate for each of the challenge Favourites.
What are you waiting for .... get those entries in.

Happy stamping!

Thanks for popping by .... enjoy the rest of your day.
I'm off now to watch some of my latest addiction ..... Grey's Anatomy.
We've only just started watching it ...... right from the start of Season 1 so there's a lot of catching up to do.  They're on Season 12 or something like that ....... and we're only just part way through Season two!!!  All that Dr McDreamy to watch (sigh!)


Cheerio until next time .......


xx

Saturday, 2 April 2016

Stencil Monoprinting ......

Happy weekend folks!

Hope you're having a good one!

It's time to launch the Happy Little Stampers CAS challenge for April.  We have another fun theme for you this month ....... Stencil Monoprinting


April is a very special month at HLS HQ ..... it's Happy Little Stampers birthday!!!  Whoo Hoo!!
It's been a whole year since Kylie released her first set of stamps ..... doesn't time fly when you're having fun!
We'll be celebrating for the whole of April ..... and there'll be prizes and giveaways throughout the month. Just make sure that you're a follower of the Happy Little Stampers Blog so that you don't miss out on any of the the fun.

As always, the CAS challenge is sponsored by the HLS Store .....


 and because we're celebrating this month the prize is ......

a $30 Gift Certificate to spend in the store for the challenge winner
and
a $10 Gift Certificate to each of our Favourites 

Happy Birthday Happy Little Stampers!

So .... Stencil Monoprinting .... what's all that about?
Well it's a different way of using all those lovely stencils we all have in our stash.
You can find some links over on the HLS Blog, to video tutorials on how to do this technique.  It's so easy, and so effective.
Depending on the card/paper you use, whether you use inks or paints and how much water you spritz will determine the look that you'll get   Some stencil designs work better than others ....... just have a play and see what you come up with.


I've used a floral stencil on my inspiration piece to create the background for my pretty spring bloom. (Sorry I can't tell you the make ..... it's been in my stash for ever and unfortunately it has no packaging!)
I simply covered the stencil with various colours of Distress Inks, spritzed with a little water then pressed the stencil down onto a piece of white cardstock .... simple!  Just carefully mop up any excess water with a piece of paper towel once you've lifted the stencil.


I then stamped the large bloom and some leaves from the brand new HLS Doodled Flowers (I love these new stamps, the flowers are so pretty and you get some really useful words on there too!)
I coloured them using the Distress Inks again and then fussy cut around them before attaching them onto the front of my card using foam pads to add some dimension


I stamped one of the sentiments on the front .....


and added a few dots of white enamel accents to the centers of some of the stenciled flowers


And of course I had to add a little something on the inside .....


A little bit of masking keeps everything to one layer ......


Now it's over to you.  I can't wait to see what you all come up with.
And if you're looking for more inspiration then pop over to the Happy Little Stampers Blog, the Design Team have been having a ball with this technique!
Happy monoprinting!

On a different note ....... I got a lovely surprise recently when I found out that some of my cards were being featured on the dotcomgiftshop blog.
They published a post all about handmade birthday cards and there's quite a few well know names on there, so to be chosen alongside them makes me feel very proud ..... thanks guys!

Thanks for popping by ..... enjoy the rest of your day.  It's been a very wet one here, lets hope it's a bit nicer tomorrow.

Cheerio until next time


xx

Friday, 1 April 2016

Pinch and a punch for the first of the month .....

Happy Friday .......

And welcome to April.
I hope you all had a nice Easter ..... not too many of those chocolate eggs I hope.

I've had a lovely relaxing week, hubby's been off work, Lauren and the little man have been away on holiday so we've had the place to ourselves.  We've made full use of the nice weather we've been having, lots of eating out, and I even squeezed in a crafty get together with the girls.  It has been a little quiet around here though ...... but that will change later this evening ..... they're all back on the island at 8 o'clock.

It's the first Friday of a new month and you all know what that means .......oh yes, a brand new challenge over on the Craft Stamper Blog.
It's the turn of Take a Technique this month ....... or I suppose you could call it more of a theme rather than a technique ....... it's all about SPRING FLOWERS

So ..... use stamped flowers on your projects, or real ones if you fancy!  Cover your art with flower embellishments, or create beautiful blooms from paper or fabric.  Go flower crazy or, keep things clean and simple ..... it's entirely up to you.  Just remember to include some stamping on there too.

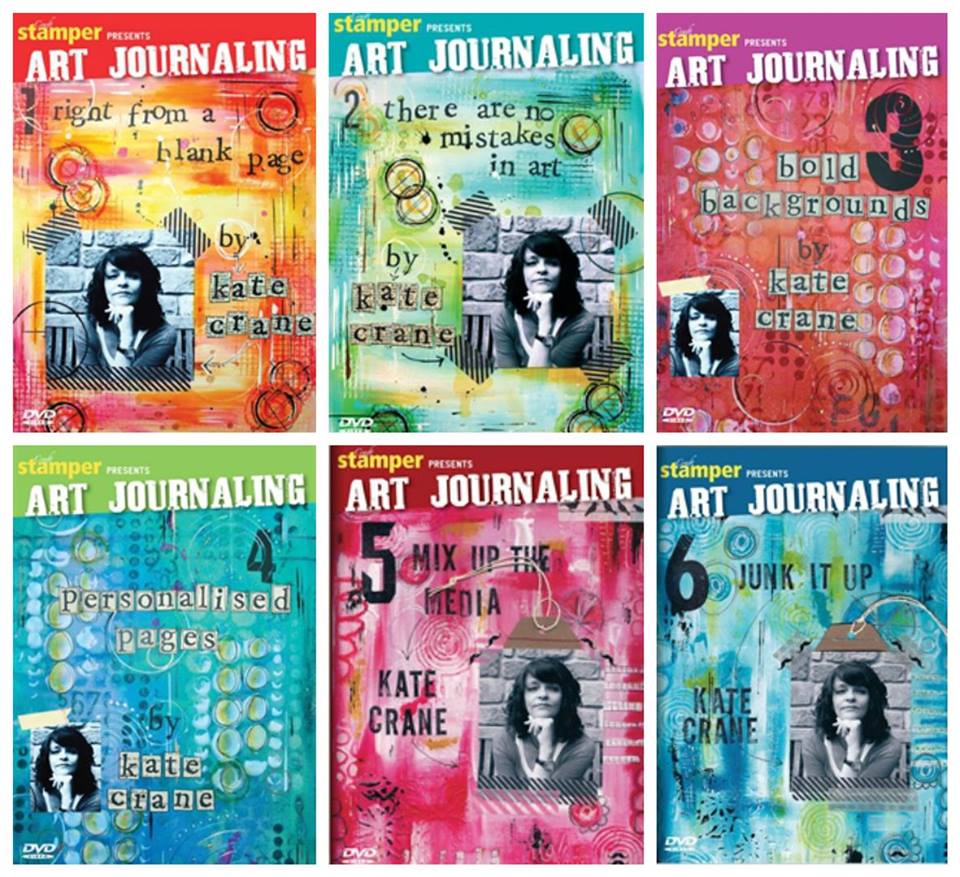
Our sponsor this month is Traplet .... the home of Craft Stamper magazine,  and boy have they got a fabulous prize for the challenge winner ........ it's HUGE!!!!!
Take a look at this .....


ALL SIX Kate Crane Art Journaling DVD's ...... wish I could enter!!!

Here's a little bit of inspiration for you to get you started ......


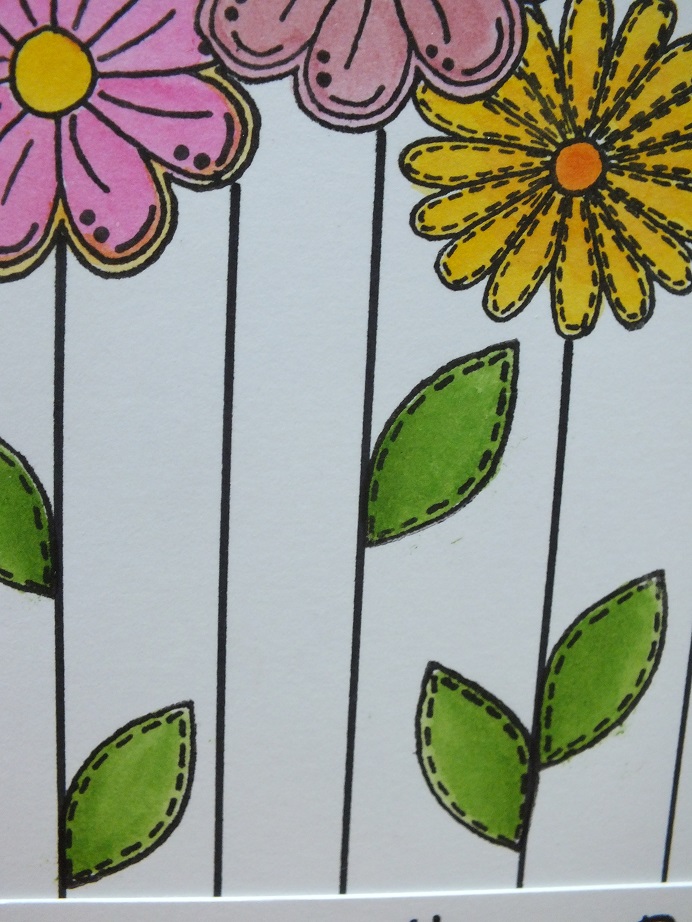
I love this brand new set of stamps from Happy Little Stampers ..... Doodled Flowers.  The blooms are so pretty and you also get a nice selection of sentiments on the set too.

I've simply stamped the blooms across the top of a piece of white card using a black Versafine ink, and then coloured them using Distress Inks and a little water


You can see I've masked some of the flowers before stamping, to give a bit of depth and then I also cut around the top edge of the flowers to add a bit more interest


The large flower has been stamped again onto a separate piece of card, coloured, fussy cut and layered to add a bit of dimension

I used a black marker to draw in the stems and then stamped the leaves from the Doodles Flowers set and coloured them using my  Distress Inks again


A sentiment stamped, and added to the front of the card finishes off the front


And then there's more of those pretty blooms inside the card ......


I can see this set of stamps being well loved in the old craft room,..... pretty designs, easy to cut out and layer and great for adding colour to


Now it's over to you.  Create something fabulous and floral and get your entries in before April 27th to be in with a chance of winning that amazing prize.

Don't forget there's also the Design Winner too .... chosen by the DT.  Their prize will be .....
- their winning project published in Craft Stamper Magazine
- they will be invited to be a Guest Designer on a future Craft Stamper Blog Challenge
- and they'll get a Winners Profile published on the Craft Stamper Blog!

Remember ......... you can enter up to 3 times but ,only ONE project per blog post please.  There must be a link to the Craft Stamper Challenge Blog and a link back to your actual blog post, not just your blog, on each entry.  
Happy stamping ...... and good luck!

Thanks for popping by ..... enjoy the rest of your day and have a fabulous weekend.

I think I'm going to be spending a little bit of time in the old craft room over the weekend.  Hubby bought me a great unit with 60 drawers in it, perfect for holding all my rubber stamps (well .... maybe not all of them!!)  
Now I just have to decide what goes where and what categories I'm going to split them all into ..... wooden stamps, cling and clear.  Do I keep them by individual company ...... individual style like cute, grungy, vintage etc.  Do I split sets up or keep them together ...... do all my JOFY go in one drawer (hmmm ...... make that two!), all my Tim Holtz in another (better keep three for that collection!) .... you get my drift!  I'm going to be busy I think.

Cheerio until next time.

Linda
xx