Friday, 29 June 2018

I'm on the Uniko Blog today .......

Good morning ......... Happy Friday!

Just a quick post this morning, to let you know you can find me over on the Uniko Blog today with a little more inspiration using the gorgeous new Mehndi Mandala stencil ...... white on Kraft card, always a favourite.


I can't believe it's the weekend again, and ....... we're almost in July!!  It's hubby's birthday coming up, and then our wedding anniversary at the end of the month ..... 30 years this time!!!  Doesn't time fly when you're having fun.

This time last week our little family break was coming to an end.  We were saying goodbye to Bourton-on-the-Water again for another year.
We had a fab time as always.  A whole week of doing nothing, well almost ..... in one of our favourite parts of the UK.
This was home for the week ..... the beautiful Welcome Cottage.  A real home from home ......


Lots of time was spent down by the river, where we met the locals ......


and even got in there on occasion!


We did go out and about too.  We had a fab day at the Cheltenham Food & Drink Festival ..... well it would have been a shame not to go, seeing as it was on the weekend we arrived. I found another new Gin .... cheers!

We went to the Snowshill Lavender Farm for afternoon tea ........ I brought some lavender plants home with me .... now I just have to keep them alive.  I'm not green fingered at all!!


We had a picnic lunch up at Broadway Tower ........


We stopped off in Stow on the Wold for a little retail therapy .......


And we had a day at the Cotswold Wildlife Park ...... and got up close and personal with the cute little pygmy goats


We do love Bourton ...... and now Chris's girlfriend and the kids love it too ......


We'll be back there again soon no doubt


Thanks for popping by ..... enjoy the rest of your day and have a lovely, sunny weekend.

Cheerio until next time .....

Wednesday, 27 June 2018

Feeling hot hot hot!! ........

Happy Wednesday .....

What another glorious day its been ..... the sun just keeps on shining! I'm loving it!
No BBQ tonight though ..... hubby is out on a business thing, schmoozing with a client.  Which translates to ...... a fancy meal, a few drinks and the football probably!  So I thought I'd take the opportunity to catch up with you guys.

Did anyone see Lucy on the TV this afternoon ..... Sweet Poppy Stencils were back on our screens with the start of their new festive designs.  It's been hard to think of Christmas with the temperatures soaring ..... my craft room has been a little on the warm side!
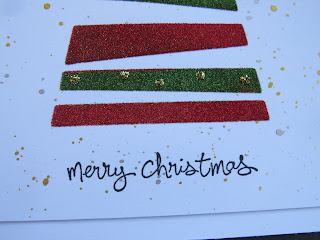
I did get a few samples for the show done though.  Luckily I made a start before we went away so all that was needed was to finish them off and get them in the post! ..... Ho! Ho! Ho!


There was brand new Christmas stencil designs, some with matching Buddy Dies and a fabulous set of nesting tag dies.  They all went down really well ..... lots of sell outs, so we're not the only ones thinking of Christmas!

Here's a quick look at what I did with some of them ..... first up, the pretty Bubble Wreath


This is gorgeous, a great size, perfect for CAS designs.  Use your inks with it, or the pastes.  Add glitters like I've done above, or use gem stones or sequins to embellish.

I kept my design really simple.  I found a piece of cardstock in my bit box, that I'd smooshed and splattered with gold and silver metallic inks, to use as my background


I then used the stencil with the glossy white paste and sprinkled fine glitters over the top whilst the paste was still wet ......


I die cut out the centre of the wreath, stamped my sentiment onto the circle and then used foam pads and a circle of gold mirri card to mount it back into place


The wreath is great for making matching tags too ..... you don't have to use the full image all the time


If you don't like the multi coloured look then just go with the one ......


Classic gold on black with a touch of festive red ......


I also used a few dots of Liquid Pearls here and there to add a bit more colour.

The Starry Night Tree is another gorgeous new design ..... quite contemporary I think


I've used the metallic inks again to create the background ...... simply splattered them over a piece of white card


Glossy White paste through the stencil, and glitter again over the top .... so quick and easy


A simple sentiment and a few dots of glitter glue .....


and a matching tag ......


Next up is the pretty Large Bauble, which has a lovely set of matching nesting dies ......


I used both the stencil, with inks and paste and glitter ......


And the set of dies, to cut out the large bauble and the bow .....


A festive sentiment and a little bit of Distress Ink around the edges and you have another beautiful Christmas design


Again .... if you like the more traditional colours, stick with the red and gold ..... and just because it's a large bauble doesn't mean you have to make large cards ...... this one is only 7 x 5 inches


Finally ...... we have the Christmas Cracker, which also has matching dies.  This is such a fun design.


I masked off the actual cracker and just did the stars first onto the background using gold paste


I then stenciled the cracker onto a separate piece of card using the white paste and glitters, and used the dies to cut out both pieces


These were then attached to my card front leaving a small gap in the middle so that I could add my greeting .....


I think this would make a fabulous festive party invite .... don't you?

Have you started your Christmas cards yet? If not I hope I've given you some ideas.

Thanks for popping by ...... enjoy the rest of your evening.
It looks like we're in for another beautiful sunset tonight .......... this was from the other evening. 
I can get used to this


Time for a cheeky glass of wine I think and some catch up TV ..... I've earned it!

Cheerio until next time ......

Saturday, 23 June 2018

Surprise stencil release from Uniko .....

Happy weekend folks .....

If you love your stencils, and you're a fan of Uniko then you're in for a treat, because today sees a mini release of three new gorgeous stencil designs all available now on the Uniko website.

There's the pretty Mehndi Mandala ..... love this!


Bright Butterflies ...... again a really pretty all over design,

and the Scattered Polka Hexagons ..... perfect for creating quick backgrounds.

As with all Uniko new releases, we're having a bit of a Blog Hop to celebrate. and hopefully give you some inspiration using these new designs.
Hop along and check in with the rest of the Design Team and also our fabulous Guest Designer .... Ruth, who's joining in the fun too.

First up from me though is that pretty Mehndi Mandala ....... this is one of those designs that depending on the colours you use will look totally different each time.


Here I've used a couple of Distress Oxide colours through the stencil to give this lovely crisp image   


I've gone for pretty sunshine shades to go with the sentiment, which is from the Uniko stamp set Spring Botanicals Daffodil


I added a few highlights here and there using a mixture of Jewel and Crystal Nuvo Drops


And then finished off by outlining some of the stencil design with a Stardust Gel Pen.  This gives a pretty shimmer when the light catches it ....... not always easy to photograph though!


Here's the same stencil but a totally different look I think .....


The background is actually a piece of what I call mop up card ...... I don't like wasting ink so if I've used my craft mat as a palette and there's ink left over, I spritz with water and smoosh a piece of card through ....... instant backgrounds and no wasted ink!


I then used the Mandala stencil, along with white paste, off the edge of the piece of card


I sprinkled white glitter over the paste and left it to dry.


A sentiment on the bottom finishes off ...... Uniko's All Occasions Sentiments #6


Up next, the pretty Bright Butterflies ..... perfect for all over designs


A simple Distress ink background, spritzed with water, then more colours used through the stencil over the top


A simple die cut sentiment as the focal point, and a few dots of white gel pen ....... easy


Another way of using the whole design in a more subtle way is to run the stencil through your die cutting machine and create a pretty embossed look to the background


Then placing the stencil back on to the card, single out just one or two of the butterflies and add colour, to create a focal point.


A simple strip across the bottom to add a sentiment ..... this also hides the edge of the embossing from the stencil and gives a more finished look, and means that you don't have to stick to the actual size of the stencil, you can go bigger!


Finally, the cute Scattered Hexagons ...... works so well with the Bee Happy stamp set from the last Uniko release


I've masked off part of my card front and used the stencil to create a simple background, moving the stencil slightly to create a shadowed look


I then stamped the cute little bee from the Bee Happy stamp set and coloured him using one of the ZIG Markers and the Stardust gel pen for the wings


He was also stamped and fussy cut from a scrap of white card, and attached just above the sentiment for a touch of dimension


I framed the stenciled panel by simply adding embossed lines top and bottom.  If it wasn't for the fussy cut bee, this would be a simple one layer card .... great for posting!


As with all the Uniko Blog Hops there's a fabulous GIVEAWAY.  Simply comment along the hop for your chance to win one of the three new stencil designs from the release and ..... as there are three new designs there'll be three randomly chosen winners!!

Thanks for popping by .... have a great weekend and happy hopping!
We arrived back from our trip to the Cotswolds last night so the house looks like a bombs hit it this morning, there's suitcases and bags everywhere. 
We had a great time though, the cottage was just perfect, Bourton was beautiful as always, and it was lovely spending time with all the family. 
Now there's all the unpacking to do ...... guess that's my weekend sorted!

Cheerio until next time .....