Wednesday, 22 December 2021

We're almost there .........

Happy Wednesday ........

Yes, only 3 more sleeps until the big day ........ are you getting excited!!!?
I am.  We're off to the panto on Christmas Eve ........ Oh no! you're not!  Oh yes we are!! (sorry!)
We're out for a late lunch and then it's Jack and the Beanstalk at the Gaiety theatre.  
And then, we've got the whole family staying over on Christmas Eve.  It's going to be so nice having everyone together first thing on Christmas morning ........ it's been a long time since that's happened.

The festive season has definitely got underway here ........ we've been watching Christmas movies all week!  Cards have been posted, presents have been bought and wrapped, and the food shopping is almost done.   The cupboards are bursting with Christmas goodies, I've tried out the chocolates and they're fine!
I've just got to pick up the bird etc., and grab fresh fruit and vegetables and then that's it ........ all done! We can sit back, relax, and enjoy a good old Walmsley Christmas.  Well once the cookings done. 

If you've been a follower of my blog for a while then you may recall that in the past, just before Christmas, I got asked to create a set of cards, to be used on a Christmas Quest. 
They were for a very special lady, made to hold clues and details of treats and activities arranged for her Quest, all put together for her by her lovely husband ........ how cute is that!

I haven't been able to do the cards for the last few years but, this year Doug got his order in early, and I must say I really enjoyed making them.  I was a bit nervous at first, what with the old mojo not playing ball and all that but, I was really happy with the results.

I know that the Quest has now been completed so I think I'm safe to share them with you (Catherine if you're reading this I hope you don't mind!)


Doug wanted 5 cards, all with a sort of vintage style, so here they are ........

The beautiful poinsettia embossing folder from Tim Holtz.  


You may be thinking 'I've already seen this' ....... well you'd be right!  (You'll find it here)  
This was the first one I did, and I loved it so much that it became this year's family Christmas design ....... slightly different colours though.

Next up, beautiful vintage skating boots ......


Tim Holtz woodgrain cardstock in the background, inked with Distress Ink and then I used his Bigz die for the skates ....... this one is my favourite I think!


We had to include Santa in the collection too .........


There's that woodgrain cardstock again ....... and more of Tim's products


A pretty little winter scene next, done using white inks onto Kraft card ...... I do love this look


And finally a jolly snowman .......


A little bit of no-line watercolouring, and one of my favourite Penny Black stamps. 

Well, I think that's me done on the blog for this year. 
Thanks for popping by ...... enjoy the rest of your day.
It's time to get a few more things crossed off my to do list.
 
Before I go though, I'd like to thank all my friends and followers for visiting the blog this past year.  I really do appreciate each and every one of you. It just wouldn't be the same without you ........ 💖


Wishing you all a Merry Christmas 
and a very Happy and Healthy New Year!

See you in 2022!


Friday, 17 December 2021

And ....... they're done!

Happy Friday ........

Well, that was cutting it fine ..... my Christmas cards are done!  I think.
Can I apologise now for any that arrive late.  Oh! and also the two birthdays that I forgot this week too ....... sorry ladies!  I'm not doing very well am I.  Cards are on their way, I promise.  I'm going to blame it on the booster jab that set me back 48 hours!!
    
Every year I find myself saying the same thing ....... I'm not going to leave my Christmas cards to the last minute but, here I am again, a week to go and I'm still busy in the craft room.  It's tags and gift wrap next though ...... the fun bit!

Here's the last of my Christmas cards for 2021.  
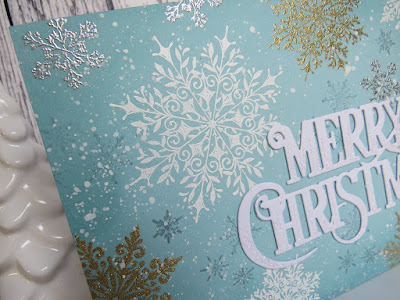
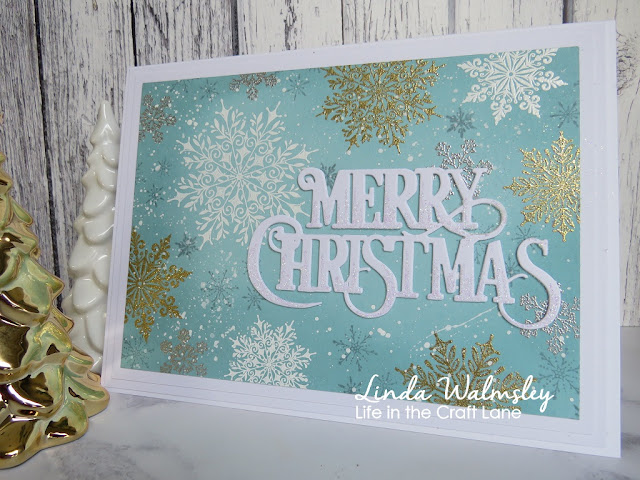
First up,  a copy of a design I did last year I think, updated with this year's favourite festive die.  I do love a snowflake, or two!


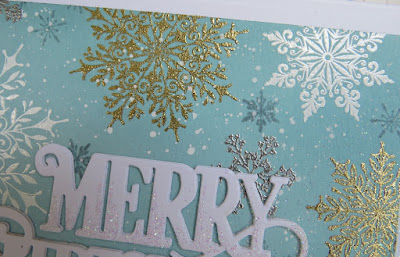
Lots of stamping and heat embossing, using Tim Holtz's snowflake stamps in various sizes.  


I did a whole batch of these, and becasue I used the MISTI to do the stamping they didn't take that long at all.


A mixture of sparkly gold, silver and white embossing powders for the larger flakes, with a few tiny snowflakes just stamped inbetween to fill any gaps.   And then lots of white paint splatters over the top


I layered the die cut sentiment to add a bit of dimension, gave it a touch of sparkle with some fine crystal glitter,  and then attached it over the top of my snowflakes ........ love it!


I love it even more with a bit of mat and layering, for one or two special cards.


My final card for this year was made especially for the team at our favourite little wine bar/restaurant ......


Says it all really!

Thanks for popping by ..... enjoy the rest of your day, and have a lovely weekend.
I'm off to the post office now!

Cheerio until next time ........ 

Monday, 13 December 2021

12 days until Christmas ........

Happy Monday! ........

Well, that's my booster jab all done and dusted before Christmas.  Lets hope it's like the other two ...... no nasty side effects! 

I hope you all had a lovely weekend.  I can't believe there's only one more before the big day ....... are you ready for it?  We did make a start on the all important Christmas gravy yesterday.  Bless Jamie Oliver for his delicious Get Ahead Gravy base ..... works a treat every year!

I've got some more Christmas cards to share with you today ....... batch making is a wonderful thing!

Here's that new die again, told you I would be using it a lot .........


Same card, just added a change of colour to the die cut sentiment.

The bunch of mistletoe is from a Julie Hickey stamp set called Under the Mistletoe ........ it fits perfectly on these 7x5inch cards.
I stamped and heat embossed in Platinum onto black cardstock, and then used pearlescent paints to colour it in


A few splatters of white paint onto the backgrounds and then I added the die cut sentiment ....... simple!
The gold one above is just coloured with Delicata Golden Glitz ink, applied direct from the ink pad.
The red and green versions were coloured with inks and then heat embossed with a sparkly clear embossing powder


And the white one was just glittered ....... so quick and easy.  The only thing that took the time was painting the mistletoe!


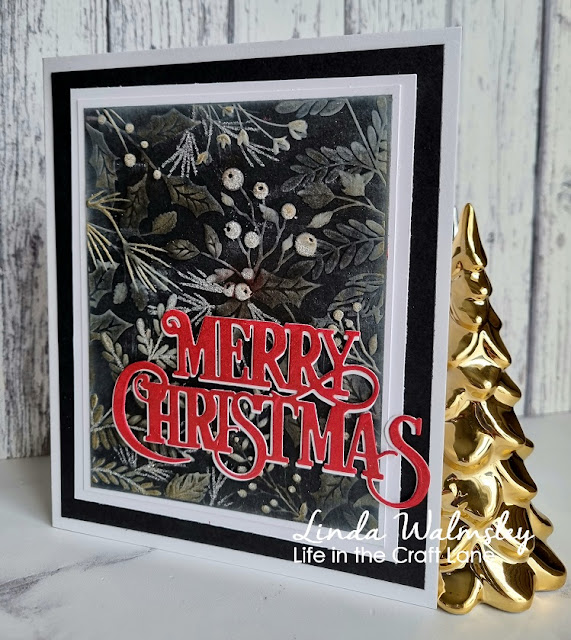
Here's another easy design, this time with an embossing folder ......... I'm loving black cardstock at the moment!


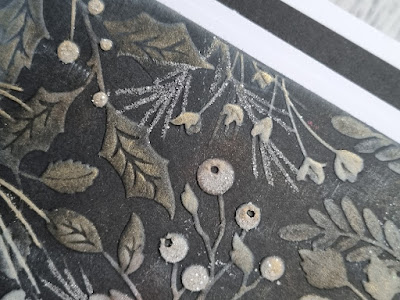
This embossing folder is ......... Holiday Greenery from Simon Says Stamp.  I've simply run it through the Big Shot with a piece of black cardstock.  I then used various inkpads (metallic) to add the colours, gently swiping each one over the top of the raised areas.


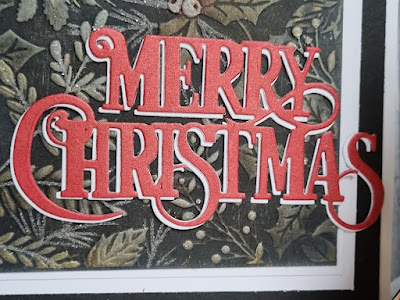
A little bit of mat and layering to frame the piece, and to finish I added a touch of Tim Holtz's Clear Rock Candy Glitter to highlight pieces of the greenery and of course, added my favourite die cut sentiment, cut twice, one coloured (Delicata Ruby Red metallic ink), one not, and then layered to give a shadowed look


Really easy cards ......... which is great if you've left things a little late like I have,  I love how they've turned out though.  

Wouldn't this make a great Christmas card ...........  can you believe Arthur's 3 month's old today!


and these are just a couple of photos from his first photoshoot ...... cute or what!

First family photo 💖


Thanks for popping by ...... enjoy the rest of your day.  
Time for a coffe and a mince pie I think

Cheerio until next time .......


Tuesday, 7 December 2021

Hello December ......

Happy Tuesday ..........

'Where have you been?' I guess you're all saying, well the answer to that is .......... nowhere!  
I've no excuses, I just think I needed a break.
 
We should actually be across in the UK right now with the van but ...... the ferry was cancelled on Saturday morning, just as we arrived at the port.  The weather was getting pretty bad, and to be honest I wasn't looking forward to the trip so I was kind of glad we weren't sailing.
Unfortunately it does mean that we probably won't get across now before Christmas which is a shame, we won't be able to see family as planned, and, because we should have been taking the van for it's service it may just affect the warranty, we'll have to see about that!  Fingers crossed we can sort something out.

It has been a busy couple of weeks though what with one thing and another ...... welcome to December!  
We've done a little bit of late night Christmas shopping here and there, we're almost done now I think.  Found time for a cheeky lunchtime treat at our favourite restaurant, and hubby actually went into the office for a few days, first time since the pandemic started I think.  It was strange not having him at home!
Around the house, we've had the heating break down, just as the cold weather arrived ........ perfect timing!!!  Thankfully it didn't take the plumber too long to get it all cosy again.
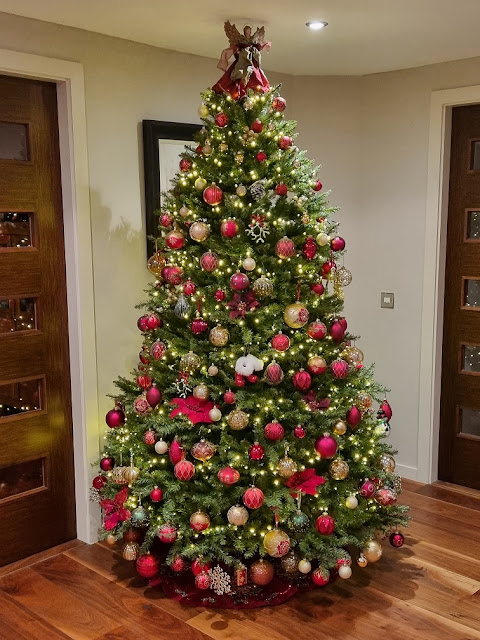
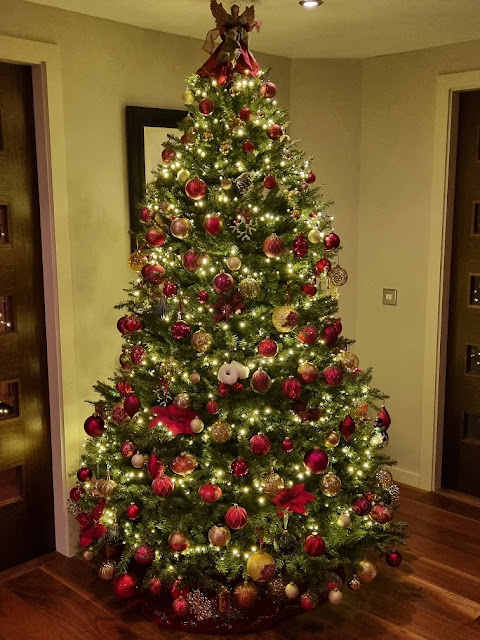
We've had a new fridge arrive ready for the festive season and of course the Christmas trees are all decorated ........


The big one fits nicley in the hall, although I did have to be a little creatvie with some of the top branches (thank goodness the angel has a wide skirt!!)


And then my favourite one in the lounge .........


Still needs a few more baubles ........ only joking ........ maybe


I also had a crafty project to do for someone on the island which, thankfully, got my mojo going in time to get some more Christmas cards done.  I really thought I was going to have to send shop bought ones this year which wouldn't have gone down well, at all!

Here's a couple of  designs that have come out of the craft room recently .......... 


These should have been going across with me this last weekend to be hand delivered to family members.

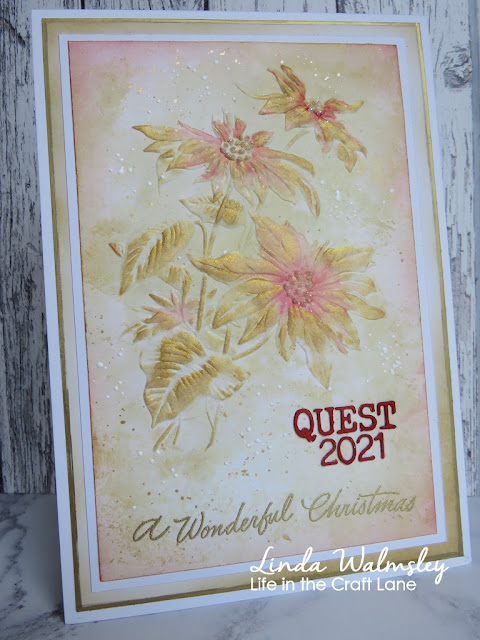
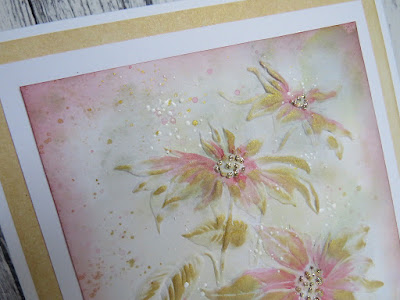
Made using the gorgeous Tim Holtz Poinsettia Embossing Folder ...... I think this came out last year but I never got around to using it!

I smooshed some Distress Inks (Antique Linen & Old Paper) onto my craft mat, spritzed with water and then used a piece of watercolour card to pick up the colour.


Once this was dry, I lightly spritzed the back of the card with water and then ran it through my Big Shot using the embossing folder.

I then gently rubbed over the raised areas with a gold ink pad (Delicata - Golden Glitz) to bring out some of the detail 


I added a touch of red Distress Re-inker (Festive Berries) onto the flowers, and used quite a bit of water to spread the colour around.

A little bit of sparkle from some glitter, a few splatters of the gold and red inks onto the background, and I finished with a sprinkling of Chunky White Embossing powder, heated from underneath


I also added a bit of Distress Ink around the edges of the card (Aged Mahogany) and stamped a festive sentiment on the bottom.

I also added some of the design on the inside too .......


This next card was made from a leftover piece from World Cardmaking Day .........


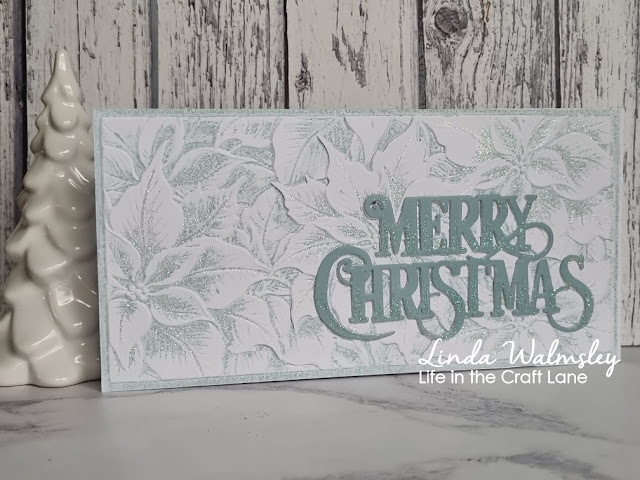
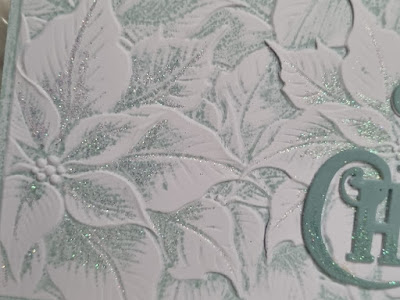
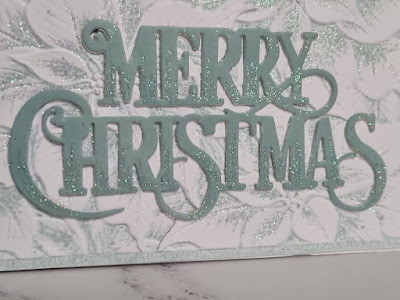
Another beautiful poinsettia embossing folder, this time from Lisa Horton Crafts.  I love this folder, the detail is just amazing!


I wasn't too sure about the panel at the time, I'd used Distress Oxide Ink (Speckled Egg) on the folder and I didn't like the results.  I think I'd put too much ink on and it pooled and gave a dotty effect.  But, I didn't want to throw it away so I left it on my desk.
I'm so glad I did .......... because look,  with a touch of glitter here and there, and my new favourite die, it looks perfect!  


I'll apologise now, but you will be seeing a lot of this die!  It arrived in the craft room at the weekend and I love it!!!!  It's from The Ton.  It's such a great size, the font is gorgeous, and it cuts beautifully. 
I might even make some more of this one!

It's still blowing a hoolie out there today.  We're in the middle of Storm Barra, and it's wild!  
I thought Arwen was bad enough last week but this one seems to be worse.  No boats (if we'd have gone across we might not have been able to get back!) and the airport is closed.  There's roads closed across the island, trees down everywhere, including our garden.  One hit the bathroom window this morning and gave me a right old scare.  Luckily there was no damage to the window but, the tree doesn't look so good!
I think it's an evening in front of the TV for us ......... stay safe and warm if the weather's bad where you are.

Thanks for popping by ........ enjoy the rest of your day.

Before I go .......... looks like this little angel is getting in the mood for Christmas.  
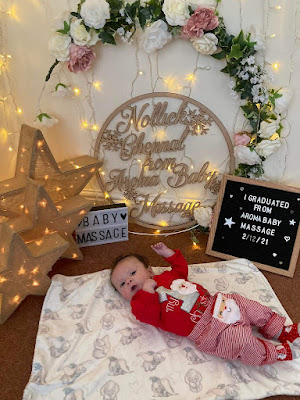
I can't believe our little grandson Arthur is 12 weeks old already! Not sure he understands the whole Christmas thing yet but he loves the twinkly lights! 


I think the day was all a bit much for him ....... just look at those legs! 💖


Cheerio until next time ........


Monday, 22 November 2021

It's started! ...........

Happy Monday .........

It's a bit of a chilly one here.  We've had our first frost this morning ......... brrrrrr!  Winter is coming!

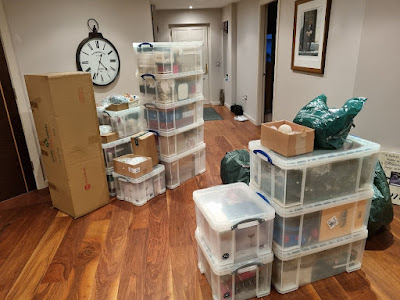
Did you have a nice weekend?  It was a bit of a quiet one here so I decided to round up all the Christmas decorations ready to make a start on the trees.
Ooops! It looks like the day we moved in, again ...... there's boxes everywhere!  
Have we really got that many baubles ..........


Apparently ..... yes we have!  

I did make a start ...... the first tree was up in no time and not a bauble in sight


Then Mr Buble arrived, and Lauren joined in, and the first decorated tree is done ...... I think!
Looking at it in the daylight it might just need a few extras here and there.


Anyway, enough of the trees, I've got two cards to share with you for the final challenges this year at CAS Mix Up and CAS Christmas

CAS Mix Up is a Stencil challenge this month with the theme .....Stencil Monoprinting


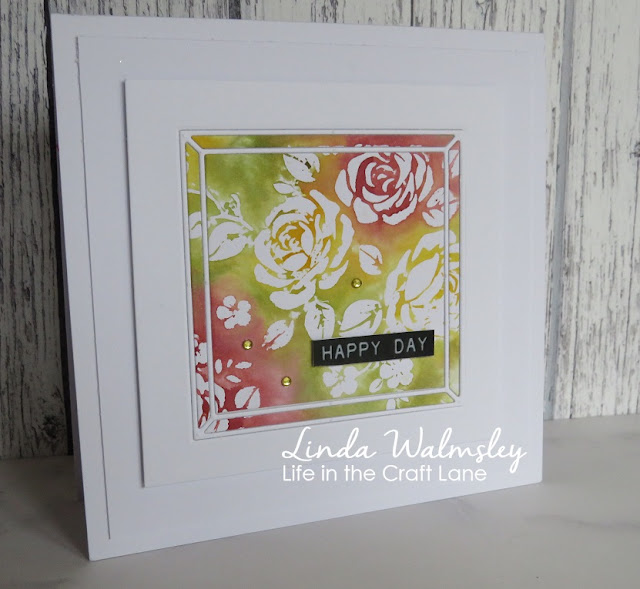
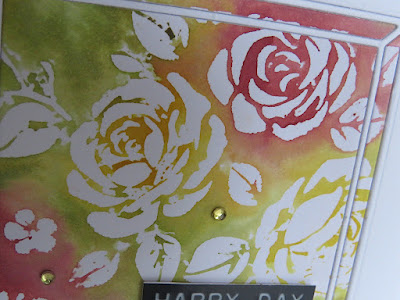
Here's a really quick and easy card using a stencil monoprint that I found in my stash, along with a pretty frame die from Penny Black


The print was done by applying Distress Inks directly from the ink pad onto the stencil, spritzing with a little water, and then laying the inky stencil down onto a piece of watercolour card.
Mop up any excess ink, gently lift the stencil, and voila!!  One piece of pretty printed cardstock.


I used the Penny Black die to ........ a) cut out the frame from the centre of a square of white card, and b) to cut the frame from the printed card.
I then placed the white die cut frame back into the square card and inlaid the coloured pieces to create the complete square.


  I mounted this on a larger square cardblank, added a simple sentiment and a few sparkly gemstones.


CAS Christmas is all about ...... Christmas Critters


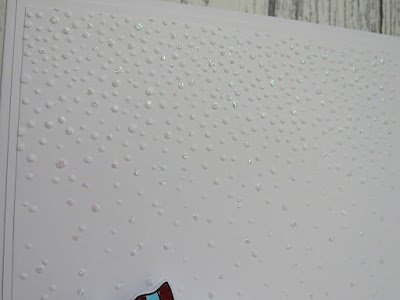
You can't get much more CAS.  The background was an embossing folder with just a touch of added glitter


Stamped and die cut this little guy ......


Added some colour using ZIG Markers ....... stamped my sentiment on the bottom of the card and attached the polar bear off to the side


Another Christmas card done!

Thanks for popping by ..... enjoy the rest of your day.
It's time to sort through those boxes and get another tree done I think ......... are you ready Mr Buble!? 

Cheerio until next time ........


Products used:
CAS Mix Up
Stencil: Floral Layering Stencil (Tim Holtz)
Inks: Distress Inks - Aged Mahogany, Peeled Paint, Mustard Seed
Other: Framed die (Penny Black); Sentiment Strip (Simon Says Stamp); Self adhesive gems

CAS Christmas
Stamps: Polar Bear Pals (My Favourite Things); Christmas Time 3 (Tim Holtz) - for the sentiment
Inks: Versafine Clair - Nocturne; Versafine - Crimson Red
Others: Polar Bear Pals Die-namics (My Favourite Things); Quickie Glue Pen; Fine Crystal Glitter; ZIG Clean Color Brush Markers