Thursday, 10 August 2017

Are you feeling festive? ........

Happy Thursday ......

Fancy some Christmas ideas? Have you started on your festive makes yet?  No ...... me neither. Having said that though I did spend yesterday playing around with this year's Christmas workshop .........  Ho! Ho! Ho!
It's coming along nicely too ..... very sparkly!  When I get them finished I'll give you a sneaky peek.

Speaking of Christmas, I mentioned yesterday that I'd have some festive Sweet Poppy Stencil designs to share with you.  I think a couple of the new stencils might just make it onto the show on Friday ... so here they are ......
There's a beautiful new Christmas Tree ...... Snowflake Tree


This is such a pretty design ..... I've used it here straight onto black card with the glossy white paste then sprinkled over the top with the fine glitters ..... Crystalina and one of the pretty gold shades


A simple sentiment added to the side of the tree ..... and you're done


Here's the same stencil used on a coloured background ......


White paste again ...... Crystalina glitter over the top


Just look at the sparkle ..... and all that detail ....... gorgeous!


One of the brand new Inspiration Words down the side ....... and you've got yourself a really simple yet stunning design.
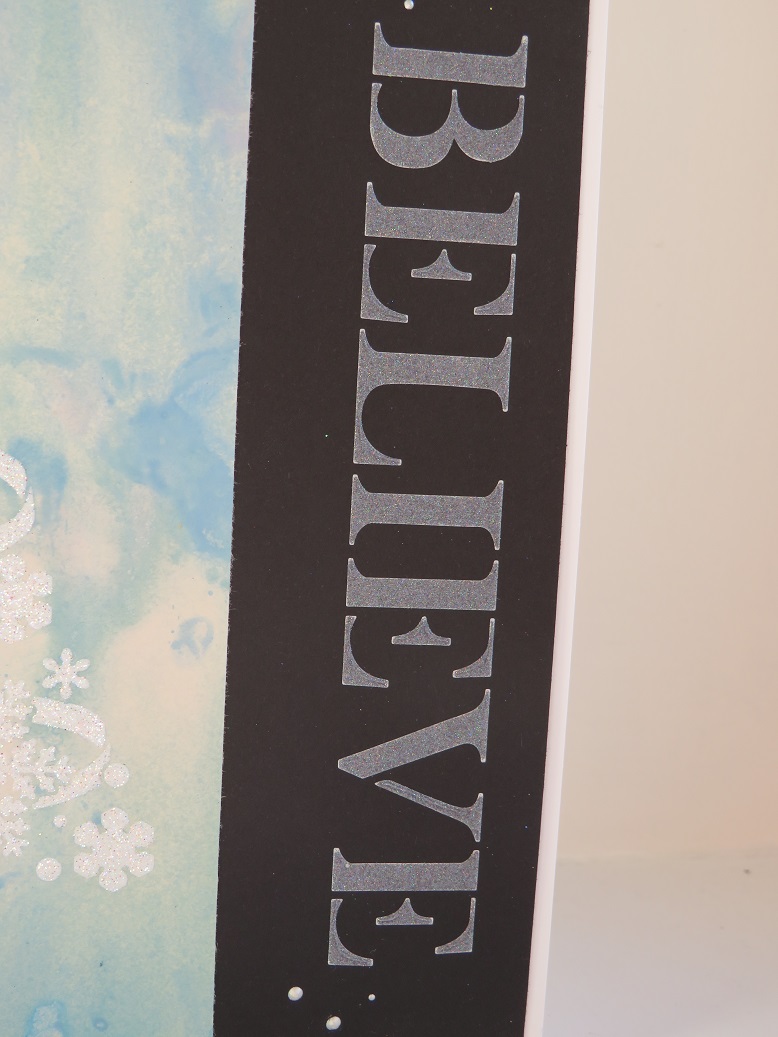

Why not use those Inspiration Words as the focal point on your cards ....... this one's perfect for Christmas designs ......


CAS ..... and the colour comes from those fabulous glitters again ....


Use your rubber stamps to add more detail ..... this cute little guy comes from an old Penny Black set.
He's been stamped, coloured with pens and inks and then fussy cut


A few sequins here and there and a touch of glitter glue ......


And I finished off the sentiment using my rubber stamps again


Here's another of the new stencil designs ....... perfect for quick and easy cards ...... Let it Snow


Classic black and white ..... a touch of gold, and lots of sparkle ......


Or use your favourite colours to change things up a little and get a completely different look.

Last but not least ...... Northpole ..... brrrrrr!


Another great sized stencil that will fill a whole card front ...... I've actually added to it here because my finished card is 8x8 so if you like making larger cards it's a great one to use.

I created a little winter scene first before using the stencil ....... stamped the trees along a hill shaped mask across a piece of white card and used Distress Ink to colour the sky .....


Added in the little bunnies at the bottom ......


I then used the stencil with glossy white paste and sprinkled the design with glitter .... white onto the snowy areas and red to add colour to the pole


I used Black Archival Ink to stencil the signs onto white card and fussy cut them to attach over the top and make them stand out a little.
Because I was making an 8x8 (inch) card, the stencil design didn't actually fill the whole of my card so I simply added more falling snow where it was needed using a dimensional glue and fine crystal glitter.


Hope you like the new designs ........ and I hope I've given you some ideas for this years Christmas makes.

Thanks for popping by ........I hope you're enjoying your day.
We've just been to the Little Fish Cafe for lunch.  It was lovely down on the quay ..... sunshine, good food and great company.  Chris joined us too which was nice.  We haven't seen much of him since his pub refurb started.  Things seem to be going to plan .... it all looks a bit of a mess at the moment but I'm sure it'll look great when it's finished.

Don't forget the Sweet Poppy Stencil shows are 12 and 4pm tomorrow (Friday) ...... on HOCHANDA Sky Channel 663/Freeview 85/Freesat 817.  I'll be watching.

Cheerio until next time

Wednesday, 9 August 2017

Book the sofa ...... grab the remote control ...... Sweet Poppy are back on the TV

Happy Wednesday ........

What's everyone up to this week? I hope you're having a good one.

I just want to give you a quick reminder that the lovely Lucy Ellis and Sweet Poppy Stencils will be back on our TV screens again this week.
There'll be some brand new stencils ....... everyday designs and possibly a touch of dare I say it .....Christmas! along with some old favourites and back in stocks  There's some brand new products too ..... exciting stuff!  And, as always great tips and demonstrations from Lucy.
Book the sofa and the TV remote NOW!  Or ..... if you can't watch live, set the shows to record.
Friday August 11th ....... at 12 and 4pm ........ on Hochanda Sky Channel 663/Freeview 85/Freesat817

Here's a little look at one of the new designs that's on the show ....... the gorgeous Mehndi Flower ..... how pretty is this!


A great size too ...... use the whole design to create stunning cards.
Classic black and white for that elegant look........


Glossy black paste onto plain white cardstock ..... simple


With just a touch of gold embossing to make it extra special ......


A few tiny gemstones for added sparkle ...... and a bit of matting and layering to frame the image


 Here I've used the same stencil ..... but created a totally different look .....


Add a bit of colour to the background ..... I used Distress Inks simply brayered onto a piece of white card


White paste this time through the stencil, and one of the gorgeous fine glitters from Sweet Poppy sprinkled over the top whilst the paste is still wet.

I used the same paste and glitter for the Inspirational Word down the side too ......


The Sweet Poppy glitters are super fine and they sparkle beautifully .... and there's lots of beautiful colours to choose from too .... this one is Penny Copper


Don't just use your stencils for the focal point on your cards ...... create interesting backgrounds with them too .......


I've used just part of the Mehndi Flower randomly on the edges of the black layer of card, with the black paste, to add a bit more interest to my design .....


Use your stencils with your patterned papers .......


I did a workshop a few weeks ago using patterned papers ...... even the ones we didn't like!  This is another version of one of the cards we made
We all have patterned papers that we love .... and don't use!  We also have some designs that are not so well loved.  Don't just throw them out or leave them on the bottom of the pile ........ cover them up a little and change the look ......


Use pretty stencil designs, and add a bit of glitter ......


Throw in a bit of rubber stamping, a sentiment too ........


Ooooh .... have you spotted one of the brand new products there ....... look at the bottom of the sentiment banner .... tiny 3D cement balls.  How cute are those ..... and great for adding texture to your projects.
I simply used my finger to apply a little bit of glue to the edges of my card, sprinkled on the tiny balls and left them to dry.  Once they were dry I gently rubbed over the top with a little White Fire Treasure Gold ......


If you click on the pictures you'll be able to get a better look at them! I can't wait to have a proper play with these ...... most of my samples were finished when they arrived but I had to use them somewhere!!!

Thanks for popping by .... enjoy the rest of your day.
It's time I made a start on tonight's meal .... hubby will be home soon!
I'll be back tomorrow though with a few more ideas for using your Sweet Poppy Stencils ....... I think we'll go a little bit festive maybe.

Cheerio until next time ........

Sunday, 6 August 2017

Ahhh ..... tissue!

Happy Sunday evening folks ......

Our weekend is almost over ....... I hope you've had a good one.
It's been lovely and relaxing here .... for a change!

It's time to get another challenge underway, with the Happy Little Stampers Mixed Media Challenge


The theme for August is all about Tissue Paper.  It's not something I use regularly but, when I do play around with it it's always fun!
There's lots of ways to use tissue ...... stamp onto it and then apply it to MDF, wood, canvas or your cards and journals. This gives a really nice delicate effect.
Use Bleeding Art tissue to apply colour to your projects .... this works great on canvas or watercolour card, makes fab background pieces.
Or ...... watercolour just plain white tissue paper, like I've done for my inspiration piece here ......

 
This fun technique is a favourite of one of my Blog buddies .... the lovely Loll Thompson. She's been using tissue a lot recently .... check out her YouTube video for some great ideas.

Inspired by Loll's techniques I used Distress Inks to watercolour my tissue paper ..... smooshed the ink directly onto my craft sheet, spritzed with water and then laid the piece of white tissue paper on the top to soak up the colour

Once it was dry ..... it doesn't take long ...... I scrunched up the tissue, opened it out again and then stuck it down onto a piece of white cardstock, using IndigoBlu's Slap It On as my adhesive ..... this makes it easier to work with.


You can see I left all the creases in the tissue and even added a few more as I glued it down ...  this gives a great texture.


Whilst this was drying I die cut my birds (CUTplorations For the Birds dies) once from plain white cardstock and once from black.  I then layered the two together off set ever so slightly to give a shadow effect ......


I also die cut a stitched frame and cut the tissue down to size so that it would fit behind the frame with the die cut birds on the top.

I added a stamped sentiment underneath ......


And a little stamped banner to the top ...... just look at all that lovely texture from the tissue paper


I had a piece of the coloured tissue left over so .... for the inside of the card I stamped part of my greeting .......


and used the tissue to die cut the rest ......... I don't like to waste anything as you know!


Don't forget as with all the HLS Challenges, there's a prize for the challenge winner ...... a $20 Gift Certificate to spend in the HLS Store .... so get creating!


Thanks for popping by ..... enjoy what's left of your weekend.
It's been very quiet here today ..... no family Sunday lunch.  I think both of the kids have been making the most of their time at home.  Lauren has had her first full day off in two weeks so she spent the day with the little man and Robbie, and Chris well .... he's had a tough week, bless him!  He's been watching the builders tear his pub apart ...... eeeek!
   
The Prospect closed it's doors last Saturday night and is undergoing a huge re-furb.  Floors have been taken out, the pool table's gone, all the decor and the TV.......... and the walls are currently a nice shade of bright green apparently! Thankfully it's only the undercoat! 
It's all supposed to be finished by the end of the month ..... re-opening night is scheduled for Thursday 31st August ........ we're looking forward to that.

Have a great week.
Cheerio until next time .......


Friday, 4 August 2017

Christmas is coming .......

Hello again .....

I know, I know ......... some of you haven't had your summer holidays yet and here's me going on about Christmas.  I do have a good excuse though .... it's time for this month's Happy Little Stampers Christmas challenge ..... Ho! Ho! Ho!


The theme is Anything Goes .... anything Christmas that is ..... with an optional twist of using a Poinsettia

I love poinsettias at Christmas time but I do struggle to keep them alive past the end of December ..... it's not just poinsettias, plants in general really. I'm definitely not green fingered ..... I had a cactus that died!!!
That's why I have a beautiful fake poinsettia ..... comes out every year and goes away with the decorations in January ..... easy!

I have a few poinsettia rubber stamps too ....... here's one of my favourites, Scarlet Majesty from Penny Black


Speaking of Penny Black ..... that's where I spotted this idea of using black ink on this style of stamp along with the Kraft card.  One of their Design Team ...... Heather Hoffman, created some beautiful designs, I just had to give it a go.   A totally different look from the traditional red, but quite elegant I think. I love it with the touch of gold too.

I did use the MISTI, and quite an old Onyx black Versafine Ink pad as I didn't want the colour too dark. I also stamped onto Crumb Cake cardstock from Stampin Up ...... this is a lovely smooth card and a great Kraft colour.   I love how you still get all the detail from the stamp, the veining in the petals and the shading ...... gorgeous!


The sentiment ..... one of the HLS Christmas Sentiments, has been heat embossed using a gold powder


And I finished off the design with a sprinkling of Fran-tage Chunky White embossing powder, to give the look of falling snow ...... sprinkled randomly on the top and gently heated from underneath, so as not to blow it all away.


I do love how this turned out ....... it's so different.   In fact this might just be one of the designs I use for my Christmas cards this year. What do you think?

Check out the HLS Blog for all the challenge details along with more festive inspiration from the rest of the Design Team

Thanks for popping by ...... enjoy your weekend.

Cheerio until next time ......