Wednesday, 2 March 2022

Who doesn't love a bargain ........

Happy Wednesday .......

And it's a day late but ......... welcome to March!  
I know February is a short month but really ....... is it over with already!!!?!
The first day of the month was beautiful here.  We had lovely blue skies and it really felt like Spring was on it's way.  Today however is a very different story .......  we're back to cold, wet and windy again!  
Oh well, the sun was nice while it lasted ........ I won't pack the winter woolies away just yet!

A new month means a new Star Buy for all you Sweet Poppy fans out there.  
For one week, at the start of each month, Sweet Poppy have one of their amazing stencils at a special Star Buy Price.  
This month it's the gorgeous Single Rose design


It's such a pretty stencil, and like all the Sweet Poppy designs, there's so many ways to use it.

Simply as is with your favourite inks, paints, stencil mediums, whatever takes your fancy.  
Here it is with Distress Oxide Inks ........ a sinlge red rose, sent with love


 Or why not try black ink onto Kraft card ...... I love this look


I used the stencil twice with Versafine Clair ink (Nocturne), buildoing up the depth of colour gradually, applying the ink with a sponge


A few black ink splatters and a touch of gold embossing gives a nice, classic look


Or, go the other way, and use a whole mix of colours to create a pretty all over design .......


By simply masking off the stem and the leaves, I used just the head of the rose from the stencil along with different colours of Distress Inks to cover a piece of white cardstock


I added in some leaves here and there, to fill in any gaps and a few splatters of gold ink over the top for added interest.

A simple sentiment and some gold thread add the finishing touches


I had to cut the piece of card down a little to fit on the front of my cardblank but, you know me. I don't like to waste anything so, I made a matching gift tag!


I also used the same stencil to create a frame .......


Same as before, I used just the head of the rose, and stenciled around the egde of a piece of cardstock.  Added in a few leaves here and there, and then fussy cut out the centre


I attached this over an inked background using foam pads to raise it up a little, and stamped my sentiment in the centre.  You could, if you wanted to, make this into a shaker card ..... how cool would that be!

If you would like to get your hands on this stencil for that amazing Star Buy price, you need to be quick, the offer is only available until the 8th March!  

Happy stenciling!

Thanks for popping by ...... enjoy the rest of your day.

March is going to be a busy month here I think. 
We've got our first trip of the year in the motorhome coming up next week ...... looking forward to that, although the van's not quite ready yet!  Let's hope the weather's kind to us.
We've got Mother's Day towards the end of the the month ....... the first one for Chris's partner Myra (Arthur's mum) so that should be a nice day.
And ........ it's my birthday soon! 
You may have noticed that I'm not counting down to this one ......... it's a BIG one ......... a REALLY BIG one!!!!  and I'm not ready for it!  
But, it'll be here on Saturday (the 5th) and there's nothing I can do about it!  ........ so bring it on!  
Apparently the celebrations are starting tomorrow.  Lauren has the day all planned ...... she's working on Saturday so we're starting early with a girlie day, just the two of us.  I have no idea what she has planned except that lunch is at 12.30.  Oh, and hubby needs to collect Alex from school!!  
I just hope that it's stopped raining!

Cheerio until next time ........


Wednesday, 23 February 2022

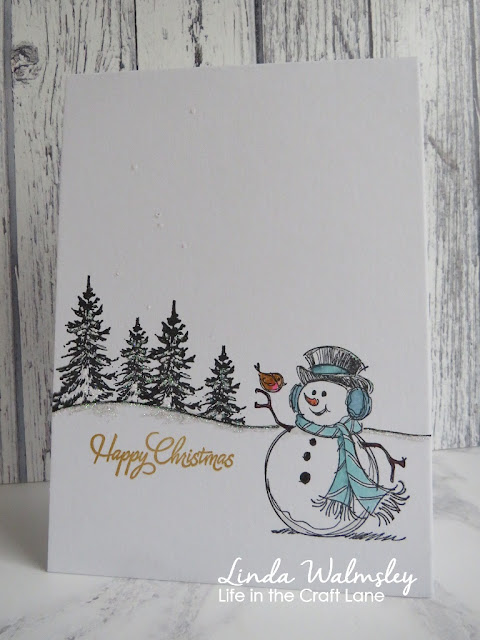
A last minute Christmas card for the CAS Christmas challenge ..........

Happy Wednesday .........

How's your week going?  
February is almost done, less than a week and we're into March!!  Not sure I'm ready for it this year ...... it's my birthday month and it's a really BIG one!!!!!!   What's the saying ......... the more candles the bigger the cake.  It's going to have to be a BIG cake!!!!

Anyway, we're still in Ferbruary, and I'm playing along with the CAS Christmas challenge again ...... yes I've managed to sneak in another Christmas card!


Really quick and easy, and hardly any colouring required.  It's one layer too. so great for posting!

The theme this month is  ...... Winter Scene


The snow we had last weekend got me thinking about snowmen so that was where I started. 
I stamped this jolly little fellow straight onto my card base.  He's a really old Inkadinkadoo wooden stamp, so no MISTI but he always stamps beautifully so it wasn't a problem.  
I then added a touch of colour to him and his little friend using ZIG Markers


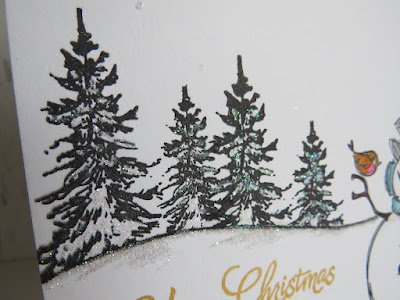
I created a mask with a piece of copier paper for the hillside and with that in place I stamped the trees in the background


I drew in the tree line with a black fine liner, added a touch of sparkle with some fine crystal glitter, and finished off with a stamped sentiment (that I did use the MISTI for ...... I didn't want to mess it up and have to do it all again!)


The snow we had didn't stick around very long, it never does here.  We didn't get chance to build a snowman.  
Thankfully though, the storms seem to have passed ...... for now!  It's still cold and a bit breezy though, but at least the sun is shining.  Mind you, it is half term here on the island, so we should have know the weather wouldn't be great this week!! 

Thanks for popping by ..... enjoy the rest of your day.

Cheerio until next time .......


Supplies
Stamps: Snowman stamp from Inkadinkadoo;  Trees - Clarity; Sentiment was a freebie from a Craft magazine
Inks: Versafine Clair - Nocturne; Delicata - Golden Glitz for the sentiment
Other: ZIG Clean Color Brush Markers; Black fine liner pen; Quickie Glue Pen; Fine crystal glitter; Piece of copier paper to make the hillside mask

Monday, 21 February 2022

Love is in the Air for February's Simply Sweet poppy Stencils challenge ........

Happy Monday ......... 

Have you played along with the Simply Sweet Poppy Stencils Facebook Challenge yet?  It's a monthly challenge that runs on the Simply Sweet Poppy Stencils Facebook page 

Each month there's a new challenge theme, and the rules to enter are simple .......
  • Follow the monthly theme and create your project, and post it onto the Simply Sweet Poppy Stencils Facebook page
  • Include the challenge theme in your post ........ this month the theme is 'Love is in the Air'
  • Use ONLY Sweet Poppy Stencils on your projects.  Other brands of mediums and inks etc., can be used but please, no other brand of stencils.
  • One sentiment or word stamp from another company can be used on your cards but, please remember this is a Sweet Poppy challenge so, the main focal point on your card MUST be a Sweet Poppy stencil
  • And finally, you can enter each challenge upto 3 times.
The winner will be randomly chosen when the challenge closes, which is the 27th this month, so there's still plenty of time to get your entries in.  You never know, you could be this months' winner of the whopping £40 voucher to spend on the Sweet Poppy website. 

Here's a little bit of inspiration for you ............


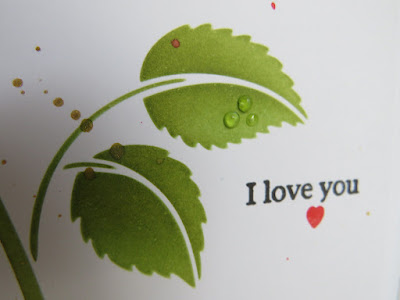
A single red rose, always a winner when Love is in the Air.
Using the Sweet Poppy Single Rose stencil with Distress Oxide inks


A few ink splatters and a simple sentiment to finish ......


Another CAS design .......


New Beginnings tree stencil,  used again with DOX inks, applied with a sponge building the colours up gradually.
I then stamped my sentiment and the little hearts and added a touch of sparkle with some fine glitter


I used a Stardust Gel Pen to 'attach' the hearts to the tree branch


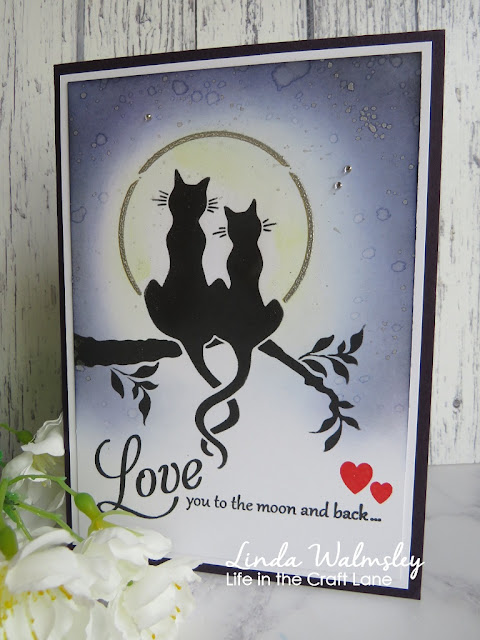
And finally, one of my favourite Sweet Poppy stencils ....... Cat Love


I masked off the word at the top of the stencil and then used a black Versafine Clair ink to stencil the cats. 
I quickly applied some platinum embossing powder onto the moon outline and heat set


I then used Distress Inks and a little splattering, to create a night sky


Finishing off with my sentiment.


Go on ..... why not join in the fun.
Here's another quick look at the rules .........


Thanks for popping by ...... enjoy the rest of your day.
  
Thanks goodness the weather seems to be calming down a little now, it's been a very blustery few days.  We've had strong winds and heavy rain for what feels like weeks, and on Saturday we had a whole load of snow!!  It looked very nice, but boy was it cold!


It didn't last that long though, and we've got blue skies and sunshine today. 
Thank goodness the wind seems to be calming down a little, although I probably shouldn't have said that.  We're off out this evening for a belated birthday meal with Chris and Myra .......  I really don't fancy getting blown there!

Cheerio until next time ........


Supplies
Stencils: Single Rose, New Beginnings, Cat Love (Sweet Poppy)
Inks: Distress Oxide Inks - Candied Apple, Mowed Lawn, Peeled Paint, Vintage Photo, Gathered Twigs,; Versafine Clair - Nocturne
Stamps: A6 stamp sets - Friends, Family (Sweet Poppy);
Other: Crystal Glaze; Fine red glitter (Sweet Poppy); Stardust Gel pen; Platinum embossing powder (WOW!)

Wednesday, 16 February 2022

A quick reminder ........

Hello again ........

Just a quick reminder for all you Sweet Poppy Stencil fans ...... Lucy will be back on our TV screens on Friday this week,  so not much longer to wait.  


The shows will be full of fabulous tips and techniques, along with some amazing demos from Lucy using the brand new release of stencils and a couple of the new stamp sets.

The new stamp sets are gorgeous.  If you love big, bold florals then they will definitely be ones for your wish lists.

Here's a few samples done using the gorgeous Daisies 


There's two different, large floral designs in this stamp set, with two sentiments in there too
Both images are great for colouring, with pens, paints, or pencils, whatever you prefer to use.  But, if you really don't like colouring,  then just stamp the flowers onto coloured papers and cut them out.  Becasue they're such a good size they are easy to fussy cut. 


The daisies make perfect focal points for your cards, but how about using them to create all over designs.
For this card I started in the centre and stamped the image with Versamark ink, and heat embossed in gold
I then used the same stamp to fill in around the edges.  Versamark ink again only this time I dusted over the top of the ink with Perfect Pearl mica powder.   I polished off the excess using a soft cloth


The mica powder sticks to the ink and gives a pretty shimmer to the stamped image.
I stamped the flower again, this time onto a seperate piece of black card, heat embossed in gold and coloured it using pearlescent paints.  It was then fussy cut and attached over the top of the stamped imageds using foam pads to add a touch of dimension


I added a few gold ink splatters onto the background and the sentiment on a strip of black cardstock across the bottom ......


I also used the stamp to add detail to the inside of my card.  How pretty does it look just stamped in black.


Here's the same stamp used with one of the new stencil designs as a background ........


For this one I stenciled the new Damask Backplate design through the circle aperture stencil, and then stamped the flower over the top.


I stamped the whole flower using a black ink but, I heat embossed just the detail on the bottom by carefully sprinkling over some gold embossed powder


I coloured the stamped flower using ZIG Clean Color Brush Markers,  then stamped the flower again onto a scrap of white cardstock, fussy cut it and coloured it with the same pens.  I then attached this over the stamped image using foam pads, slightly offsetting the petals to create a fuller looking flower


A few gemstones and a sentiment add the finishing touches


The second stamp in the set is a gorgeous, large daisy head ...... perfect for your card fronts on it's own 


I simply stamped the flower onto an ink smooshed background, and coloured it with markers.


I did hand draw in a stem 


And I added some natural twine around the bottom, and a Sweet Poppy sentiment from a previously released stamp set

Still with me? ........ don't worry, this is the last one!


Same daisy stamp, stamped off the edge of a square piece of card


A touch of colour added to the petals and the sentiment stamped above.

I then used the same stamp to decorate my background piece.  I took a square of hot pink cardstock, used an ink pad as close to the same colour as I could find (I think it was Versafine Clair - Glamorous), and stamped the daisy all over the card


I love this tone on tone look, especially for backgrounds.

This stamp set is going to become a real favourite I think.   Just think of all the different colours you could use ....... so pretty!!

Don't forget to tune in to Lucy on Friday ......... that's February 18th at 9am and 1pm on The Craft Store TV (Sky channel 673, Freesat 817 & Freeview channel 85) 
There'll be lots more fabulous ideas from the rest of the Design Team using these stamps and more from the Sweet Poppy new release. 
  

Cheerio until next time .....

A Christmas card for a windy Wednesday ........

Happy Wednesday .........

Everyone OK? ........ I do hope so.  
We're hurtling towards the weekend again ...... at least the diary is clear for this one!  

I'm playing along with the CAS Christmas Challenge today ........  I'm still trying to make a start on filling up the festive card box!


The challenge this month is to create Winter Scenes ........ 


I just love die cuts for quick and easy cards.  This is from an old Stampin Up! die set which I think is called Hometown Greetings (not sure if its still available though)
I simply die cut the houses from white cardstock, and then added colour to just the tree using Distress Ink and a ZIG marker


Using Distress Inks, I then inked the top half of another piece of white cardstock.   To create the look of  a wintry sky I splattered the ink with clean water, let it sit for a few seconds to active the Distress Ink, then mopped up the water with a paper towel, removing some of the ink with it leaving this splattered look behind ........ giving the look of falling snow


A stamped sentiment underneath, and a touch of glitter on the tree finishes off my card.


It's it bit wintry outside today.  We're just about to batten down the hatches again as we've got back to back storms coming in over the next few days.  No ferries again today, as storm Dudley is beginning to blow a hoolie out there ...... it's freezing cold with the wind but the sun is shining ..... for now!!
  
This poor chap has managed to find a sheltered spot in the garden.   He comes in quite often and just wanders across the lawn.  He's being a bit careful today though, the wind is ruffling his feathers just a little bit!


Thanks for popping by ...... enjoy the rest of your day.
If the weather's bad where you are, stay safe.

Cheerio until next time ......


Supplies:
Dies: Hometown Greetings (Stampin Up!)
Stamps: Christmas Time 3 (Tim Holtz Stampers Anonymous);  A Winter's Scene (Julie Hickey)
Inks: Distress Inks - Stormy Sky, Faded Jeans, Chipped Sapphire (for the sky) & Peeled Paint for the tree; Versafine Clair - Nocturne; Delicata - Golden Glitz
Others: Brown ZIG Marker (for the tree trunk); Fine Crystal glitter