Saturday, 31 October 2020

Happy Halloween .......... mwahhahahaha!!

Happy weekend to you ......

We're at the end of October and it looks like its going out with a bang, here on the island anyway.  
We've got weather warnings in place for strong winds and heavy rains.  The boat's been cancelled, again, and it's not looking too good for the Halloween, or should I say Hop Tu Naa celebrations that may or may not be going on this evening.  

It's been a busy old week in the craft room, getting ready for the blog challenges at the start of November, working on ideas for samples for the next Sweet Poppy TV show, and of course Christmas cards! ...... not that I got very far with those. 

The cards I am sharing with you today are from a Facebook Live Workshop with the fabulous Eileen Godwin ..... I call her the Queen of Colour   If you don't know Eileen then please look her up, she's amazing! 

These are my finished cards from the workshop.  Eileen did them as one layer cards, straight onto card blanks.  I wasn't that brave, so I did them on pieces of cardstock and them made them up after the workshop had finished. 


I crafted along with Eileen, adding my own little touches here and there ........ a little bit of sparkle to the antlers on the deer using a glue pen and fine crystal glitter .......


I used a Stardust Gel Pen to draw around the stenciled dragonfly for an added highlight and touch of shimmer ........


I gave the butterfly a little more colour using coloured pencils ......


And completely changed the size of card for this one, and used the stencil twice to fill the space.


I think there's more workshops in the pipeline from Eileen ....... I hope so anyway.  It's a great way to spend a morning or afternoon.

Thanks for popping by ..... enjoy your weekend.


I've decided to leave the broomstick in the garage this evening it's a little bit windy out there!! 
Instead hubby and I are having a cosy curry night in front of the TV ...... much better option!

Cheerio until next time .......


Products used:
Stencils: Geometric Stag, Dragonfly Duo, Thistle (Funky Fossil); Plaid Back Plate (Sweet Poppy); Floating Leaves (Simon Says Stamp); Bubble stencil from my stash
Stamps: Tim Holtz Perspective stamps set (butterfly); Various sentiment stamps from my stash
Inks: Distress inks - various colours; Versafine Clair - Nocturne; Delicata - Golden Glitz
Other: Quickie Glue Pen, Fine Crystal Glitter, Ranger White Enamel Accents,  Chunky White Embossing Enamel

Monday, 26 October 2020

Autumn Florals for the Sweet Poppy Stencil challenge .......

Happy Monday .......

I hope you've had a lovely weekend ..... did you remember to put your clocks back?

We're racing towards the end of October, and the deadline for this month's Simply Sweet Poppy Stencils Flowers and Blooms Challenge.  

I've dug deep into my Sweet Poppy collection and found this pretty little stencil ....... Floral Love Birds 


I've gone for an Autumnal look, using shades of orange, yellow and red Distress Inks, applied through the stencil with a sponge, building up the colours gradually.


When I'm using a sponge with Sweet Poppy stencils I tend to gently pounce the ink through the stencil. 
I try to avoid using a circular motion, the stencils are metal and the edges can be sharp, so they can damage a sponge if you're a little heavy handed, just be gentle with them (take care cleaning them too especially the very detailed stencils, they can cut fingers ...... trust me I know!!)

Once I was happy with the colour I used a black fine liner pen and drew around the edges of the design.  I did it free hand but you could just as easily do this with the stencil still in place.


I added a few highlights to the flowers using a white gel pen, and gently inked around the edges of the card with Distress ink


The challenge closes on Thursday the 29th and this months winner will be announced on Friday 30th.
There's a £40 voucher for the winner, to spend on the Sweet Poppy website.  To be in with a chance of winning please, please, please follow the rules ......


We've had quite a few entries this month that sadly we have had to disqualify.  The theme is Flowers and Blooms, not trees or leaves, holly or pine sprigs.
You MUST use Sweet Poppy stencils ONLY (it is a Sweet Poppy challenge after all), and the stencil MUST be the focal point on your design.
If you use stamps they can be any brand but, please keep them small, accents only.
It's not fun having to tell someone that their beautiful design, that they have spent precious time creating, unfortunately can't be entered into the challenge because ......... they haven't followed the rules! 😢

Thanks for popping by ..... have a lovely day.
It's half term here, so a busy week for me.  
The little man will be around at some point,  we've got a pumpkin to carve for weekend.  And I've got a crafty get together tomorrow which I'm really looking forward to ....... haven't seen the girls for ages!!

Cheerio until next time .......


Products used:
Stencils: Floral Love Birds (Sweet Poppy)
Inks: Distress Inks - Wild Honey, Scattered Straw, Carved Pumpkin, Crackling Campfire, Aged Mahogany
Stamps: Cheers A6 stamp set (Sweet Poppy)
Others: Black Fine Liner, White Gel Pen

Wednesday, 21 October 2020

Christmas Birds ........

Good morning .......

Welcome to the middle of the week.  Not quite sure what happened to Monday and Tuesday but, here we are, and I'm hoping to spend the day in my craft room ..... whoo hoo!!  Lets hope it's a productive one. 

I thought it was about time I made a real start on some Christmas cards,  as it's only about six weeks until the beginning of December ........ eeeek!!  It's a good excuse to play along with this month's CAS Christmas Card Challenge too.

The theme for October is ...... Christmas Birds 


I do love a cheeky little robin or two, or three ..... and seeing as this gorgeous stamp flew into the craft room recently I couldn't resist playing along


I saw this stamp a few months ago on Bonnie's Blog (Stamping with Klass) and I fell in love with it.  I don't think they're actually robins but ......... depending on what colours you use on them they could be any type of bird.
I think they make cute little robins .......


Stamped and heat embossed in gold, and then coloured using Distress Inks and a waterbrush.

I stamped a snowflake onto the background and heat embossed in white and I created a mask to cover the birds.
I then applied Distress Ink over the background ....... around the birds and over the snowflake.


The white embossing acts as a resist to the blue ink, so once I was happy with the depth of colour I polished off any excess left on the snowflake and finished off with a sprinkling of Chunky White Embossing Powder to give the look of falling snow.  
With the Chunky White I simply sprinkle this where I want it to be (it's great for covering up small mistakes!) and then I heat set from UNDERNEATH so that it doesn't all blow away.

A festive sentiment stamped underneath finishes everything off nicely


I loved how this turned out so ..... I have three for the Christmas box!  Lets hope the festive mojo is in the mood for playing again today.


Thanks for popping by ..... enjoy the rest of your day.

Just to add to the festive spirit it's the Christmas Preview evening at my favourite garden centre tonight.  We might just pop in and have a little look at what they've got this year ..... there's always room on the tree for more pretty decorations!

Cheerio until next time ........


Products used:
Stamps: The bird stamp is from Impresssion Obsession (E19968); Most Wonderful (sentiment set - Clearly Besotted); Snowflake from my stash
Inks: Distress Inks - Stormy Sky, Faded Jeans, Gathered Twigs, Evergreen Bough, Festive Berries, Fossilised Amber; Versafine Clair - Nocturne; Versamark ink
Others: White Embossing Powder, Gold Embossing Powder (WOW!); Chunky White Embossing Enamel (Stampendous)

Thursday, 15 October 2020

There's still time to play at the CAS Mix Up Challenge .......

Happy Thursday .......

The weekend is approaching, and if this nice weather that we're having at the moment continues, we might just get a couple of days away in the van!  Not sure where yet.  Wherever we end up, it'll be a bit of 'wild camping' as I think nearly all the actual campsites on the island are now closed for the winter, which is a shame.  But I believe there are a few places dotted around the island where we can still stay overnight.  We'll be fine, we have everything we need in the van, and enough power to last us a few days. 

Anyway, enough of all that ........ the reason I'm here is to remind you of this months CAS Mix Up challenge.  Have you played along yet?  Don't worry there's still time, the challenge doesn't close until October 24th. 

Viv is our host this month, and it's a stencil challenge with the theme ..... Tone on Tone


I do like this effect, especially when using stencils.  It's a real easy way of creating layers and adding depth to your cards.

Like the piece I made for the challenge launch ....... which you can see here if you missed it ..... I started out with a piece of coloured cardstock, and then chose my inks in different shades of the same colour.


Very Autumnal don't you think!


I used the pretty leaf stencil from Uniko and Distess Inks. 
I started with the lighter shade first, which was Spiced Marmalade, then stenciled over the top with the new Crackling Campfire ..... a gorgeous colour for this time of year.


I added a few splatters of gold ink over the top, stamped my sentiment  .......


And finished off with a few sparkly sequins, before mounting it onto a black cardblank ....... I love how it makes the colours really stand out. 

Thanks for popping by ..... enjoy the rest of your day.

Cheerio until next time ........ 


Products used
Stencils: Natures Treasures II (Uniko)
Stamps: sentiment collection (Penny Black clear stamp set)
Inks: Distress Inks - Spiced Marmalade, Crackling Campfire: Versafine Clair - Nocturne; Delicata Metallic ink - Golden Glitz (for the splatters)
Others: Sequins

Wednesday, 14 October 2020

Sweet Poppy Stencils are back on the TV .........

Happy Wednesday ......

I just wanted to pop by and say, if you're a Sweet Poppy Stencils fan you'll be pleased to know that Lucy is back on Hochanda tomorrow ...... whoo hoo!!!

There are two shows ......... the first one is at 11am, and then again at 3pm.  
There'll be lots of gorgeous stencils, some festive designs, some not.  Lots of fab mediums etc., to use with your stencils, and a whole load of inspiration from Design Team samples and of course live demonstrations from the lovely Lucy herself.

I've been busy playing (oops!) working with some of the stencils, making samples for the shows. 
So, if you have some time to spare and fancy a quick look ..... here we go!  You might want to grab a cuppa, it's a bit of a long post!
 
One of my favourite Sweet Poppy stencils is making it's TV debut this time ....... the gorgeous Teardrop Background


I do love this design ..... it is a great background but, it's so pretty as the focal point too.  
For this card I used washi tape to mask off a strip across my piece of card, placed the stencil over the top and inked through using Autumnal shades of Distress Inks ..... love it!


Oooh .... did I mention that Sweet Poppy now have their own stencil brushes ....... the really popular make up style ones, and they are soooo nice to work with.  Watch out for them on the shows .... you need these!

I stamped a sentiment onto the white strip and added some dry embossed lines top and bottom to highlight the area


I finished off by adding a few gems here and there in matching colours 


Why not change the colours and give the same stencil a more festive look .......


Distress inks again, with a little bit of pen work this time ...... white highlights onto the 'berries'


and a touch of gold around some of the teardrop shapes.

A simple sentiment stamped over the top .....


and to give it a real Christmassy look, some chunky white embossing enamel .... I love this stuff on Christmas cards!


Another of the stencils coming up on the shows is the Absolutely Abstract Back Plate ........ 


I must admit, it took me a while to decide what to do with this one, I haven't done much abstract (I have been watching Eileen Godwin's YouTube videos though, so you might just see a bit more in the near future!)

I used a whole bunch of Distress Inks again through the stencil, blended to create a Galaxy Sky ......


With the stencil still in place, I added a few splatters of water, not much, I didn't want it to leak underneath the stencil.  
I mopped up the excess with a paper towel and you can see that the water reacts with the ink and removes some of the colour too, leaving this lovely speckled look behind. I never get tired of this technique!


I added a spritz of  Perfect Pearls over the top to add some shimmer, and a few splatters of white paint, then I carefully removed the stencil.

Once everything was dry, I stamped my sentiment across the shapes .......... 


And finished with a splattering of gold ink all over the design.

Same stencil, only this time I didn't use the whole design ......


A bit of masking whilst I was inking, to keep the edges of the colours crisp .......


and I drew around each of the shapes using a gold gel pen just to give a different look ...... you can see I've splattered with water again to, gives it a bit more interest I think.

I used the lines of the stencil design as a guide for my sentiments


Last, but not least I have a few more festive makes ....... the beautiful Cross stencil is back.


A cross is perfect for all sorts of occasions, but I gave it a festive feel and used it along with the Christmas Words stencil, which will also be on the show.

I used the words to create the background, and Versamark ink through the stencil and heat embossed the cross in gold.  I then fussy the cross and attached it over the words using foam pads to add a bit of dimension 


A few gold ink splatters and a sentiment .......


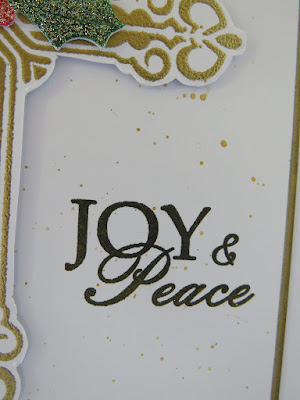
and some Christmas holly, cut using the Sweet Poppy Holly die and a little bit of glitter card


Here's the cross again, used a little differently this time .......


Again using Versamark ink and gold embossing powder, and a little bit of masking, I made a decorative frame around one of my large Christmas sentiments.


There's that holly again!

And finally, here are the Christmas Words again ..... used to make a very quick and easy card 


Festive colours of Distress Inks, a pretty ribbon bow and just a touch of Christmas sparkle!


Phew!  That was a long one!

Enjoy the shows tomorrow.


Thanks for popping by ..... enjoy the rest of your day.

We're out this evening ...... it's a Wine Down Wednesday Wine Tasting and it's Rioja week!  We're doing the tasting and learning all about Rioja, and then we have a meal ..... 4 courses of delicious food all paired with the perfect wines ..... looking forward to that!  

Cheerio until next time ......


Products used:
Stencils: Teardrop, Absolutely Abstract, Christmas Words, Cross (all from Sweet Poppy Stencils)
Stamps: A7 stamps set - Have a Great Day;  A6 stamp sets Family, Cheers, Joy & Peace (all Sweet Poppy); large sentiment from my stash
Inks: Distress Inks - various colours; Versamark ink; Versafine Clair - Nocturne; Delicata Golden Glitz metallic ink
Others: Gold embossing Powder (WOW!); Crystalina Glitter (Sweet Poppy), Gold and white Gel Pens, white paint, gems