Showing posts with label Funky Fossil stencils. Show all posts

Sunday, 14 August 2022

Fun in the sun ......

Hello there ........ 

Happy Sunday to you.  I hope you're all having a lovely weekend. 
It's another beautiful day here on the island (I could get used to this) ........ the sun is shining and it's getting hot out there!  
 
We've got a BBQ this afternoon, a nice easy one this time ....... we're having homemade pizzas!  Quick and easy to cook on the BBQ, although quite a bit of prep to do first.  Guess where I'm going next! 
    
Apparently the heatwave is about to break,  which I'm sort of glad about.  I don't mind the heat today but we're off in the van again next week so, if temperatures are about to cool off a little that's fine by me. I've been a little warm in the van this week, whilst I've been getting things ready!

Anyway, before it gets all crazy, again, I thought I'd do a little catch up.  
There's not been that much going on in the craft room, its just been too hot but, I have been in there.  Well, I had to pack a few bits to take with me in the van!

I did make this though ...... for a guys birthday


I saw something similar on Pinterest so the design isn't all mine ....... when it comes to mens cards Pinterest is always my go too!

I used a Funky Fossil stencil for the speech bubbles and Distress Oxide Inks ........ they are so easy to use with stencils 


I used a different coloured oxide for each of the bubbles, and then searched through my birthday stash for sentiments that fit inside each one.


I added a few matching coloured enamel dots here and there to finish off 


It's been a busy couple of weeks with one thing and another .... all good though.
We've had birthday celebrations, which were fun.   We finally put an end to something that's been going on for the last eight years ...... I won't go into details, I'll just say that everything went in our favour at last, so it was worth all the time and effort!
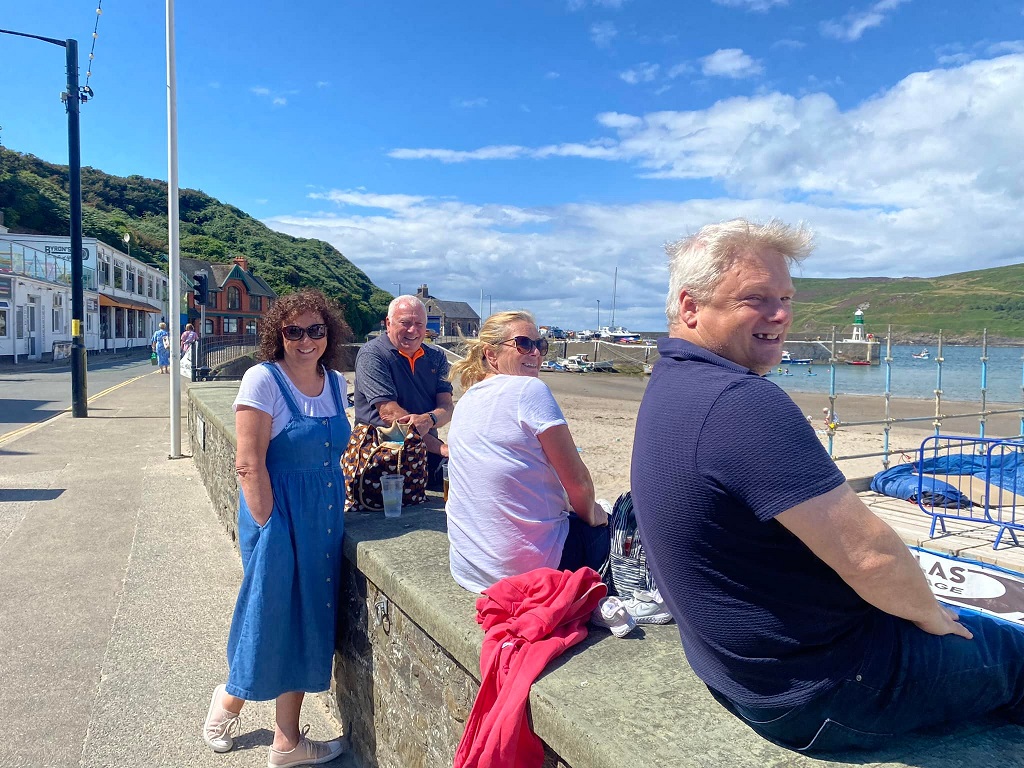
And my big brother and sister-in-law came over to visit for a couple of days which was lovely as we don't see each other very often these days.  They brought their granddaughter, Amelia with them too .... she's such a sweetheart, and growong up fast!


We caught the steam train and spent a day down in Port Erin. 


Amelia loved the train.

It was another glorious day .......


We had fun on the beach, and a bite to eat .....


We spotted one of the dolphins (couldn't really miss it!!) that are hiding all over the island this year for The Big Splash Art Trail


Then it was time to head back to the train .......


Some of us were a little sleepy on the way home ........ awwww!


And to end the day .......... a BBQ, and a rainbow.  Perfect!


It was lovely to see them, they didn't stay long enough!

I've also managed to make a start on some Christmas cards!!! A crafty day with the girls, and I was very productive for once but,  I'll save those for another post.  
Time to enjoy the sunshine I think ...... now where did I put the sun cream! 😎

Thanks for popping by ...... enjoy the rest of your weekend.  

Cheerio until next time ....


Supplies
Stamps: Various sets of birthday sentiments from my stash
Stencils: Say What stencil (Funky Fossil)
Inks: Distress Oxide Inks - Tumbled Glass, Speckled Egg, Spiced Marmalade, Scattered Straw, Abandoned Coral; Versafine Clair - Nocturne (for the sentiments)
Other: Self adhesive enamel dots

Thursday, 14 January 2021

We're back!! .........

Happy Thursday ........

The weekend is in sight ......... whoo hoo!!  Not that weekends are any different than weekdays really when you're in lockdown!! 

For all you blog challenge fans out there, and if you love Clean and Simple (CAS) you'll be pleased to know that the Perfectly CAS (using one third or less) Challenge is back!
We've had a nice long break, and now we're raring to go.  
You'll see that the challenge blog has had a bit of a make over ...... ooohh! and we have some brand new designers joining the Design Team ....... a big welcome to Bozena, Charlotte (Lady Joyful), Darlene, and Joy  it's nice to have you on board.

So, we're starting the year with a nice easy theme for you ......... Stencils


If you're not familiar with the Perfectly CAS Challenge, it's all about using just one third (or less) of your card space ........ if you struggle creating CAS designs this makes it really easy!
Remember the rule of three .......... imagine your card in 3 sections across, and 3 sections top to bottom 


Now if you keep you design to just one of those three rows (top three, middle three or bottom three, or ..... left top to bottom, middle top to bottom or right top to bottom or, even either of the diagonals I suppose) you'll have used a third of your card leaving lots of lovely white space ..... does that make sense?  If not, check out the rules on the Perfectly CAS Blog 

Something like this maybe .......


I've used a stencil for the speech bubble with a couple of shades of Distress ink .......


Stamped my greeting inside .......


And then added in this cute little guy at the bottom ......


Stamped in Versafine Clair, and coloured using Distress inks and a waterbrush ....... really quick and easy.
He's from one of the Anita Jeram stamp sets from the Colorado Craft Company.  I managed to get my hands on a few sets before Christmas and this is the first time I've used one of them so, I'm linking this card up to January's NBUS Challenge


Don't forget keep your challenge entries CAS and follow the theme.  Can't wait to see you in the gallery.

Thanks for popping by ..... enjoy the rest of your day.

Cheerio until next time ........


Products used:
Stamps: Birthday Wishing (Anita Jeram - Colarado Craft Company); Birthday sentiments (Happy Little Stampers)
Stencils: Say What! (Funky Fossil)
Inks: Distress Inks - Mustard Seed, Spiced Marmalade

Monday, 4 May 2020

Layered Stenciling for the CAS Stencil Challenge ........

Happy Monday .......

I hope you all had a nice weekend. 
I spent most of mine in my craft room, doing online workshops ...... it was great!!!  However, that does mean that this week I'll have to catch up with all the boring day to day stuff ...... like housework (sigh!) and the ironing ..... I've got nothing to wear!! 

Before I start all that, it's time to get this month's CAS Stencil challenge underway.
Hilary is our host for May, and the theme is  ........ Layered Stenciling


There's many ways of layering stencils, check out the video links on the CAS Stencil Blog for some fabulous ideas and inspiration.

One way is to simply layer two, or more, different stencils, one on top of the other to create interesting backgrounds and focal points.


One of my favourite stencils at the moment is this fab distressed looking stripes ...... I love it!!  I think it's called Watercolour Lines from Funky Fossil.  
It makes a great background, and just think of all the colours you can use!

I used Distress Ink, applied lightly with a blending brush building the colour up gradually


I then used an old Imagination Crafts stencil over the top, with a black ink for a silhouette look


Again, build up the depth of colour gradually.  I like to use a sponge with black ink, and less is definitely more.  
I use very little ink, and I pounce the sponge onto the stencil ...... no swirling!  You don't want the black ink to go underneath your stencil.  Just take your time and you'll get a nice crisp image.

A simple sentiment to finish off .......


and I added a little more interest with some Nuvo Crystal Drops.

Check out how the rest of the Design Team, and Greta our Guest Deisnger this month have been layering their stencils, and then join in the fun!

Thanks for popping by ..... enjoy the rest of your day.
I'm off to enjoy a little bit of the sunshine ........ hubby's putting the BBQ on I think!

Cheerio until next time ......


Products used:
Stencils: Watercolour Lines (Funky Fossil); Flower Stencil (Imagination Crafts)
Stamps: kisses & wishes (Penny Black)
Inks: Distress Ink - Stormy Sky, Broken China (I think!); Versafine Clair - Nocturne
Other: Nuvo Crystal Drops

Sunday, 15 March 2020

A quick reminder for this month's CAS Challenges ........

Happy Sunday .......

It's been a busy weekend for blog posts.

Time to remind you about this month's CAS Challenges ...... first up CAS Mix Up .
March is a special month for us ..... we're celebrating our 4th Birthday ..... whoo hoo!


To mark the occasion there's prizes to give away ........

a $25 Simon Says Stamp Gift Certifiate for the Challenge Winner
and ....  a $25 Simon Says Stamp Gift Certificate for one random draw from all the entries
(you must follow the challenge rules to be eligible for the prizes)

Our host this month is the lovely Jenny and the theme she's chosen is ........ Acrylic Paint


We all have them ..... we don't always use them though, especially for card making.  But, all those bottles and tubes or tubs of pretty coloured paints can give amazing results and effects.
Still not convinced ...... then check out the CAS Mix Up Blog for links to some really useful videos full of tips and techniques.

I've used my acrylic paints to add colour to the flowers on this design .......


The piece was originally done for one of my workshops where we were using a faux bleaching effect.

The background was coloured using Distress Ink applied directly from the ink pad onto the card and then swiped across using a wet wipe


Once the ink was dry, I stamped and heart embossed the flower bouquet using a white embossing powder.  Then with a water brush and a paper towel I 'bleached' out the colour from the stamped image.  Simply paint with water over the flowers and leaves and then dab away the colour with a paper towel.  This removes the colour from the image allowing you to paint over the top with pencils, or markers, or in this case acrylic paints


I used opaque Fresco Finish Chalk Acrylics from PaperArtsy and mixed them with a little water to make them easier to paint with.


I added a simple stamped sentiment to finish.


Are stencils your thing?  Then how about playing along with the CAS Stencil Challenge .....


This month's theme is all about using your stencils with Heat Embossing


I've simply used Versamark ink through my stencil design ....... applied using a sponge ....... and then sprinkled gold and silver embossing powders over the top and heated in the usual way.


If you wanted a little more dimension to your stencil design, use stencil paste instead of the Versamark, sprinkle with embossing powder whilst the paste is wet, and leave to dry.  Heat the embossing powder once the paste is dry.  This also creates a little more texture too.

I die cut the word star from three snippets of card, layered two of them together and covered the third with Versamark ink and used the embossing powders again.  I did this a couple of times, to create a thicker embossed layer


I attached the embossed word on top of the others and then inlaid it into the stenciled panel.
Finished of the sentiment with a little stamping.


Another fun way of using your stencils.

See you in the gallery!

Thanks for popping by ........ enjoy the rest of your weekend.
We've got the family coming round later ..... don't think they're here to see us, they want to check out the new motorhome I think!

Cheerio until next time .......


Products used:

CAS Mix Up
Stamps: Hello Lovely (Concord & 9th); Simply Said Blocks (Uniko); Tiny Words (Simon Says Stamp)
Inks: Distress Ink - Picked Raspberry (background colour); Versamark;
Acrylic Paint: Fresco Finish Chalk Acrylic - Wisteria, Lavender, Magic Moss, Granny Smith, Lemon Meringue (PaperArtsy)
Other: White Embossing Powder (WOW!);

CAS Stencil
Stamps: Written in the Stars (MFT)
Stencils: Shooting Stars - Funky Fossil
Inks: Versamark, 
Other: Gold & Silver Embossing Powders (WOW!); Shining Stars Die (MFT)

Wednesday, 4 March 2020

Birthday Fishes for the CAS Stencil Challenge .......

Happy Wednesday .....

Guess what ..... have I mentioned it's my birthday tomorrow!!!
I'm 29 ..... again, and again, and again. In fact I'm 29 again for the 29th time (hubby worked that one out!!)

Anyway, enough about my birthday ...... it's time to get this month's CAS Stencil challenge underway.
Viv is our host for March, and the theme is ..... Heat Embossing


This is another fun way of using your stencils.
We've all sponged inks and paints through our stencils,  applied some texture paste perhaps. Well, how about trying some heat embossing.  Use your stencils instead of stamps ........ apply Versamark or an embossing ink through the design, sprinkle on some embossing powder and heat in the normal way ..... easy!


Use your coloured inks too, all you need is your ink to stay wet long enough for you to get the embossing powder on the top.
I've used Distress Oxide inks on the above design.  These inks do tend to stay wet for a little while so if you're quick enough you can sprinkle your embossing powder over the top and then heat in the usual way.
Regular Distress Inks also work, Versafine and Versafine Clairs work well too, and I'm sure there's lots more brands that you could use,  just play around with the inks you have.

My background is a mop up piece from my stash ....... I think its just Distress Ink on plain white cardstock, nothing fancy.
I then used a Funky Fossil stencil and applied Distress Oxide Inks through the design


I quickly sprinkled sparkly embossing powders over the top and heat embossed .....


It looks so pretty when the light catches the fish .....


I added a sentiment, and finished off with a few dots of Nuvo Drops to look like bubbles


Need more inspiration?  Then pop over to the CAS Stencil Blog for more fun ideas from the rest of the Design Team and, our lovely Guest Designer ..... Cat (Cat Luvs Paper) who's joining in the fun this month.   You'll also find some useful video links on there too.

Thanks for popping by ..... enjoy the rest of your day.

Not sure if I'm looking forward to tomorrow or not ....... we're out in the evening which will be nice but, I have an appointment at the hospital in the morning.  A simple routine check for a woman of a certain age ....... yes it's time for a mammogram ..... Happy Birthday Me!!

Cheerio until next time ......


Products used:
Stencils: Shoal of Fish (Funky Fossil)
Stamps: Gill Friends (MFT) - for the sentiment
Inks: Distress Oxide Inks - Tumbled Glass, Salty Ocean, Twisted Citron; Distress Ink - Tumbled Glass (background); Versafine Clair - Warm Breeze (sentiment)
Other: WOW! Embossing Powers - Under the Sea, Glacier, Golden Pine; Nuvo Drops - Sea Breeze

Tuesday, 4 February 2020

CAS Stencil challenge .....

Happy Tuesday ......

It's time to get this months CAS Stencil Challenge underway.
Our Host for February is the lovely Barb ...... she wants us to use foil with our stencils.


Using foil on your stencil designs is a fun way to add a touch of sparkle and shine.   There's lots of ways to do this, either with or without a foiling machine.  A simple laminator will do the job, great when used with stencil pastes.  There's transfer gels, sticky embossing powders or simple adhesives.  Check out the links on the CAS Stencil Blog to some fab video tutorials, then give it a go ..... you'll love the effect!

I used my laminator and stencil paste for my design, with a beautiful stencil from Funky Fossil ...... this is it's first outing.

Using the stencil and the paste I added the design to the bottom of my card and left the paste to dry completely.


Once it was dry I covered the area with some pretty rainbow coloured foil, placed the card in between two sheets of copier paper, and then ran it through my laminator on a medium temperature.


Hold your breath whilst you peel back the foil (not really necessary but it always seems to work for me ....... hahaha!!) and volia! ...... you're left with a beautiful foiled design.  I love how this has turned out, and it was so easy. 

I simply added a strip of co-ordinating card along the top edge which I'd stamped and heat embossed my sentiment on ......


And I finished off with some tiny gem stones.


The challenge closes on the 24th of this month so you've lots of time to play along.
If you need more inspiration then check out the CAS Stencil Blog, the rest of the Design Team have been busy foiling away!
We also have a fabulous Guest Designer ...... Steph from My Paper Corner is joining us this month so pop by and say Hello!

Happy foiling!

Thanks for popping by .... enjoy the rest of your day.

Cheerio until next time ......


Products used:
Stencils: Elegant Foliage (Funky Fossil);
Stamps: Banner Bits (Avery Elle)
Inks: Versamark Ink;
Others: Rainbow DecoFoil (iCraft);(Gold Detail Embossing Powder (WOW!); Glossy White Stencil Paste (Sweet Poppy); Gem stones